Zipper Pouch Tutorial and Free Pattern Part 3
Zippers!! Zippers are that finishing pizzazz to make a bag or pouch go from blah to fabulous in a snap. Today in part 3 of this zipper pouch tutorial and free pattern series, we finally get to start sewing! In part 1, we cut and interfaced all the pieces for the zipper pouch. In part 2, we got the zipper ready to install (and maybe we did a little zipper shopping!). Part 3 in this zipper pouch tutorial covers installing a zipper. All the preparation for a sewing project is the slowest part… but the sewing of this pouch is quite quick. Before you know it you will have a perfectly completed pouch! Make sure to catch up and read part 1 and part 2 if you haven’t yet!
A quick reminder that the supply list, cutting instructions, and labeling instructions can be found in part 1!
Table of contents for this post!
Attaching the Zipper Side 1
Basting the Zipper in Place
When sewing a zipper, it is important to keep track of where the zipper pull is so that you do not accidentally hit it with the needle or presser foot, or end up with a curvy seam because the pull got in the way.
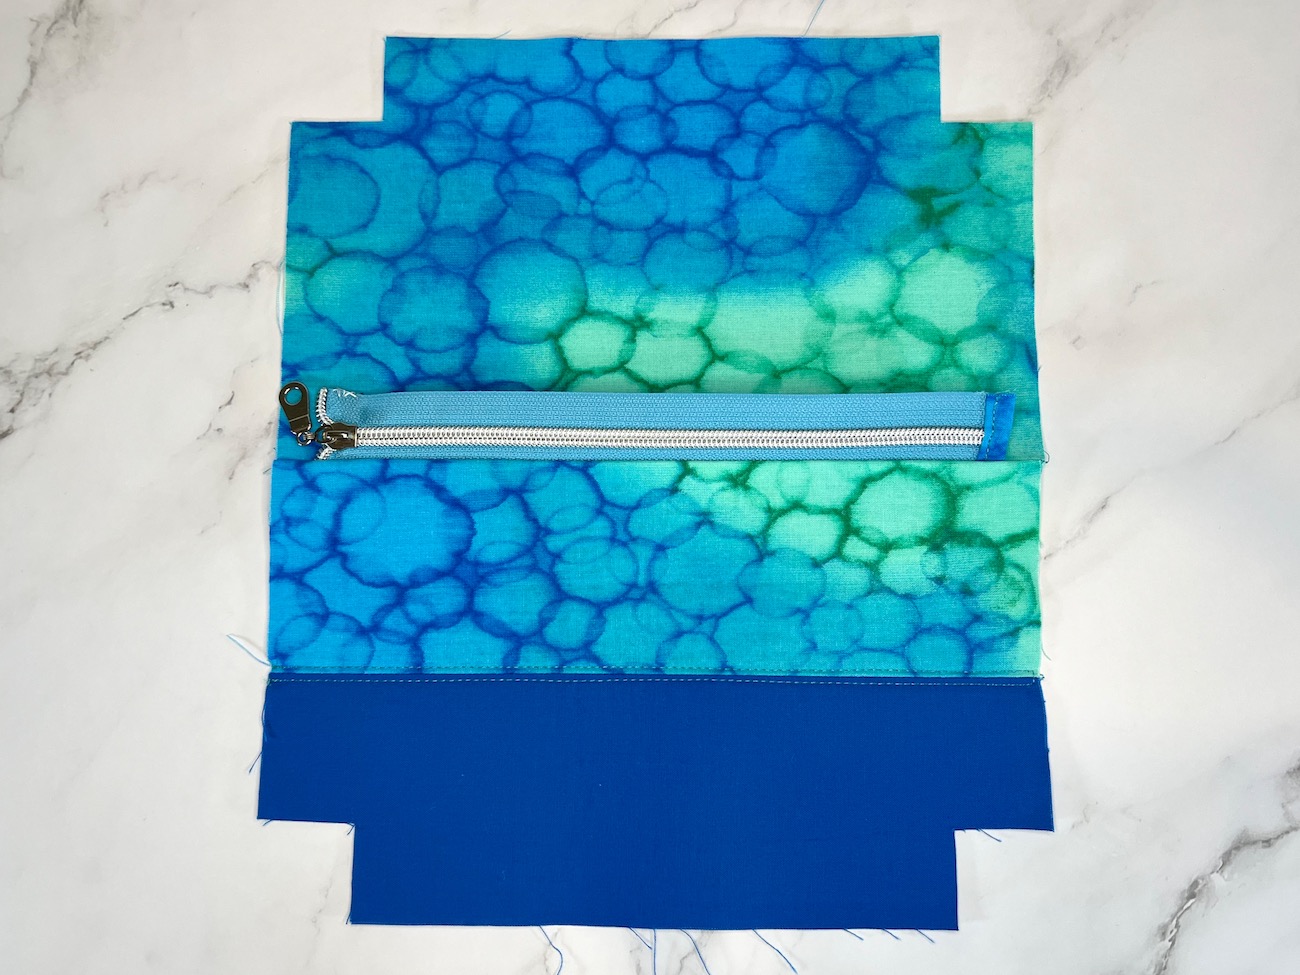
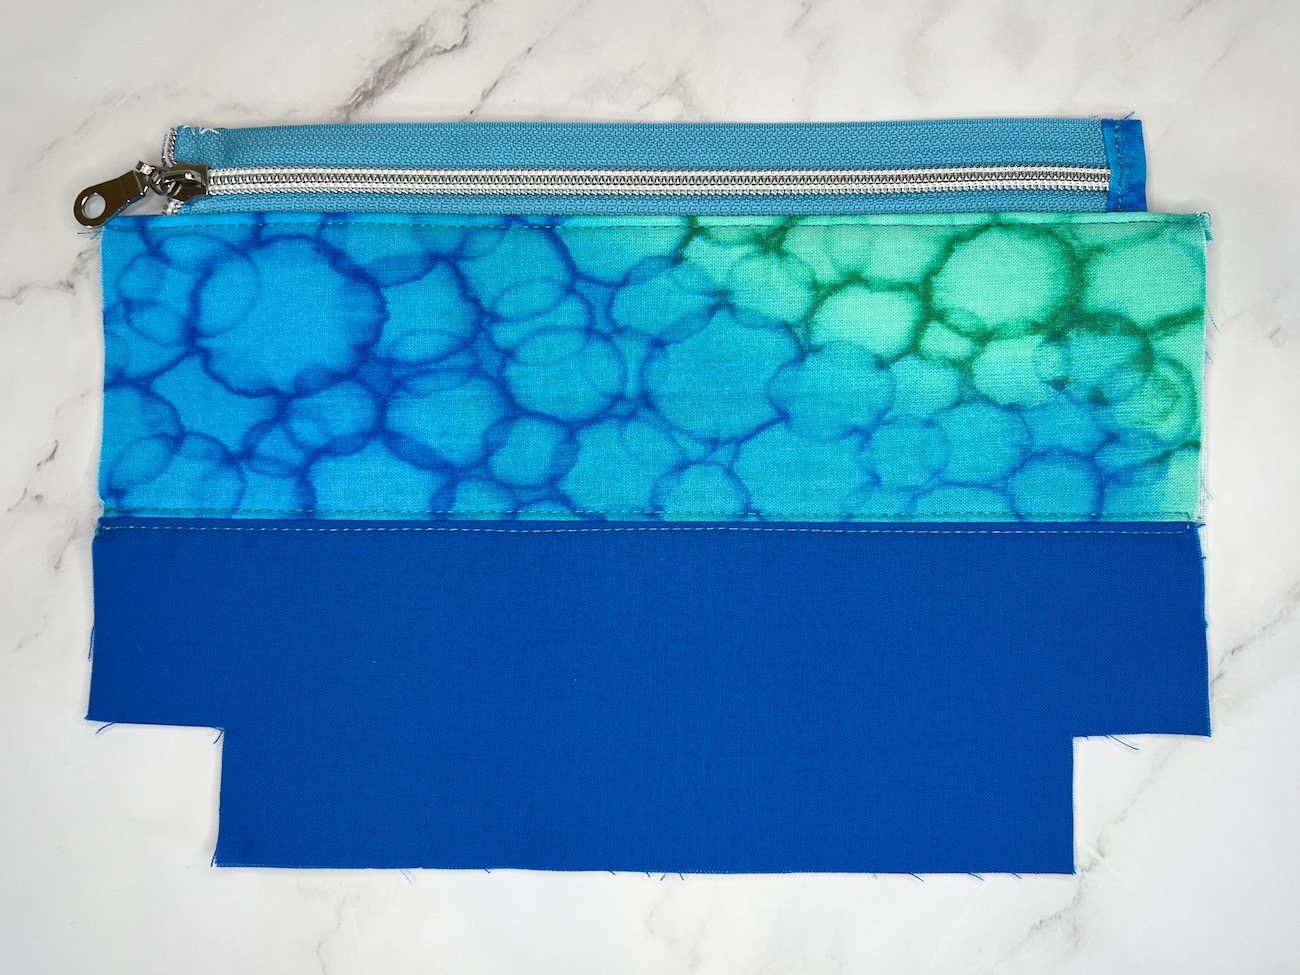
With one exterior panel (piece H1) right side facing up, place the zipper right side facing down. Align the curved edge of the zipper on the left inner marking, and the zipper tab edge on the right inner marking (the zipper may not align perfectly within the inner markings. That is okay as long as it is close to the inner markings and not touching the outer markings).
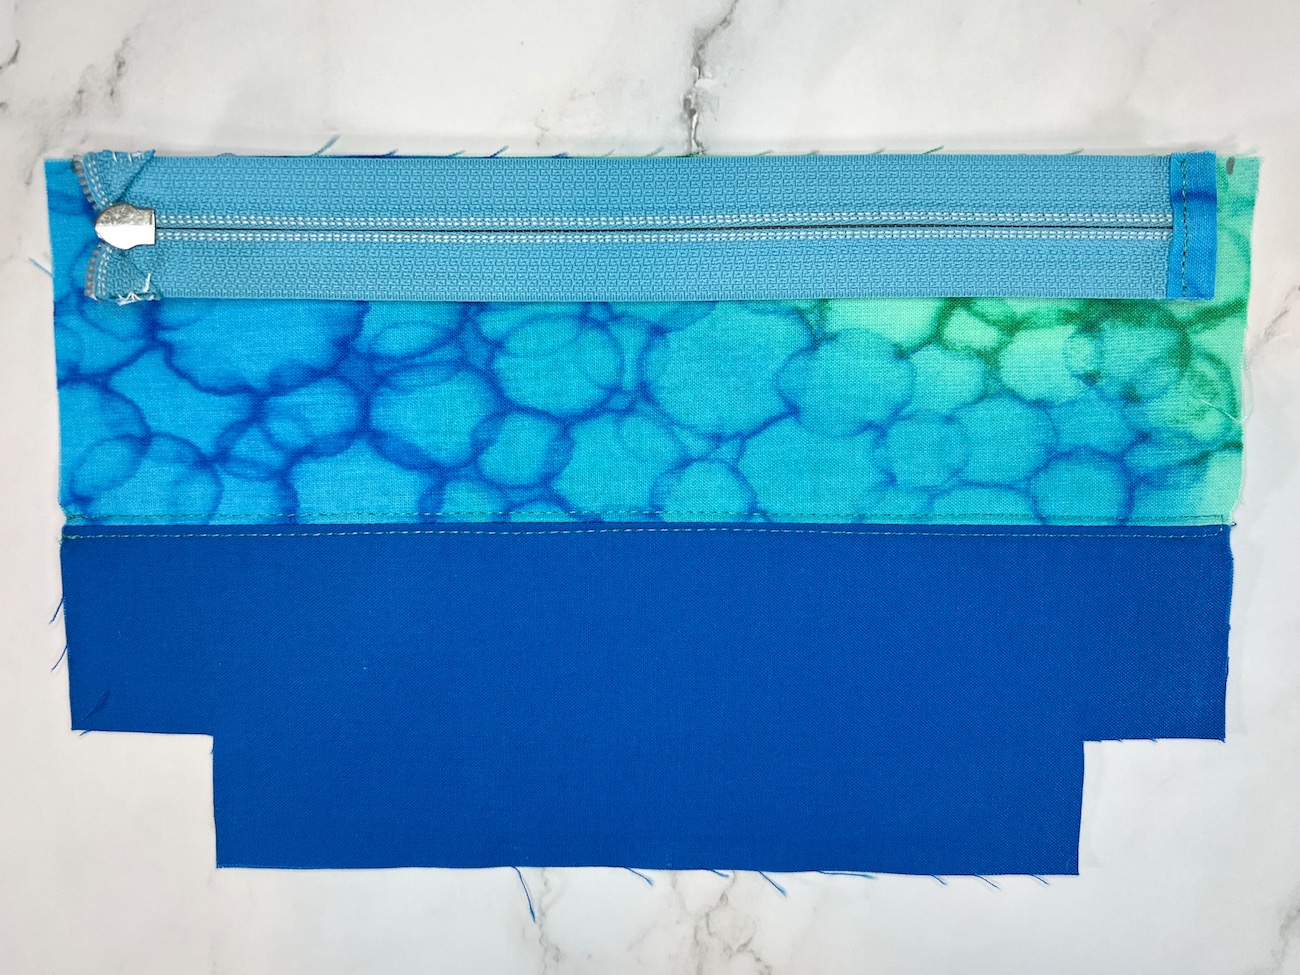
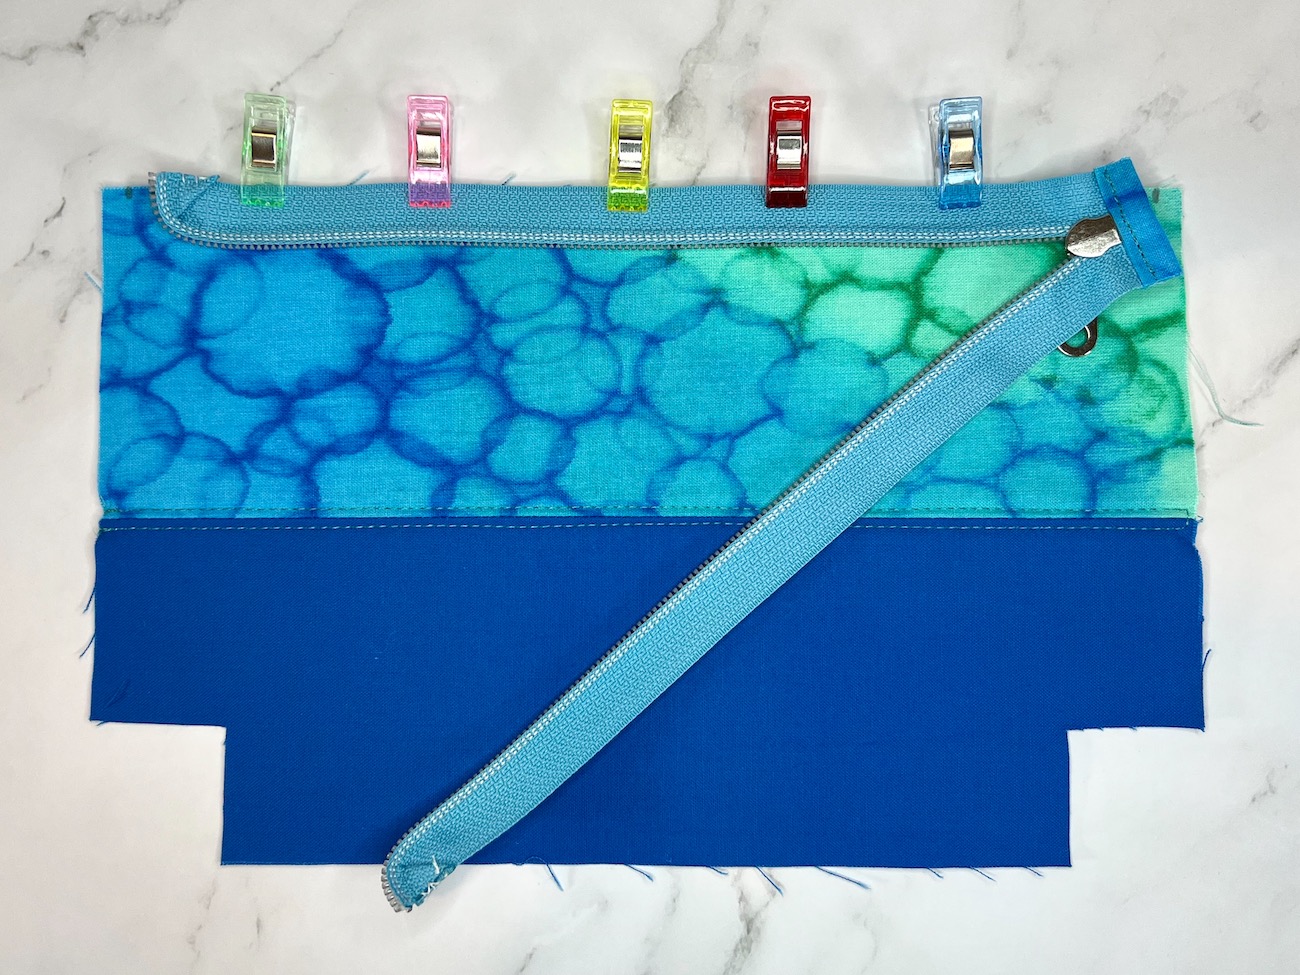
The zipper is easier to baste in place if it is unzipped, so unzip the zipper completely and clip (or pin) the zipper in place.
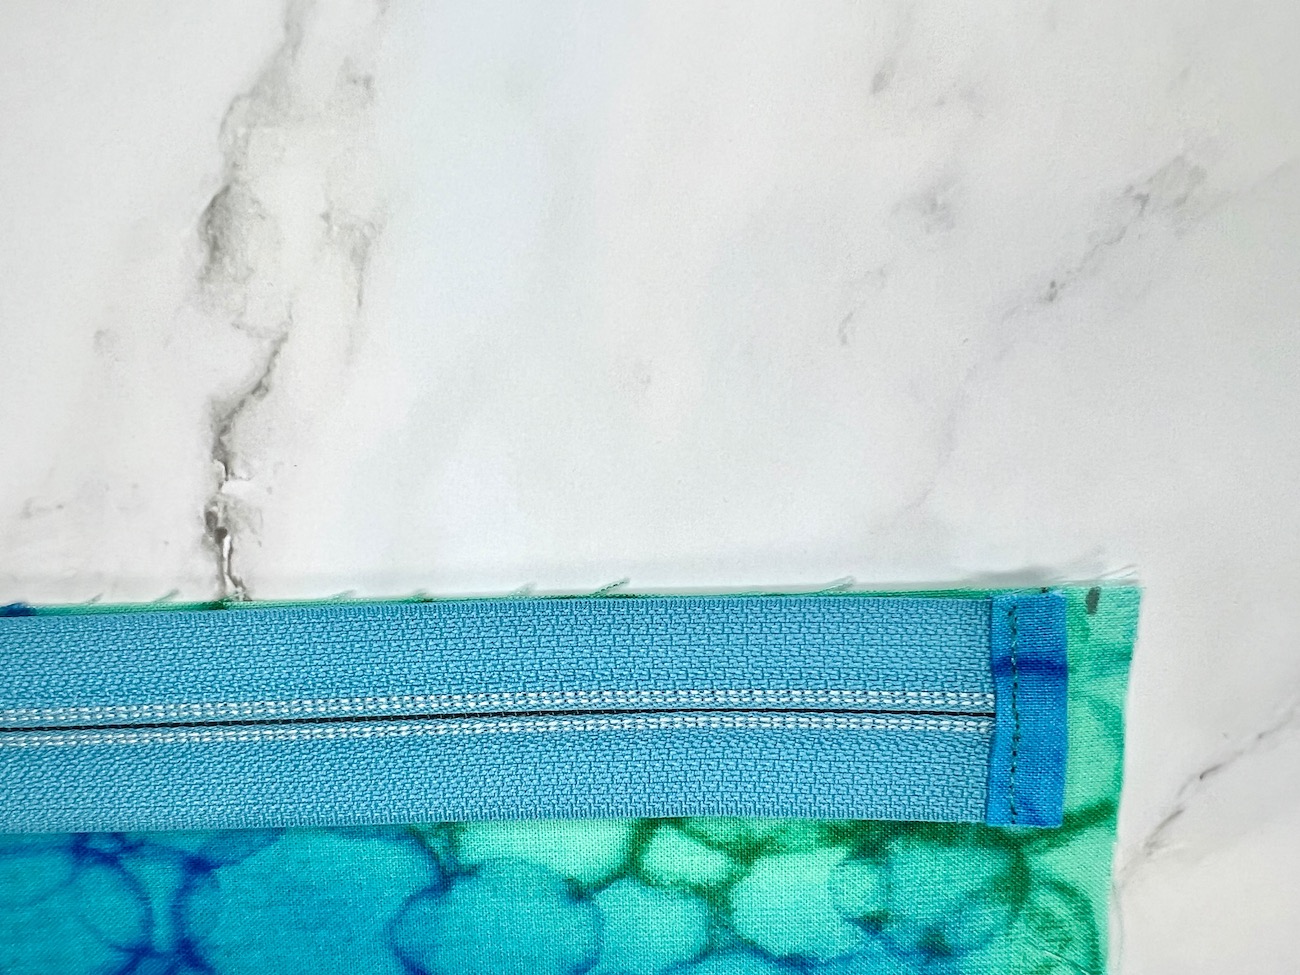
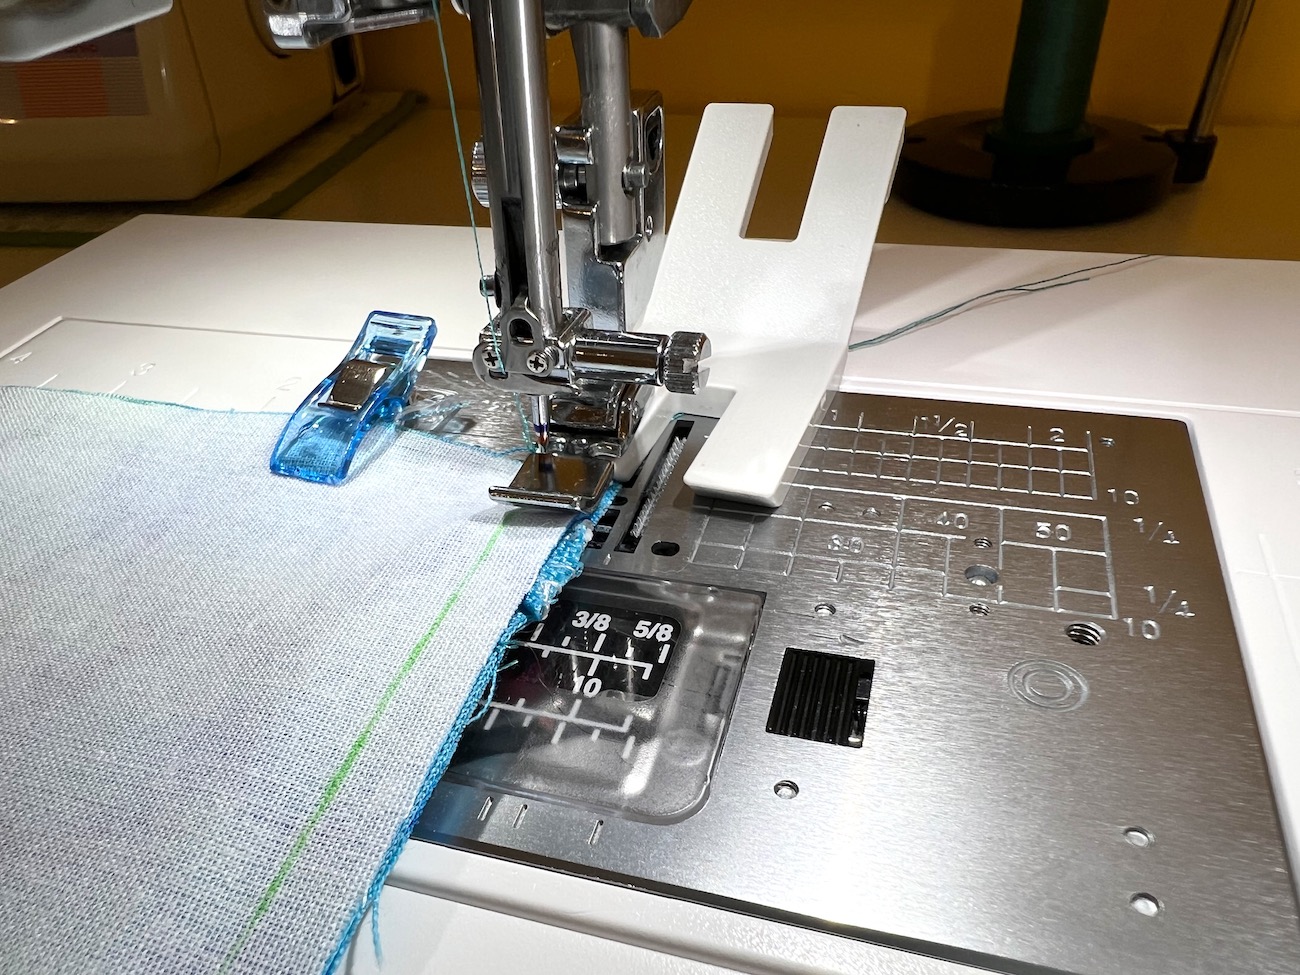
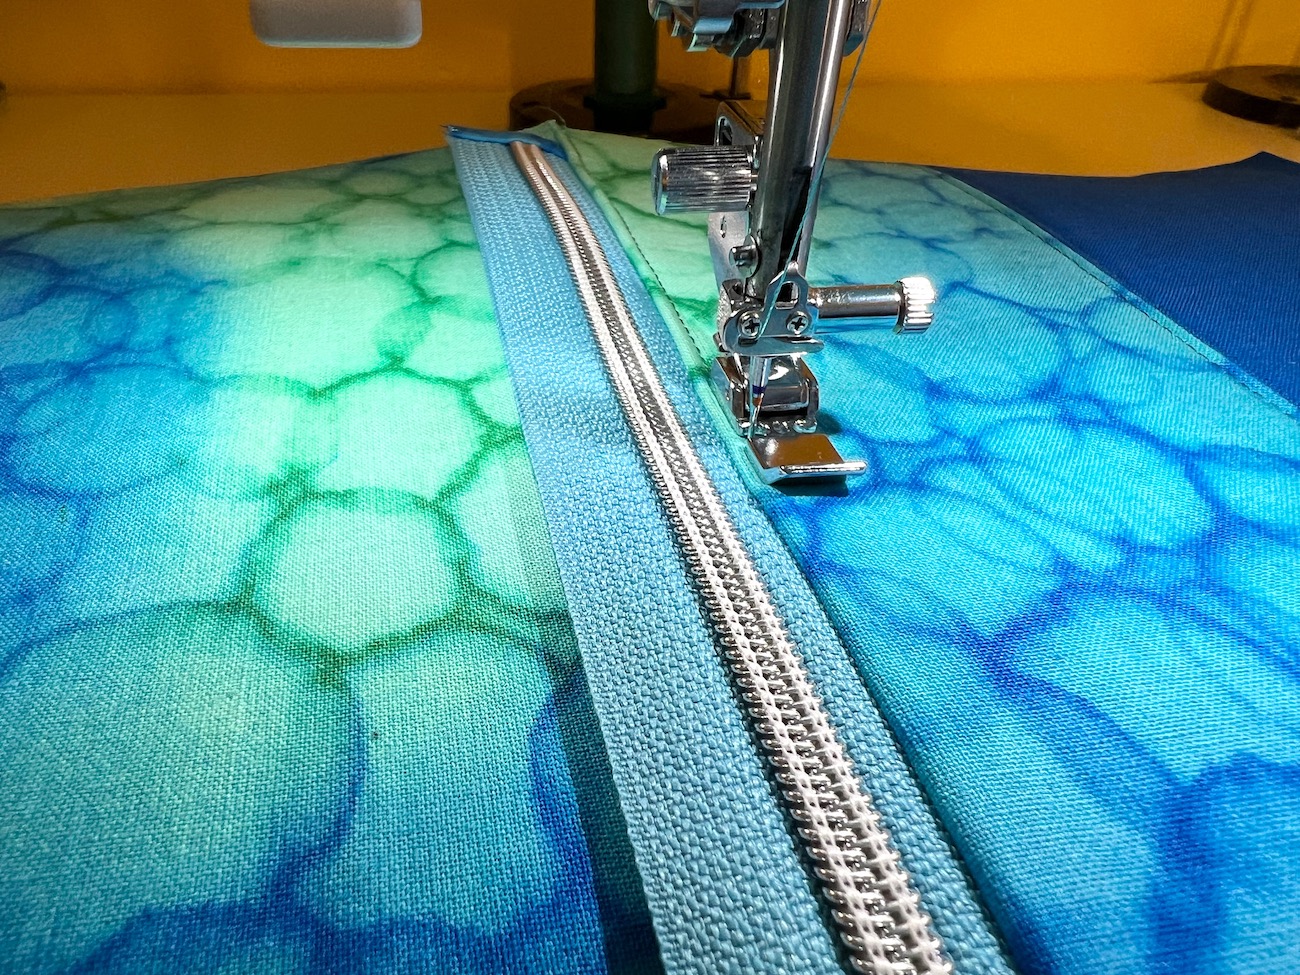
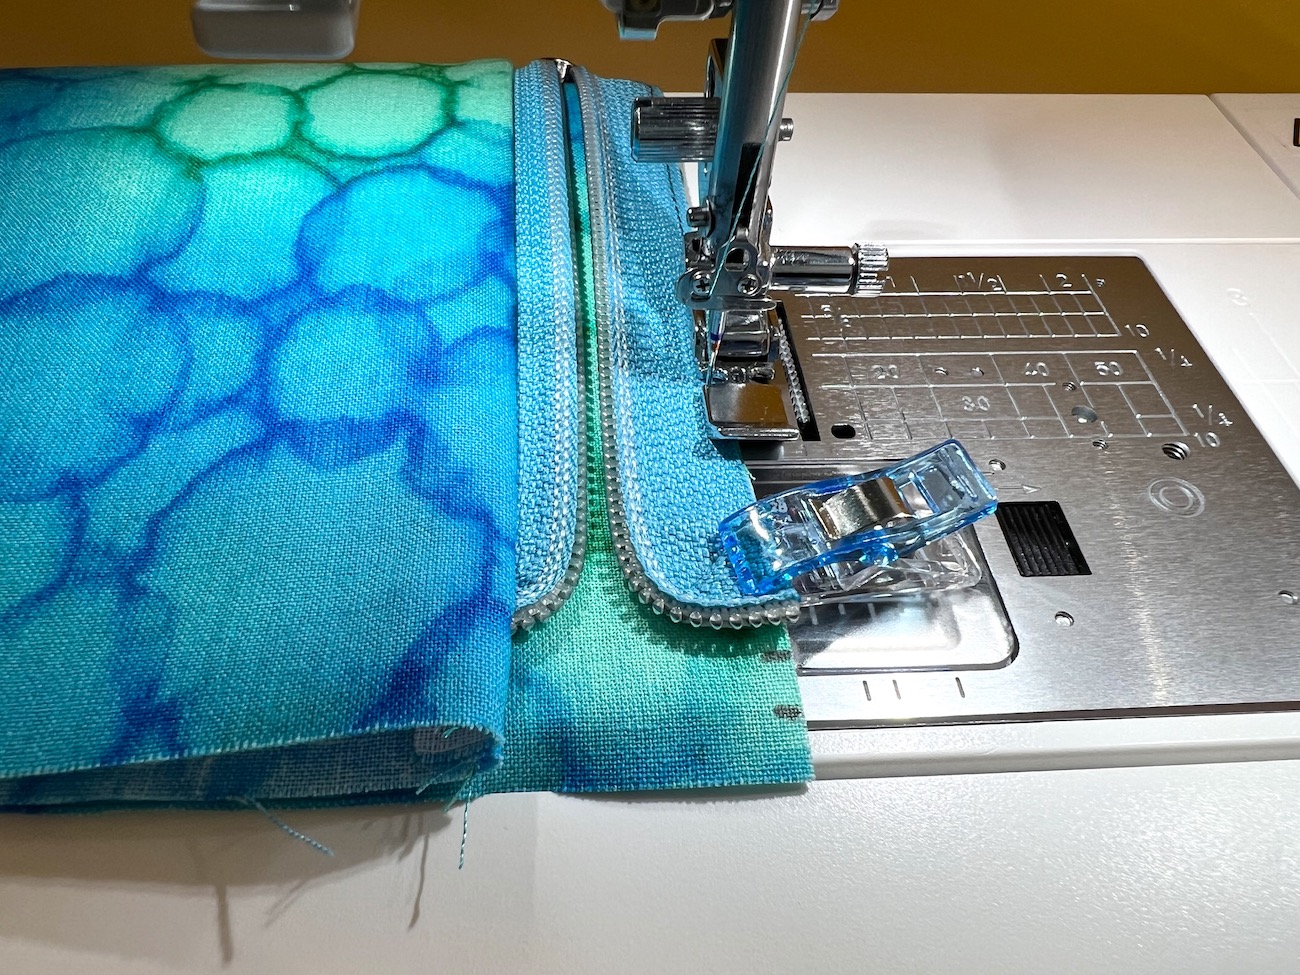
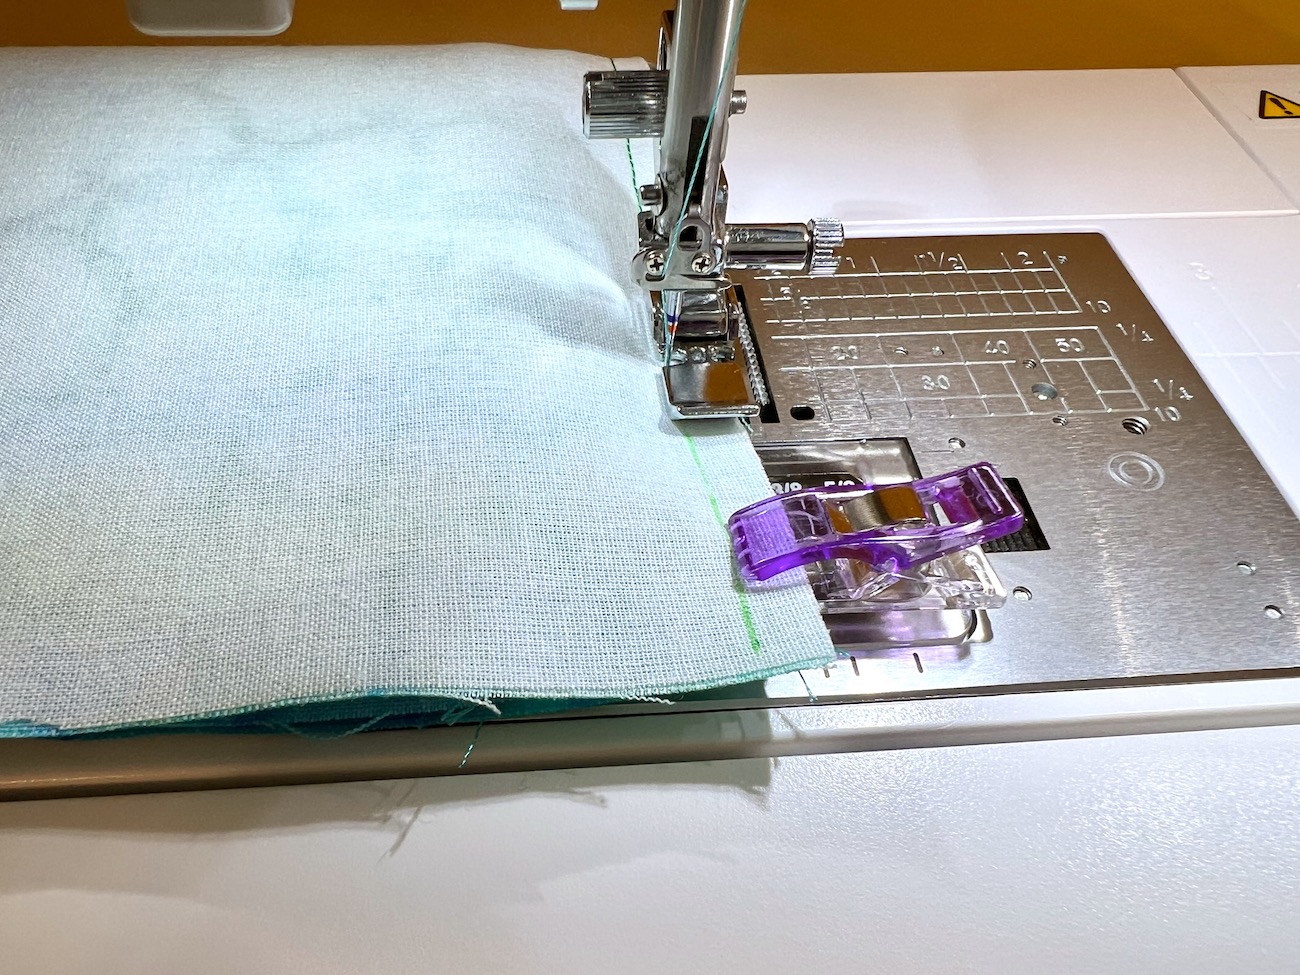
Using a zipper foot (and the needle in the correct position for the zipper foot), baste the zipper tape in place with an ⅛” seam allowance, and a 3 mm stitch length. These basting stitches will not be removed later. Instead, basting in this case means attaching the zipper tape to the exterior panel so the zipper does not shift when attaching the lining. Place the back of the zipper foot against the zipper teeth, and then sew until you are near the zipper pull (the zipper teeth curving into the seam create bulk, so I start just past the teeth for the basting stitches).
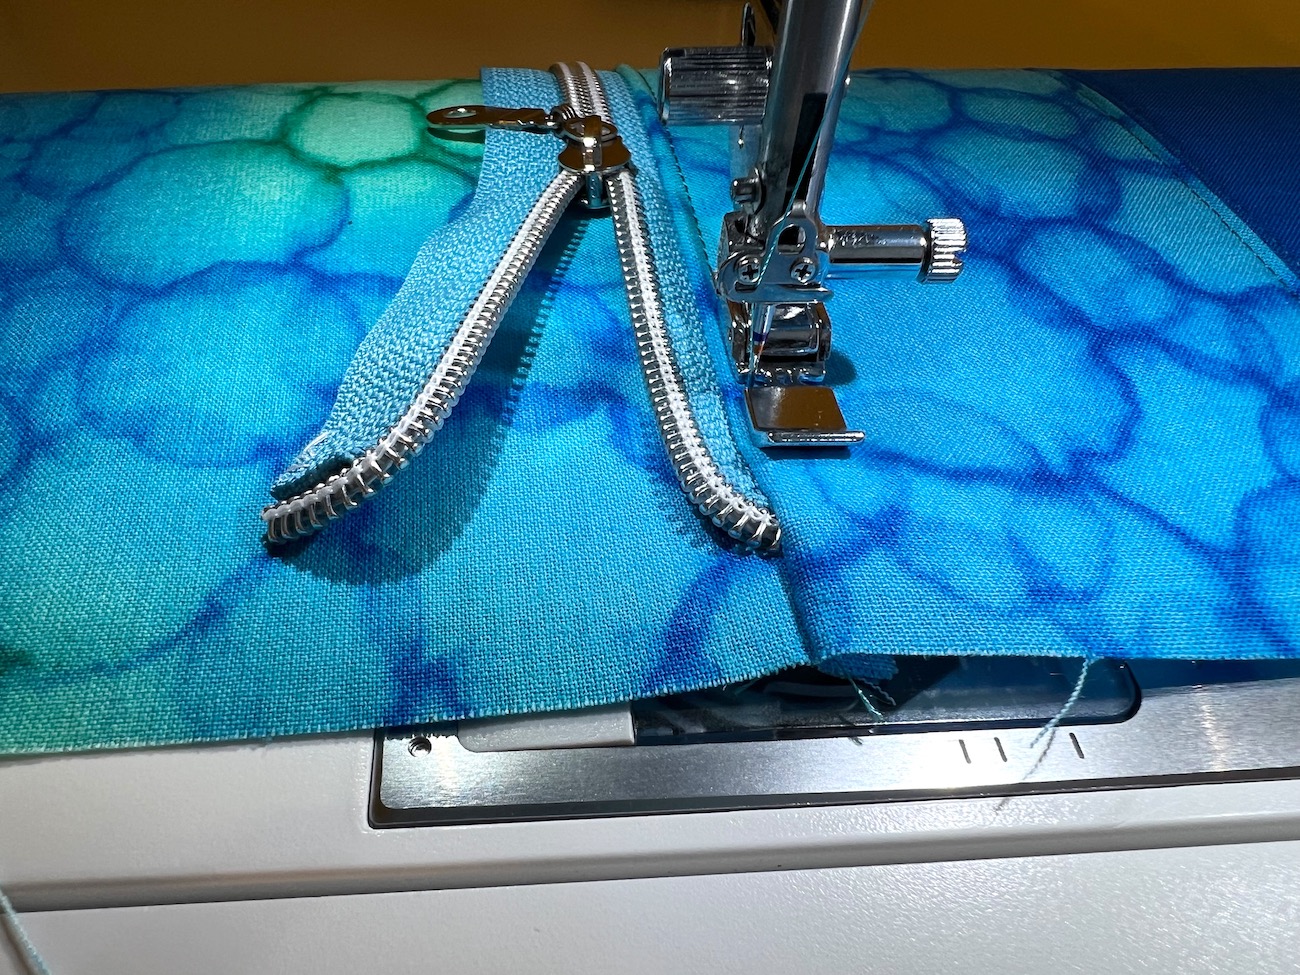
When you near the zipper pull, stop sewing, and raise the presser foot.
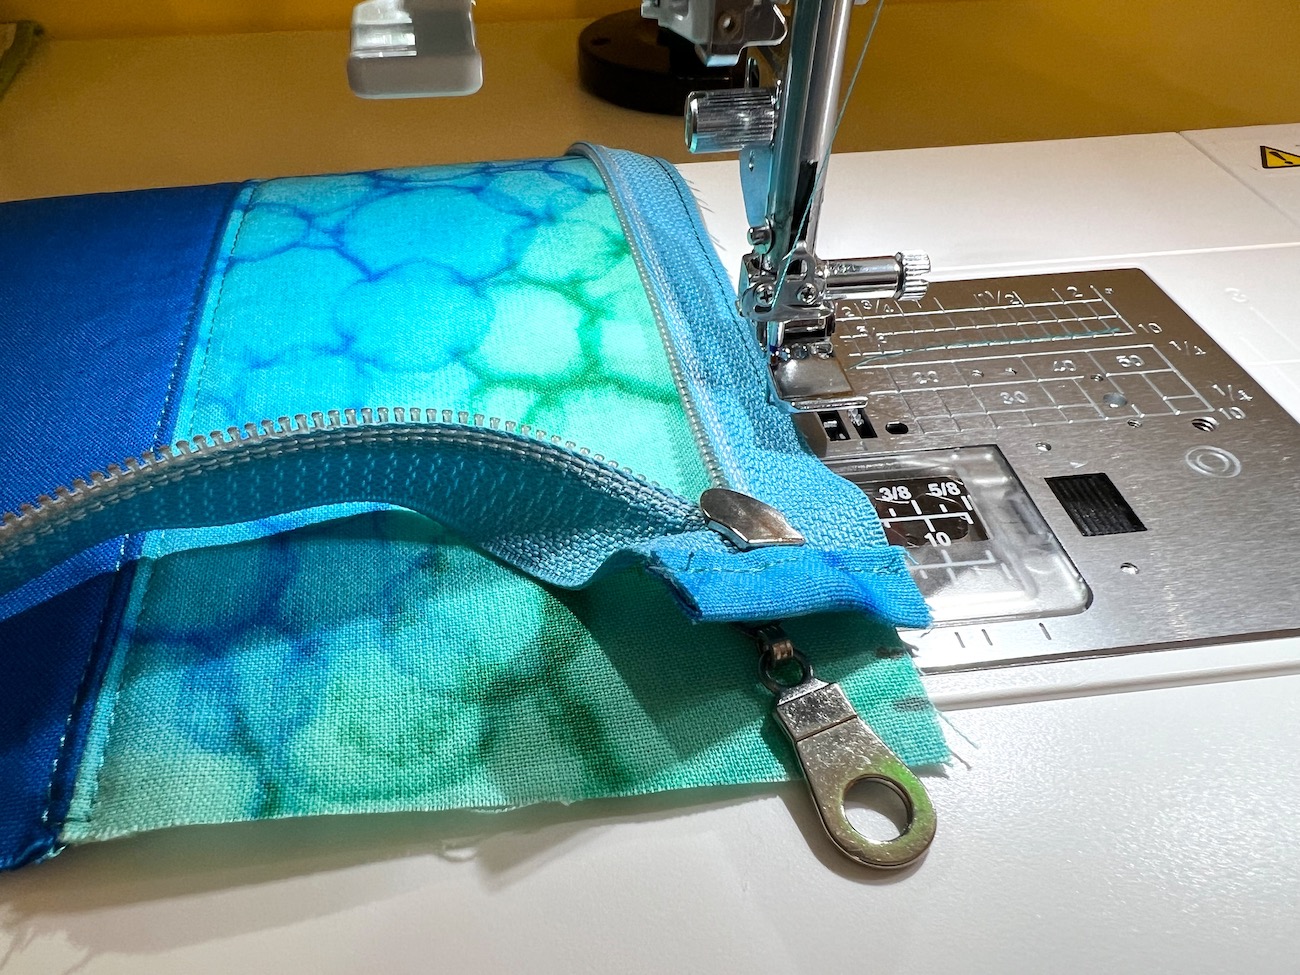
Slide the zipper pull out of the way and zip up the zipper.
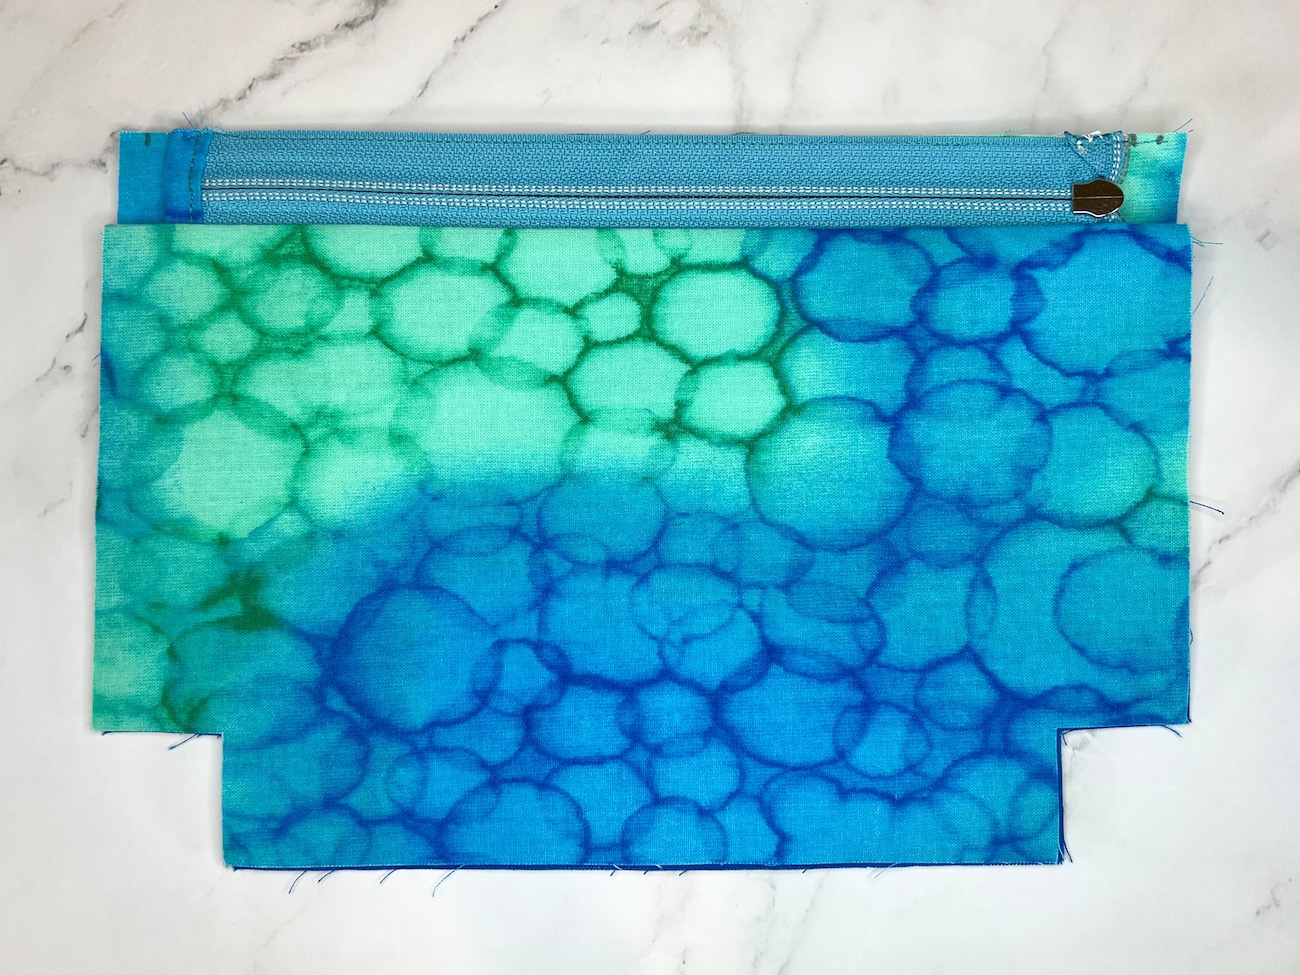
Re-align the edge of the zipper tape with the edge of the exterior panel and finish sewing the ⅛” seam.
Attaching the Lining Panel
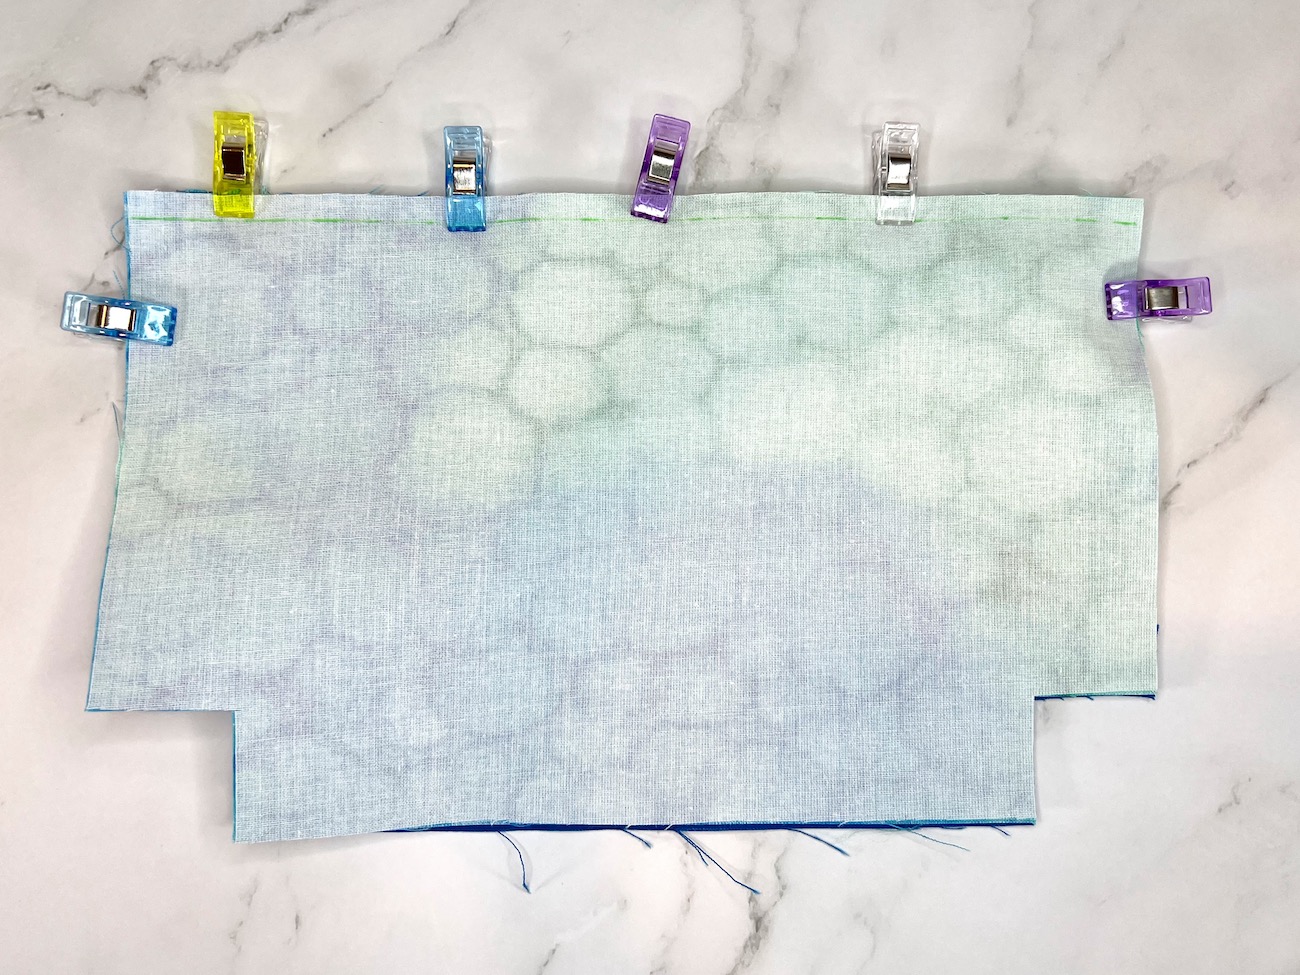
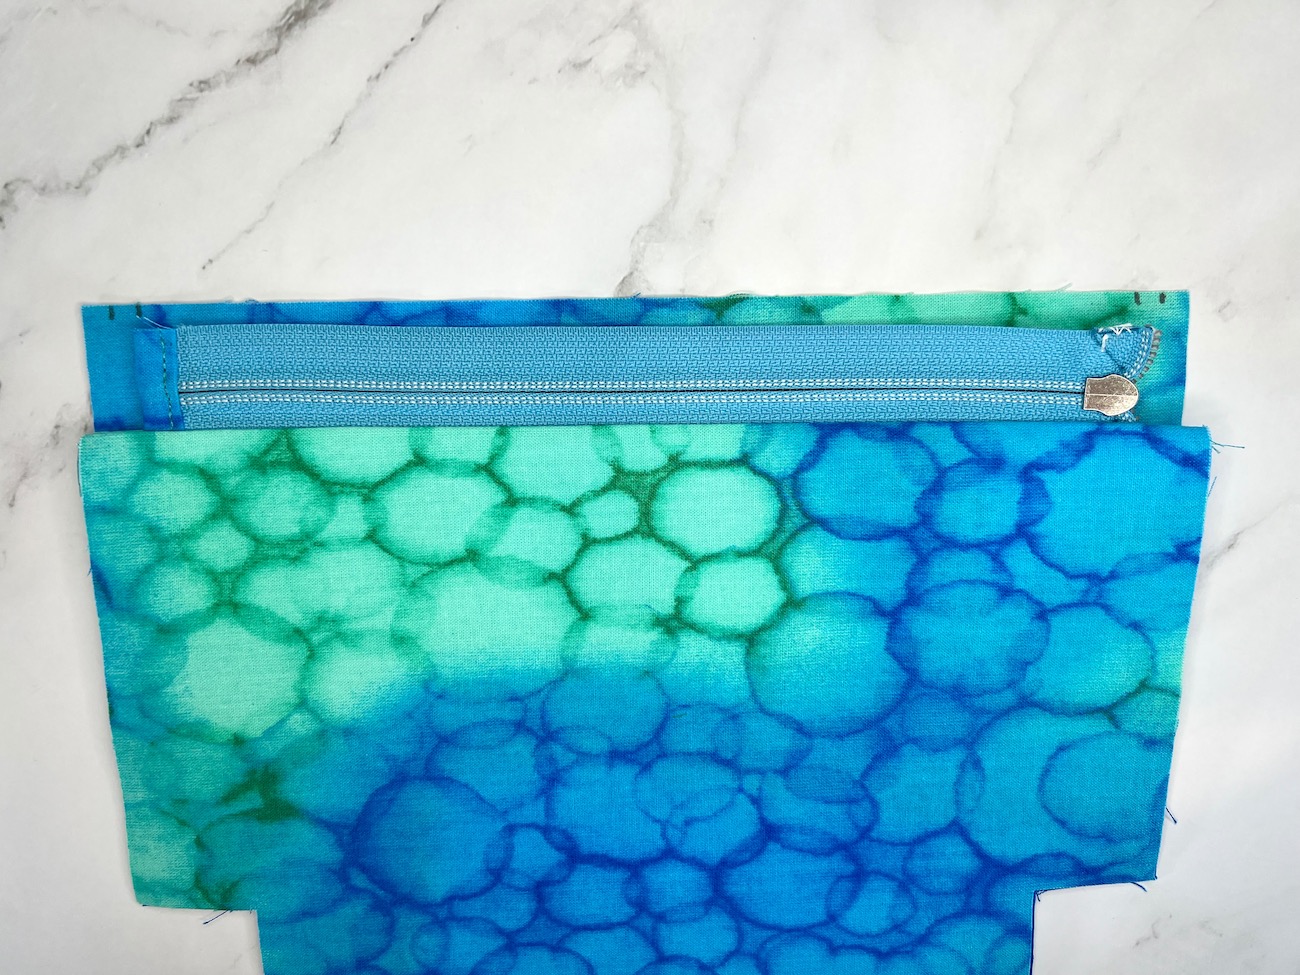
TIP: I find it difficult to maintain an exact seam allowance with a zipper foot, so I like to draw my seam allowance on the wrong side of the lining panels with a removable fabric marking pen before sewing these seams. Take one of the lining panels, and mark a line ¼” below the top straight edge (the edge opposite of the edge that has the square cutouts) on the wrong side of the lining panel.
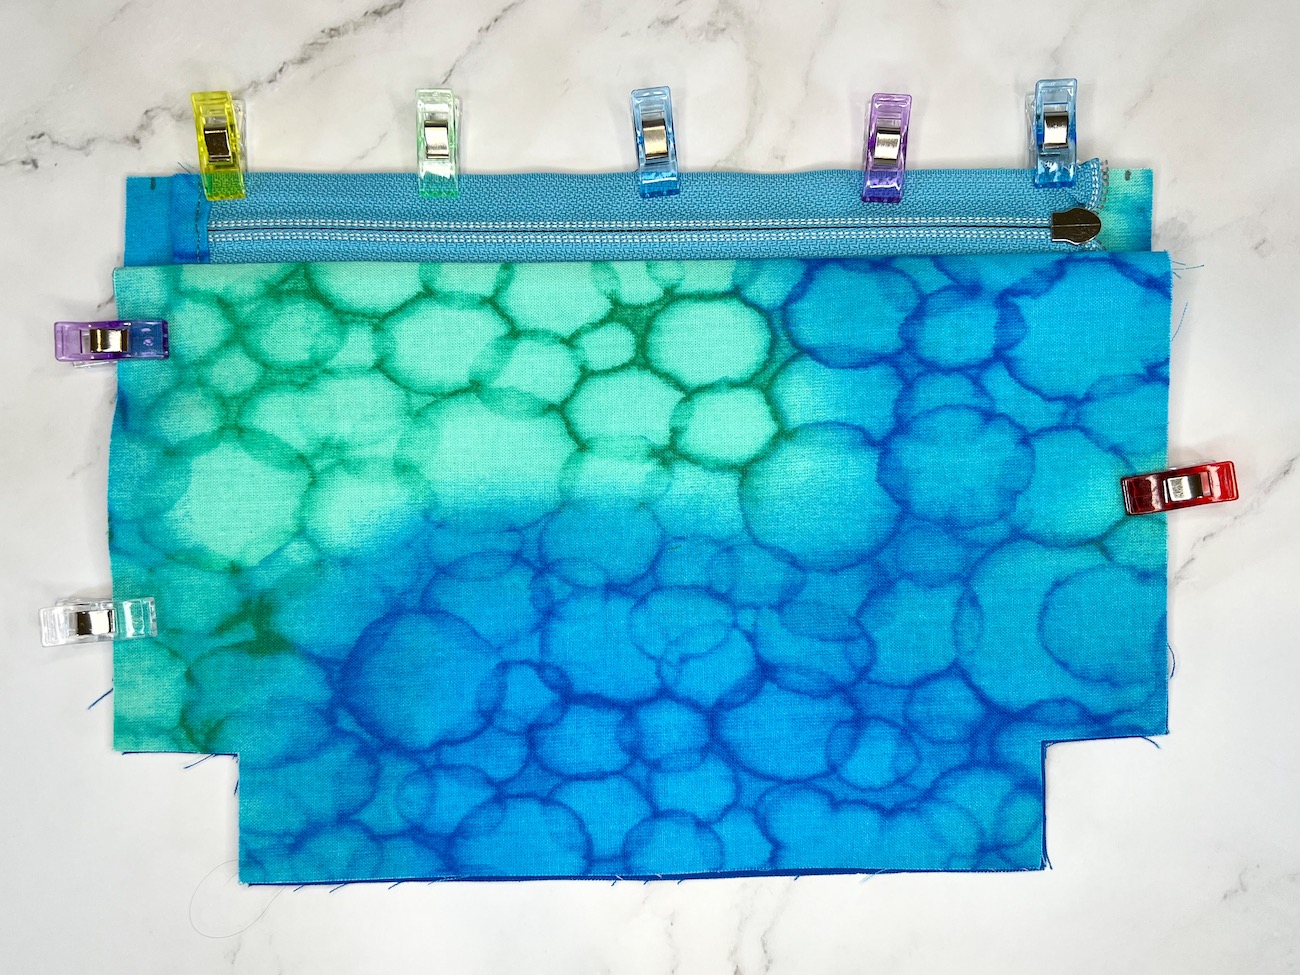
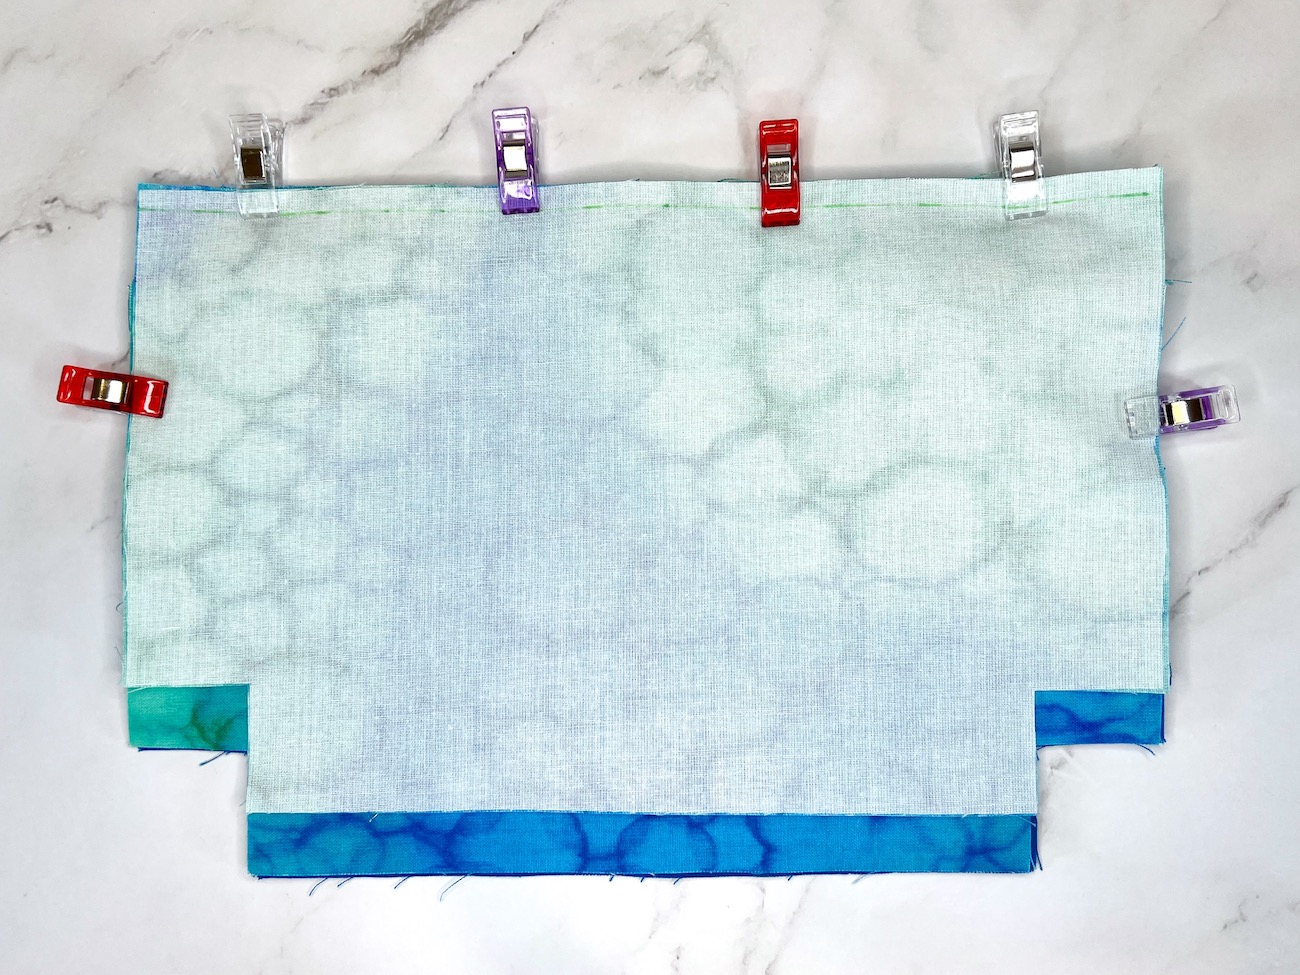
With the exterior panel right side up (the panel with the basted zipper) open the zipper all the way. Place the lining panel (piece C1) right sides down on the exterior panel, align the top edge and sides, and clip or pin in place. In the picture below, notice the ¼” seam drawn along the top of the wrong side of the lining panel.
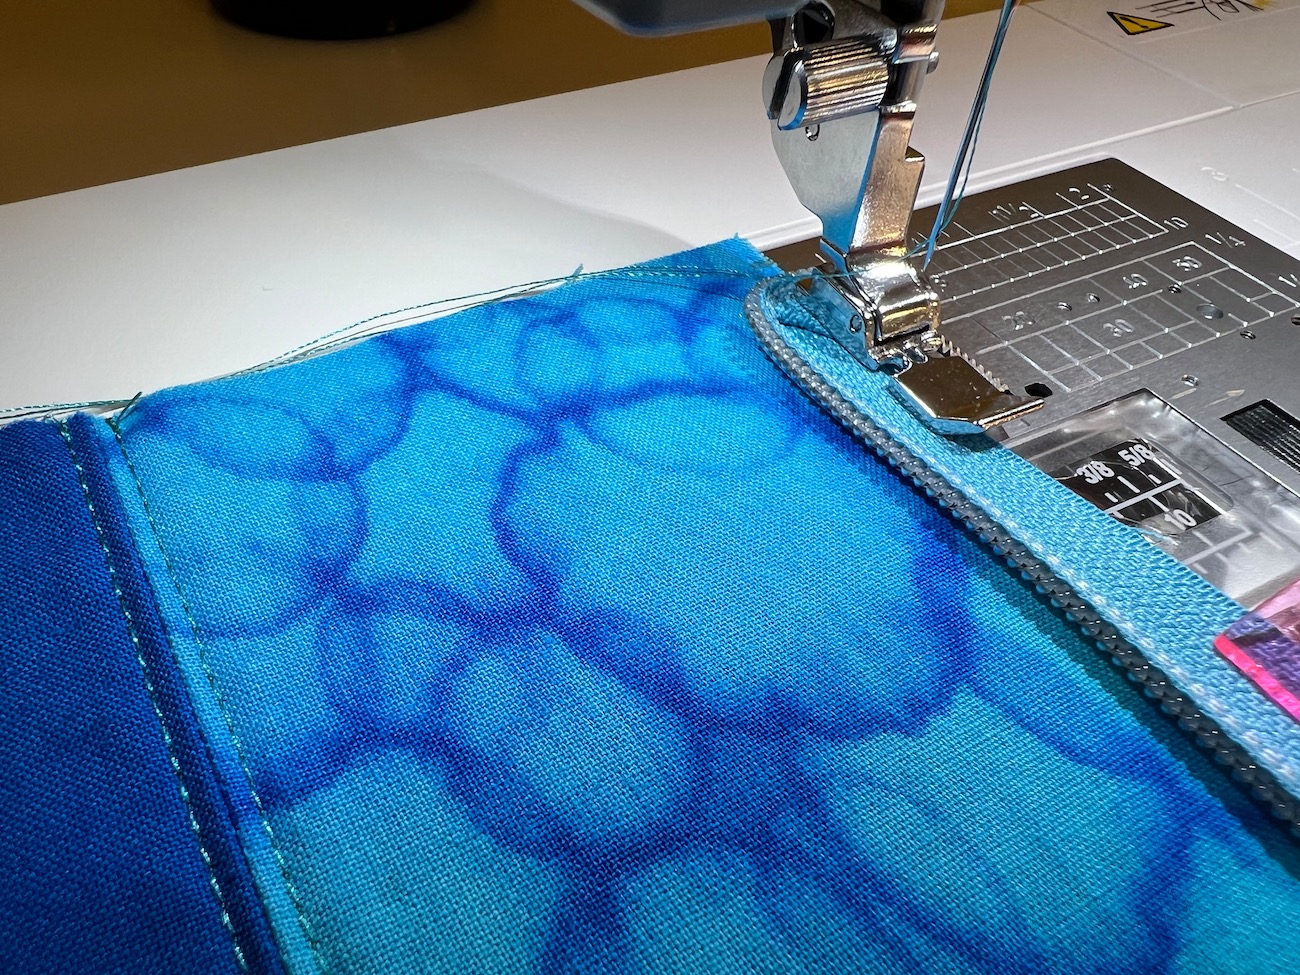
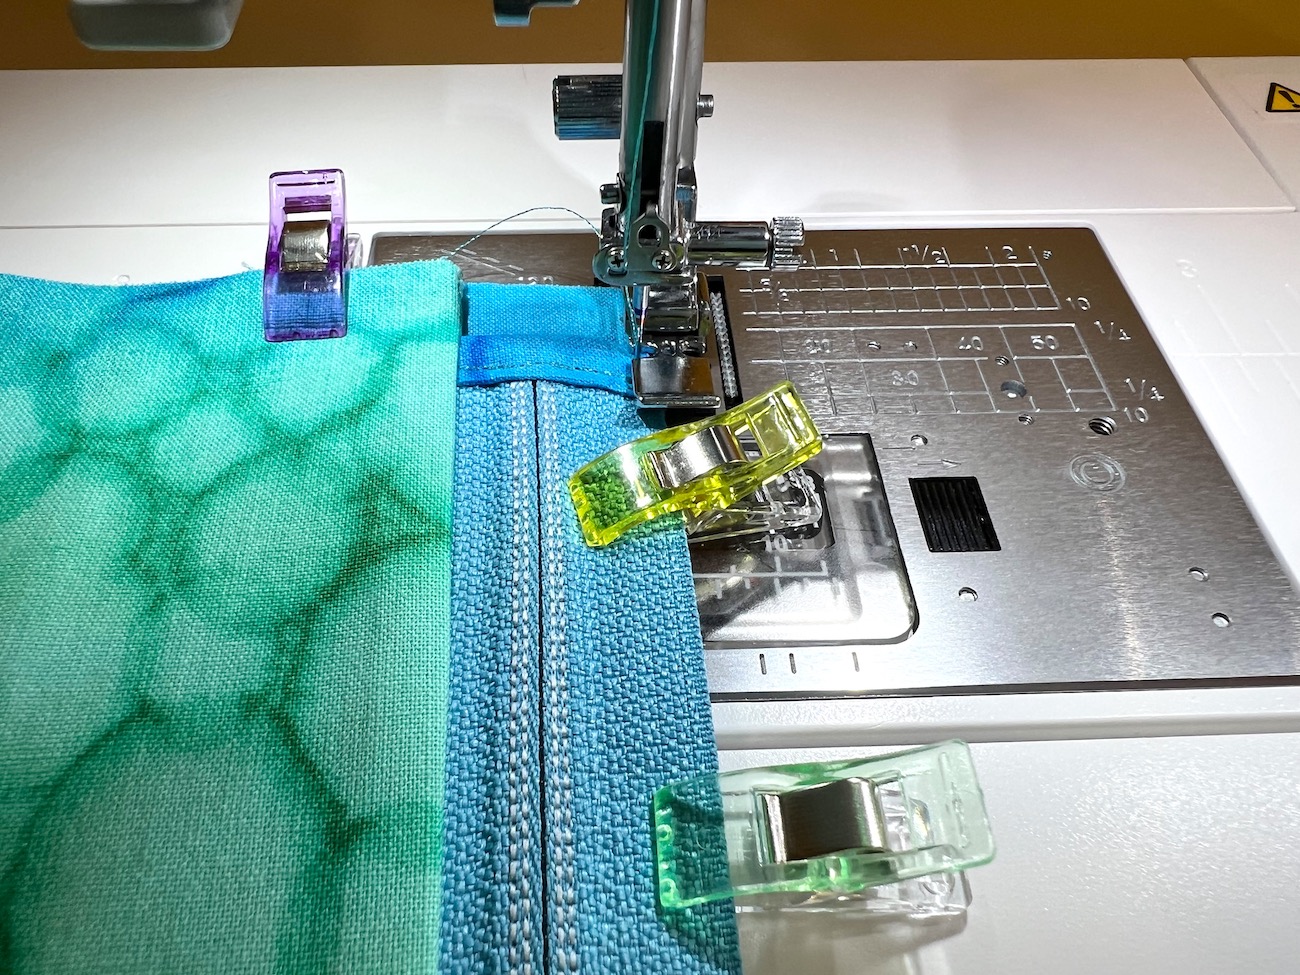
Because of the bulk of the zipper teeth, this seam can require a bit of extra care depending on how your machine handles bulk. Pull up the bobbin thread, and leave the top and bobbin thread long to hold onto those later for the first few stitches. Align the needle with the ¼” inch line drawn, and lower the needle into the fabric. Be aware of where the zipper teeth are, I’m pointing to them in the picture below.
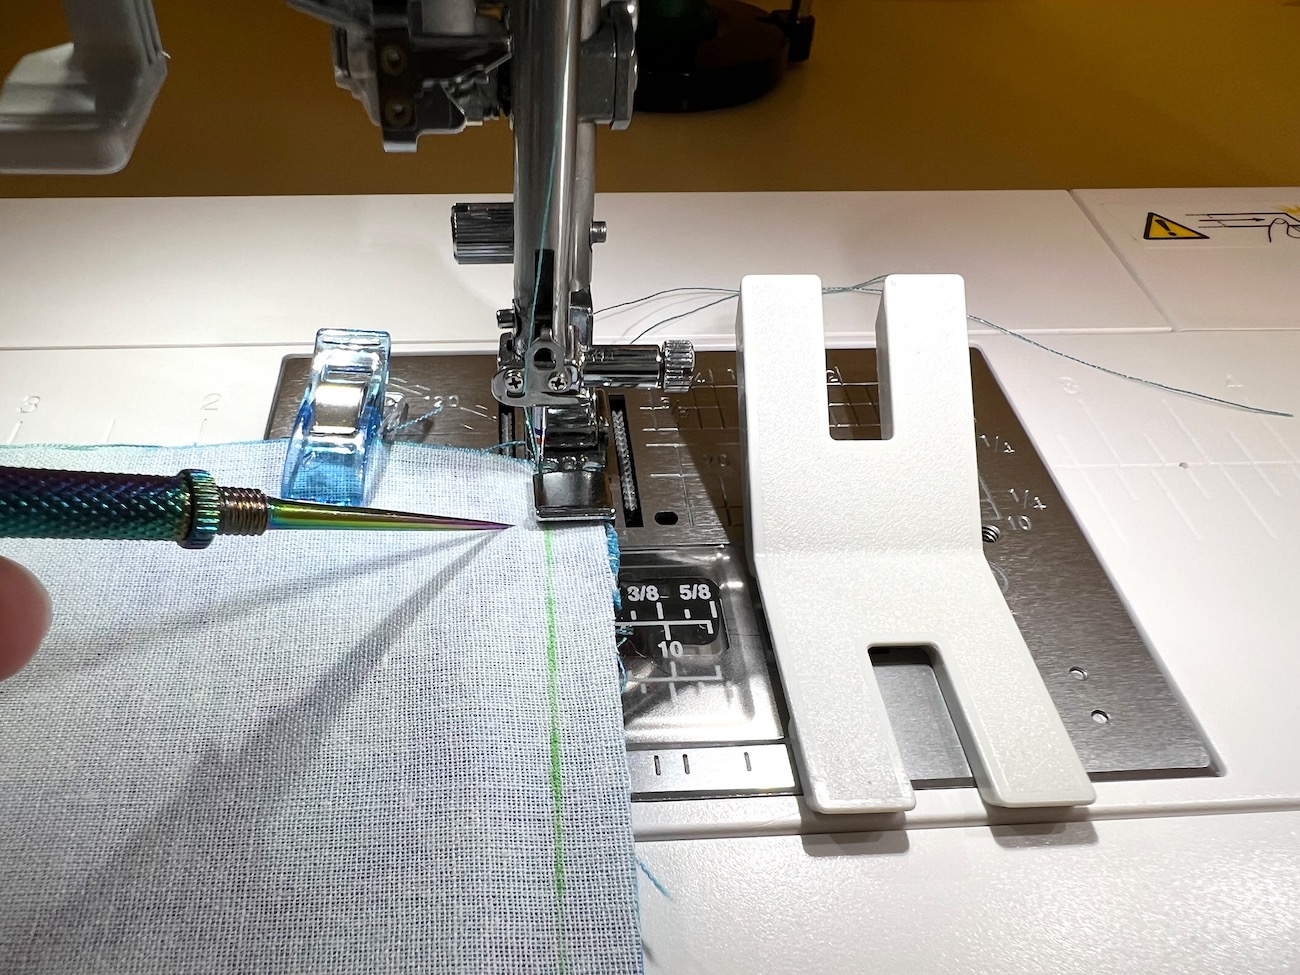
This is where the hump jumper will become your best friend (you can also use a scrap of fabric/vinyl/cork folded multiple times). Raise the presser foot, and place one leg of the hump jumper underneath the back of the presser foot.
The hump jumper will raise the back of the presser foot, leveling out the entire foot and enabling it to smoothly sew forward. Using the hand wheel, slowly hand crank forward a few stitches until you sew completely over and past the zipper teeth. Backstitching at the beginning of this seam can be difficult, so as long as the stitching is started within the ¼” side seam allowance, I don’t backstitch at the beginning (this line of stitching will be sewn over again later). The presser foot will slowly sew off the hump jumper, so stop and place it behind the foot again if needed.
Continue sewing this seam following the ¼” mark until you near the zipper pull. Stop sewing, raise the presser foot, and zip up the zipper sliding the zipper pull out of the way. Continue sewing the rest of the seam, and backstitch at the end of this seam. Check the line of stitching, and see if it is decently straight. Adjust and fix as need be. My line of stitching is not perfect (especially where I backstitched at the end) but it is even enough that I’m content with it!
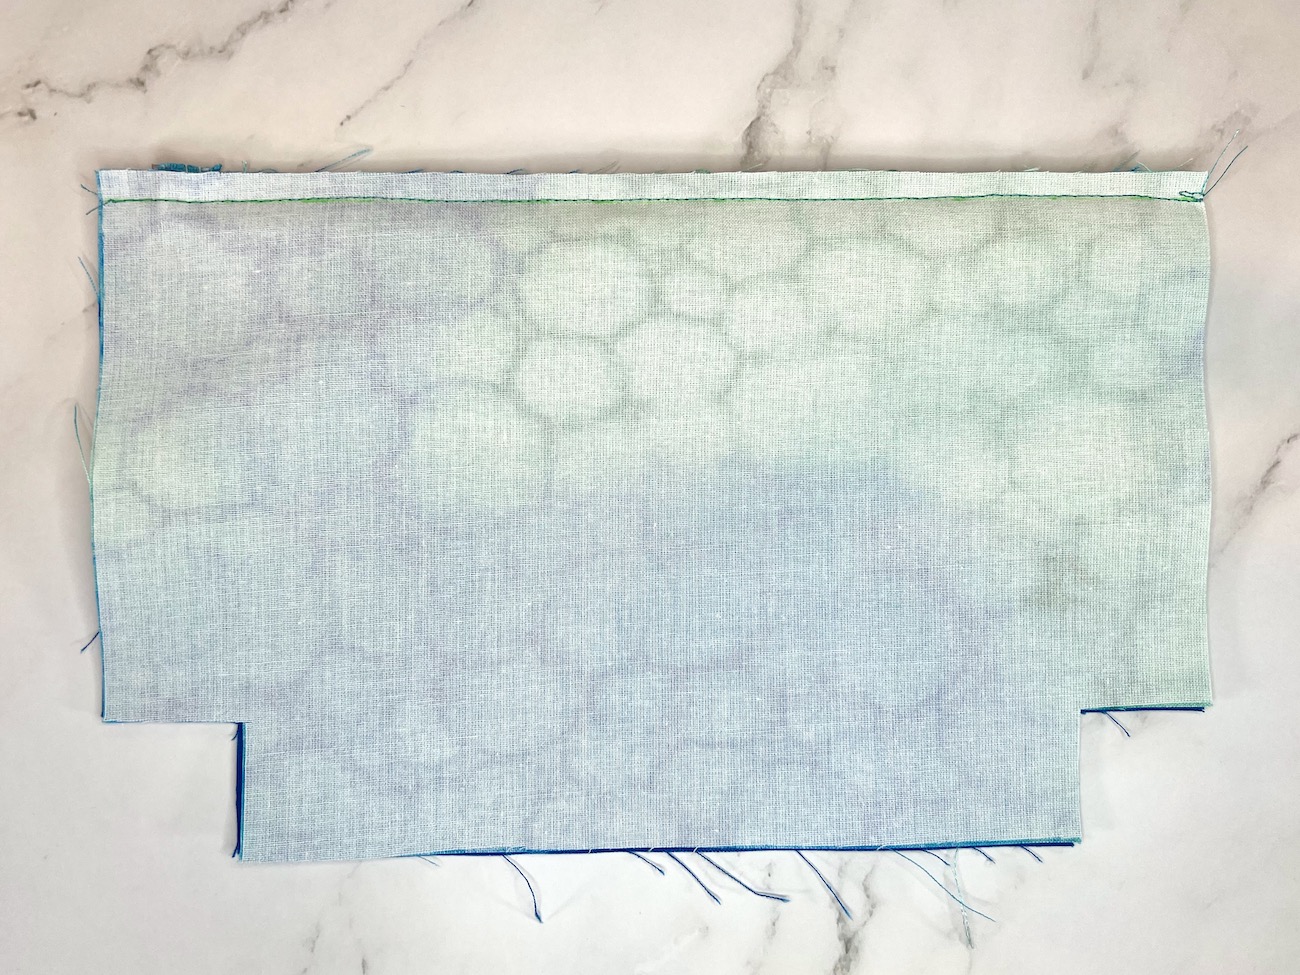
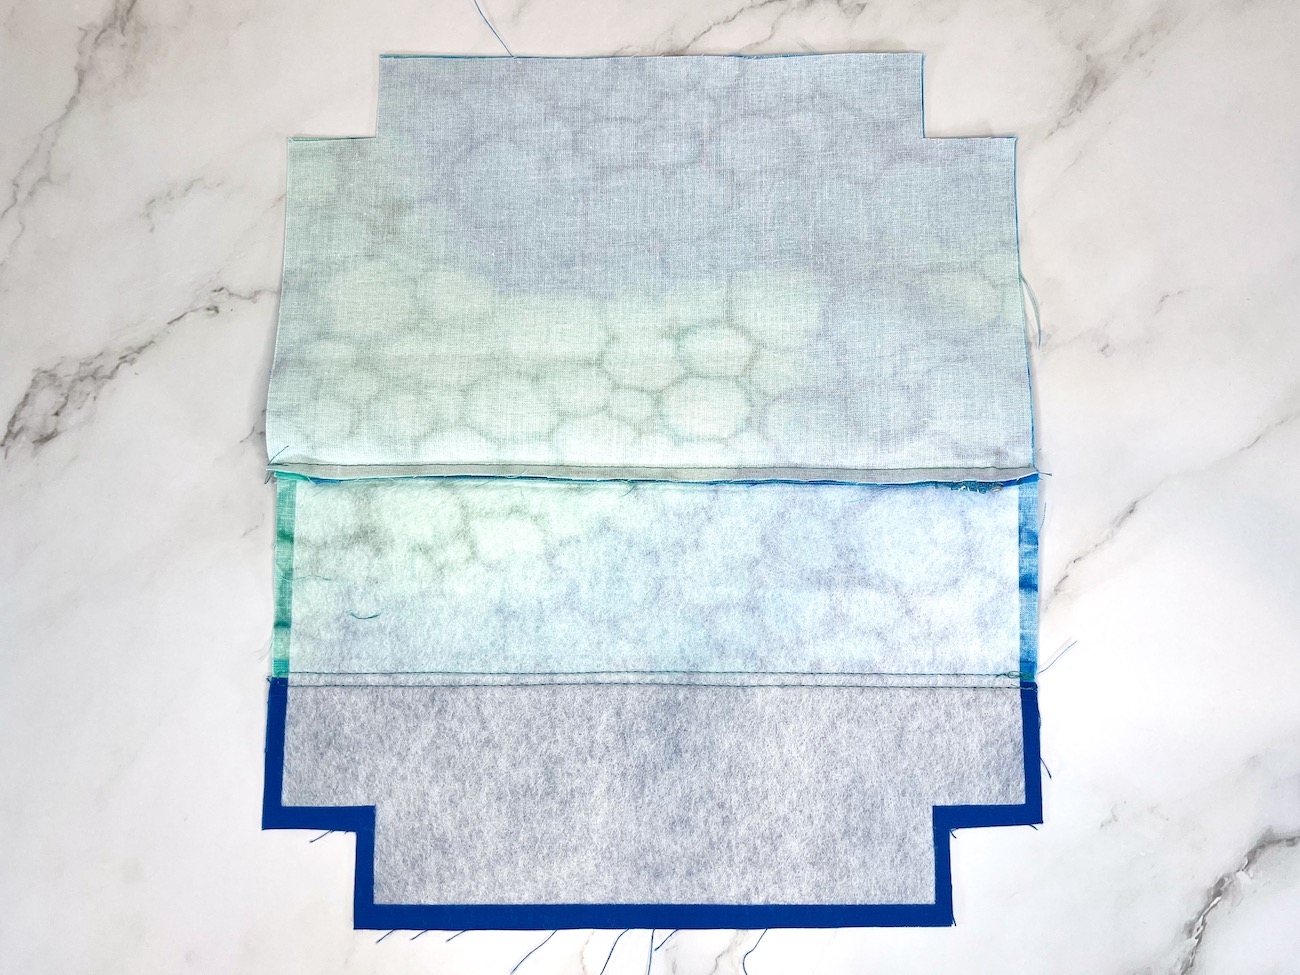
Take the lining panel and fold it back so that the wrong side of the lining panel is touching the wrong side of the exterior panel.
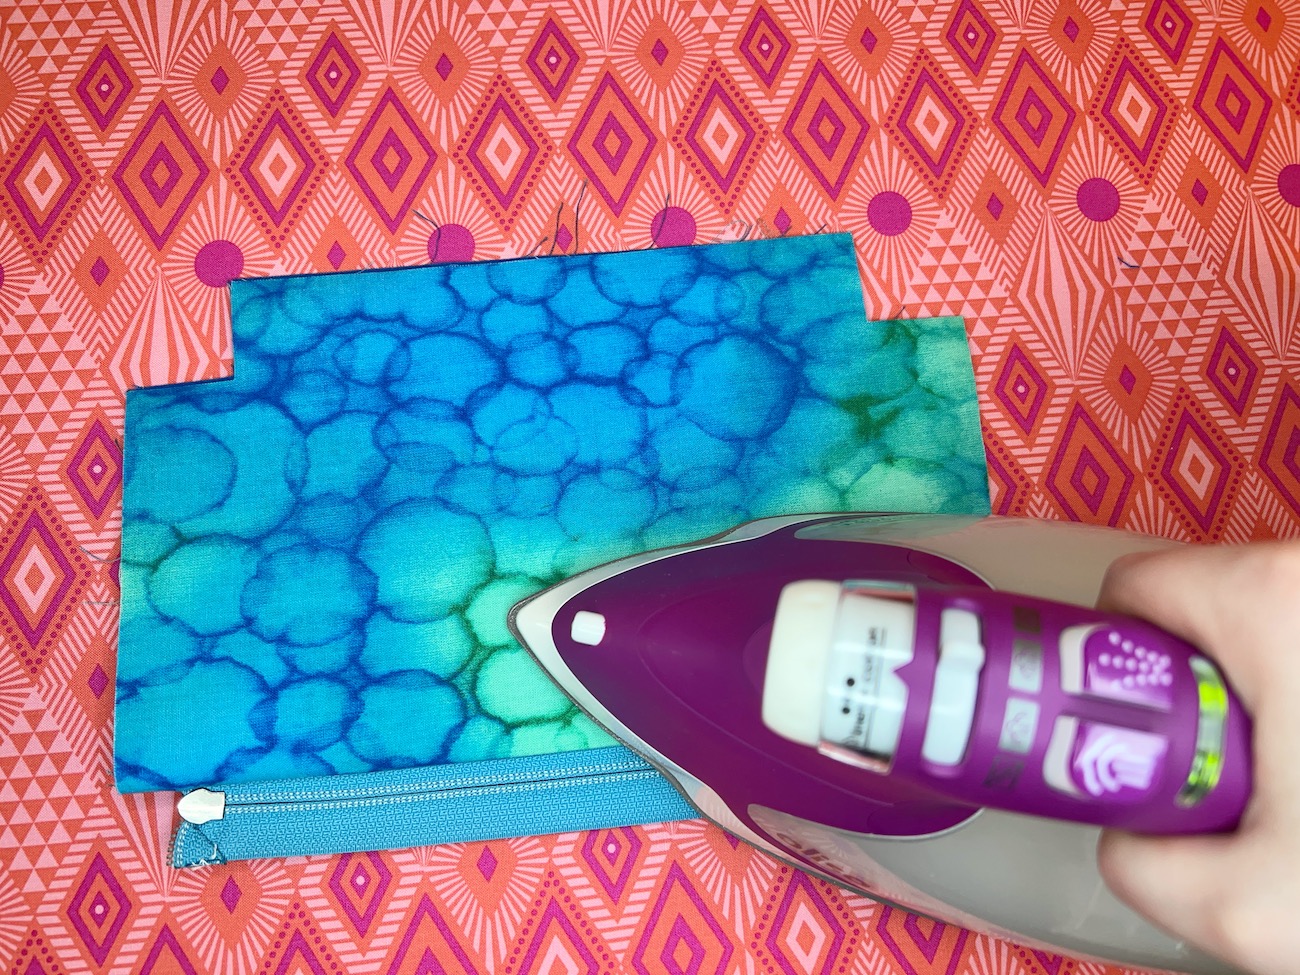
With a hot steamy iron, press the lining panel and the exterior panel along the zipper really flat, ensuring that the panels are folded smoothly away from the zipper tape. A quilting/tailors clapper can aid in an extra flat seam here.
Topstitching Zipper Side 1
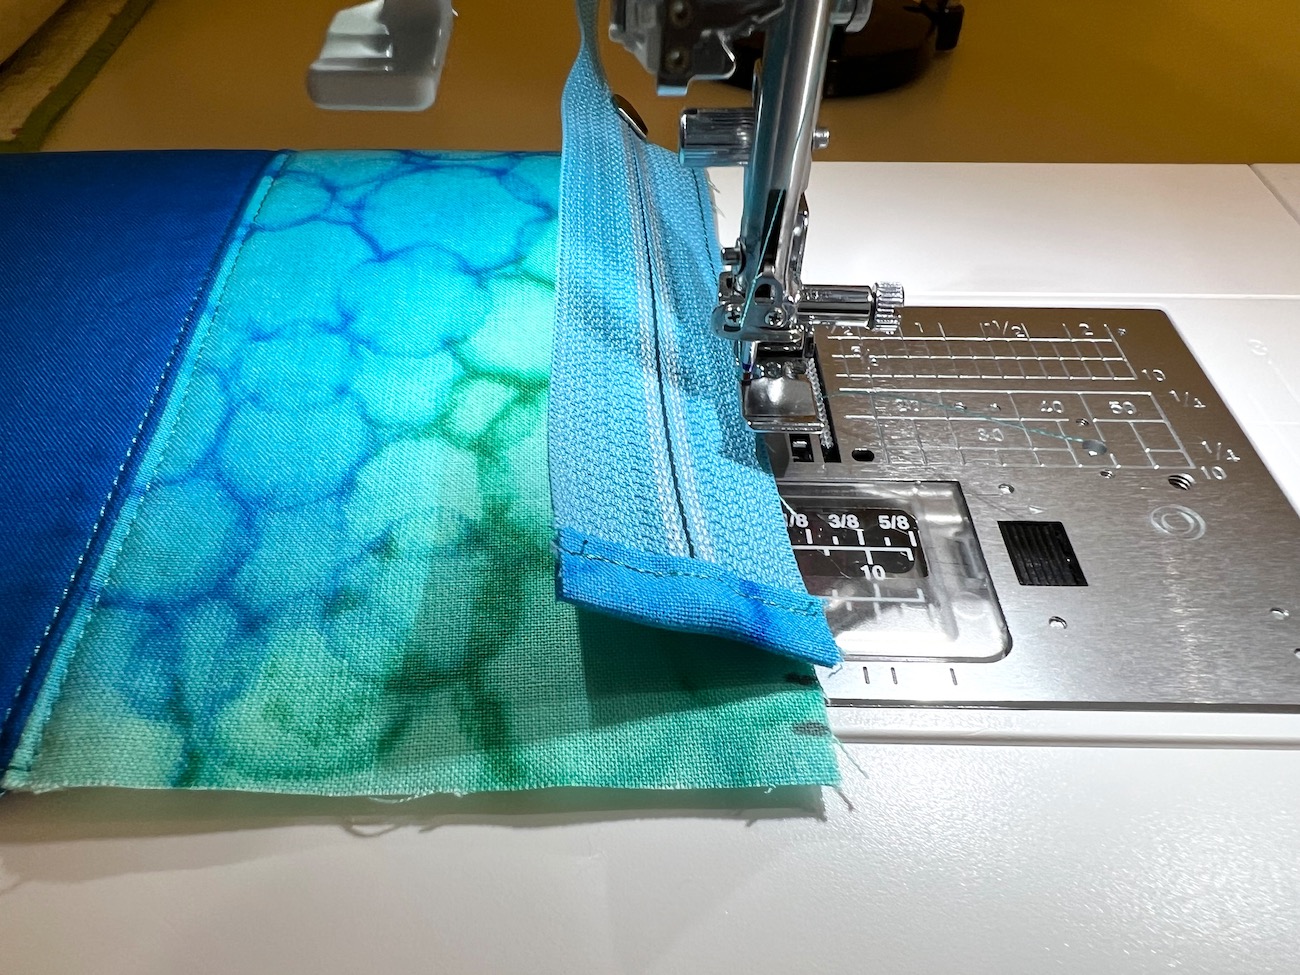
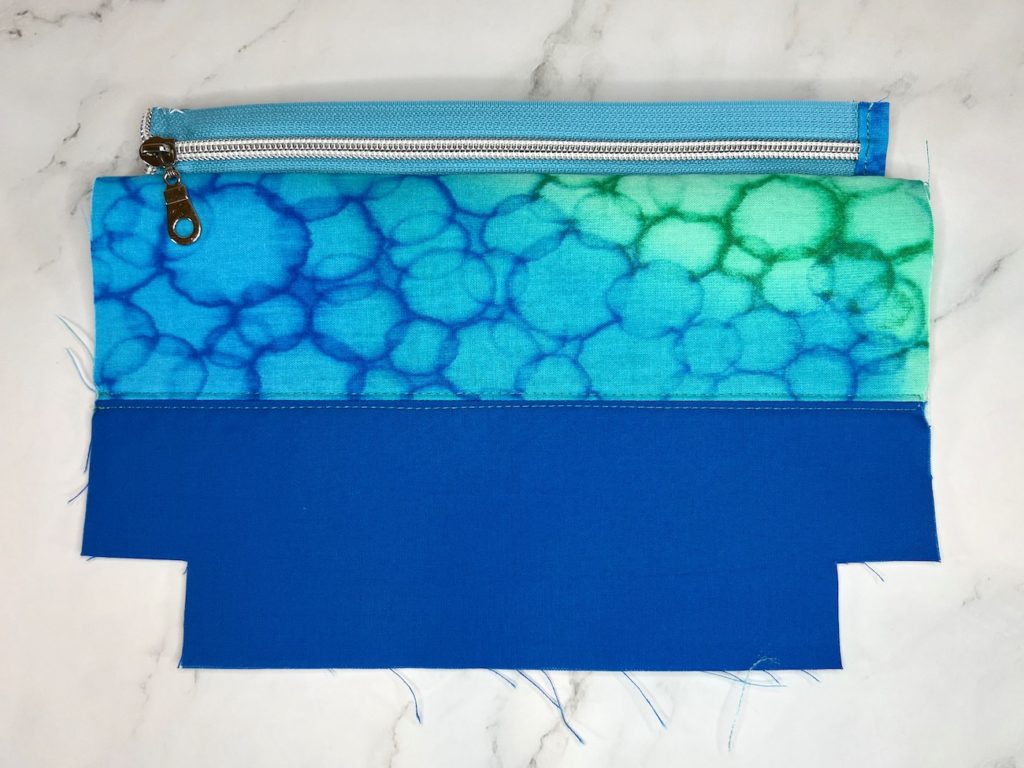
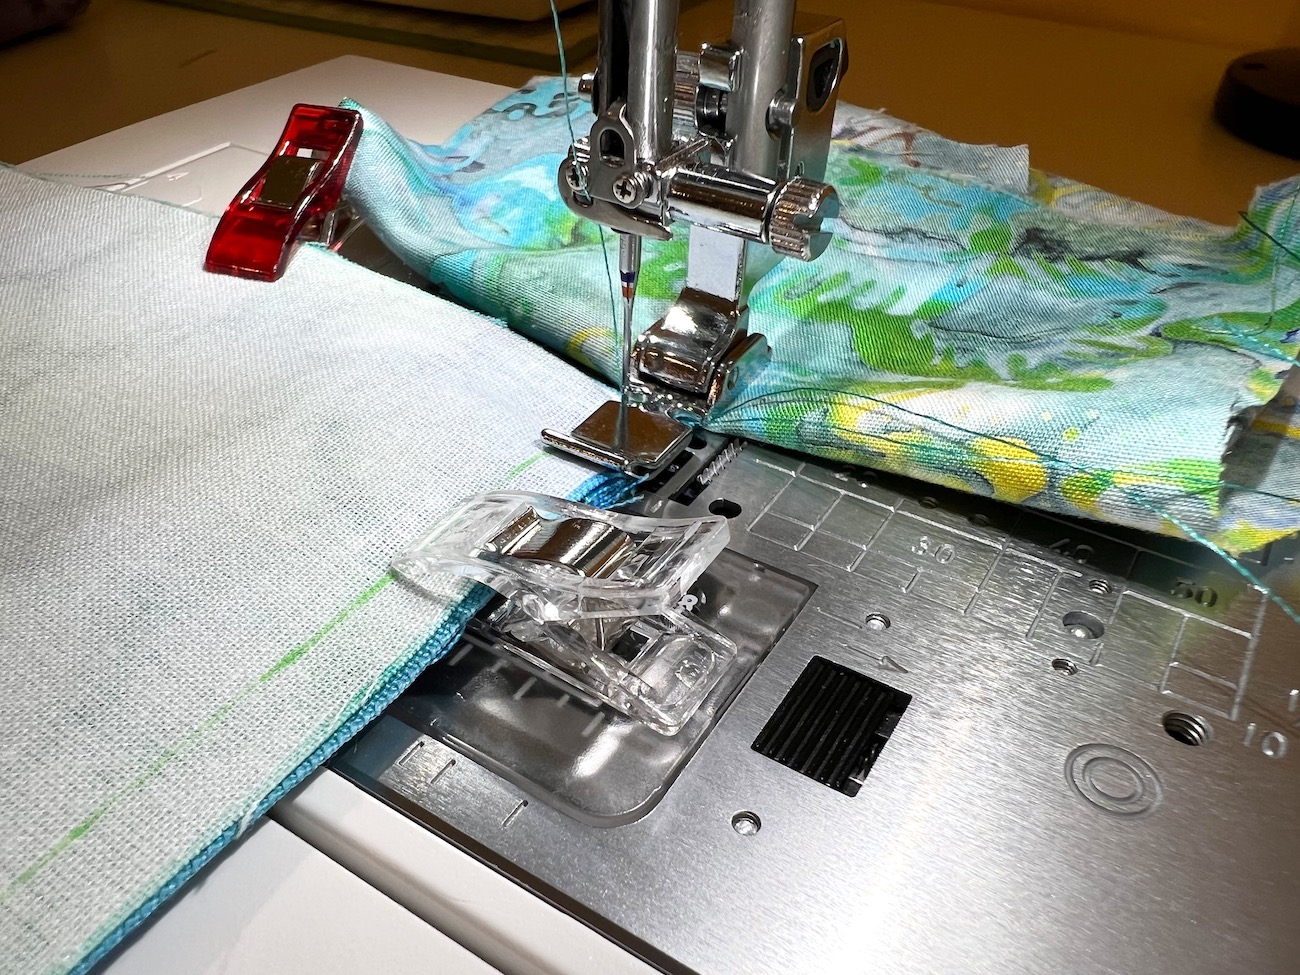
To topstitch along the first zipper seam, take the lining panel and fold it out and away from the exterior panel. The seam that was just sewn, and the exterior panel will be facing down. The zipper and lining panel will be facing up.
With the zipper zipped closed, sew an ⅛” away from the fabric edge with a 3 mm stitch length.
When you near the zipper pull, stop sewing and open the zipper, sliding the zipper pull out of the way.
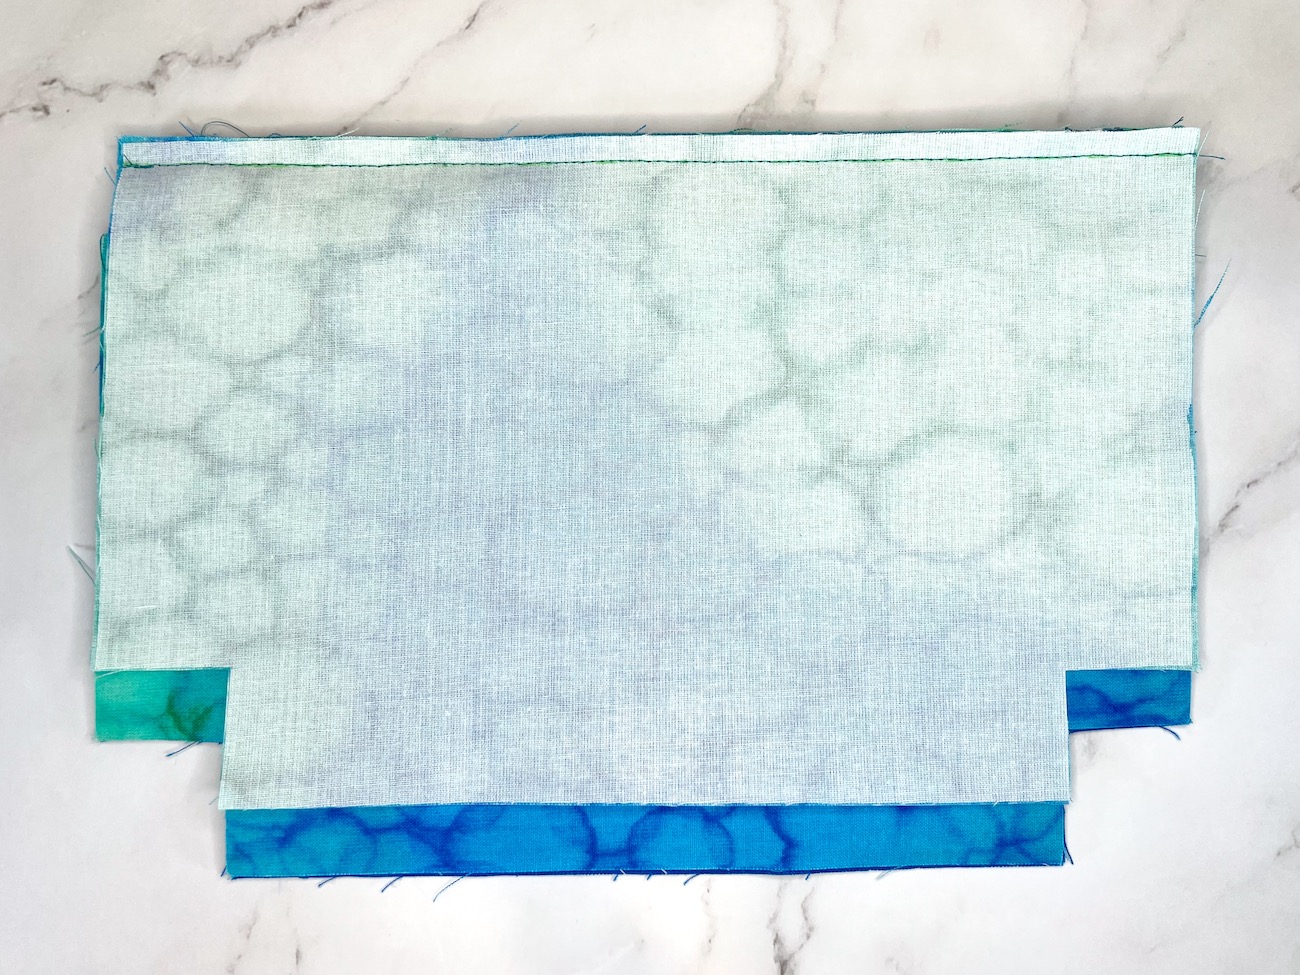
Continue sewing the rest of the topstitching seam, making sure to use the hand wheel and hand crank over the zipper teeth. Use the hump jumper again if there is any difficulty sewing over the zipper teeth. One side of the bag is totally done! With this topstitching seam correctly completed, the stitching is visible from the exterior but not on the lining side.
Attaching Zipper Side 2
Basting the Second Side of the Zipper in Place
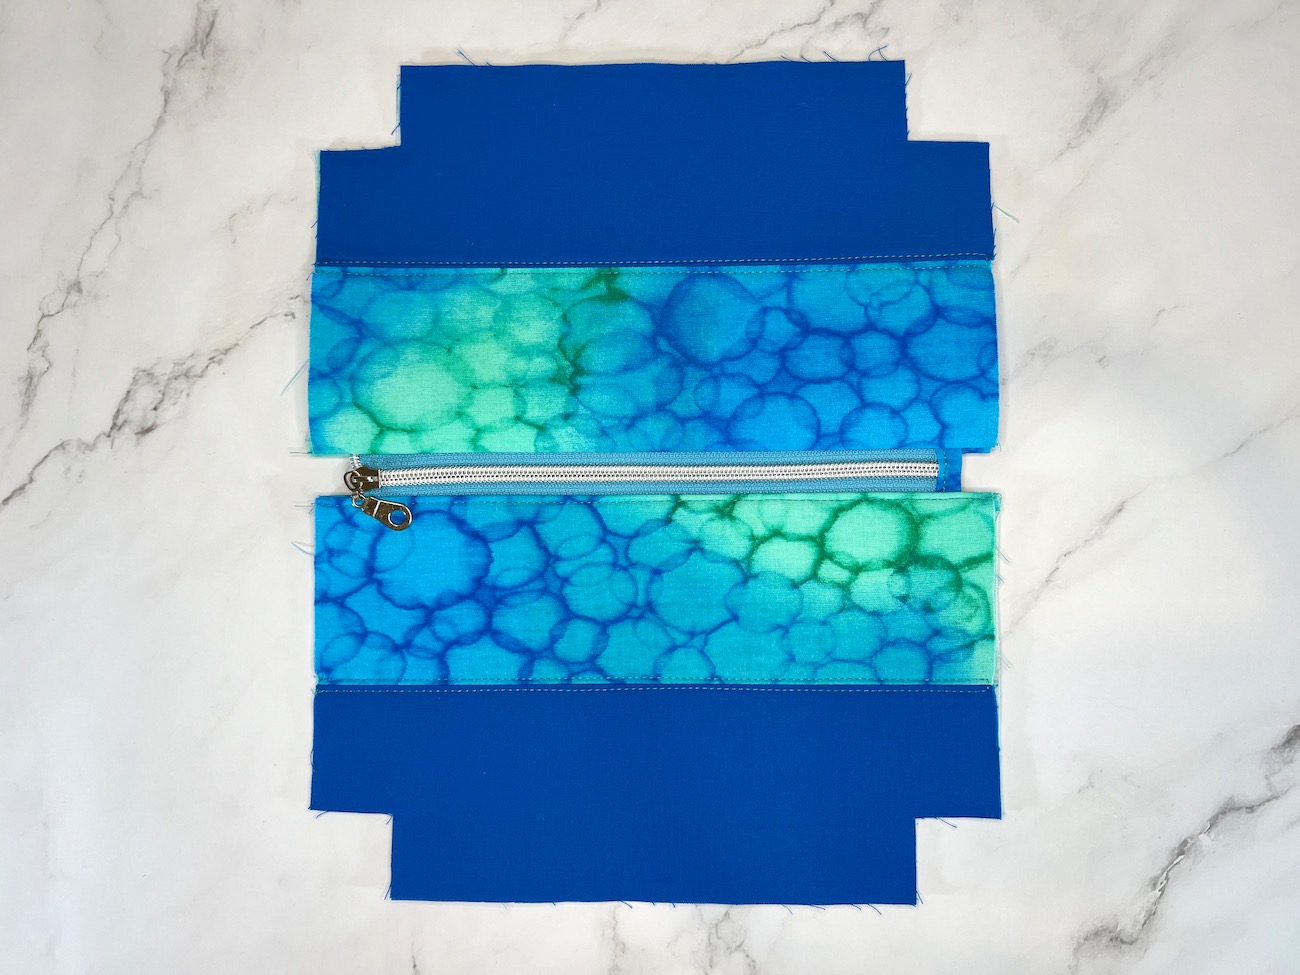
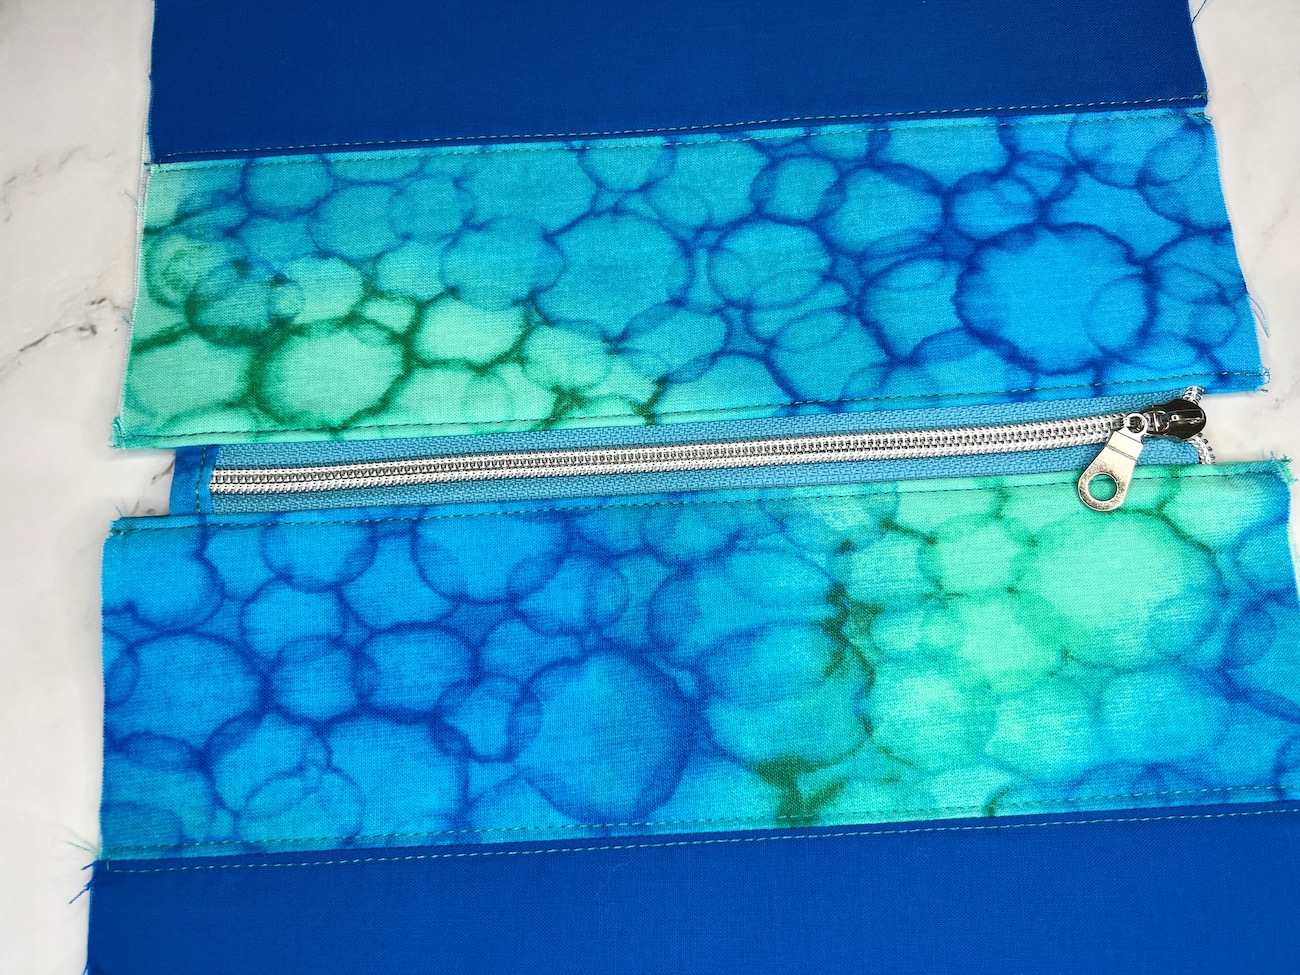
Take the second exterior panel (piece H2) and place it right side facing up. Take the first side of the bag with the attached zipper, and lay that right side facing down on the second exterior panel.
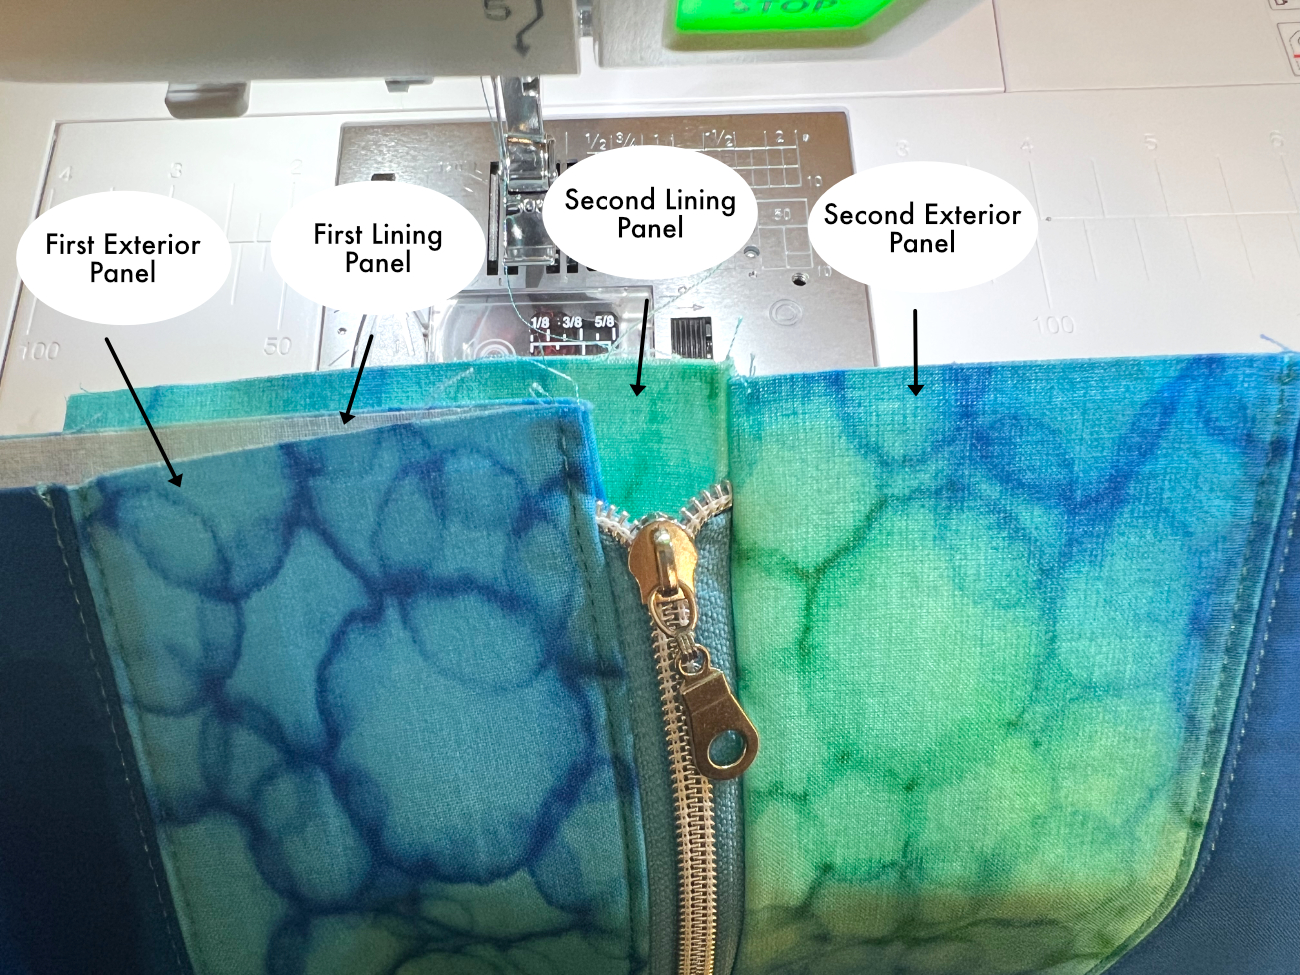
Line up the zipper with the inner marks on the second exterior panel (H2), and align the sides of all three panels (first exterior, lining, and second exterior). With the zipper closed, clip or pin the zipper in place.
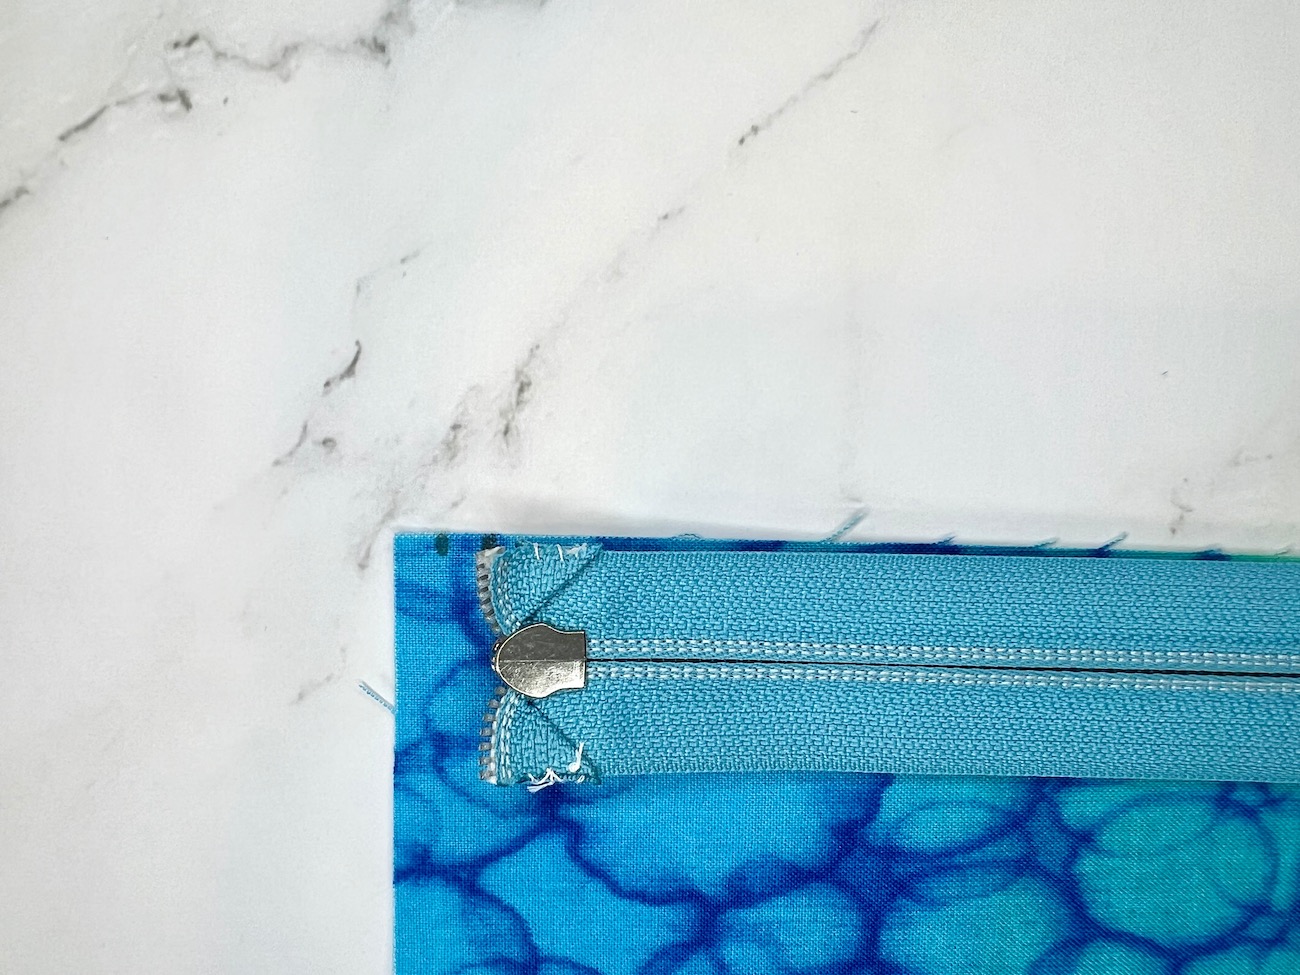
Baste the zipper tape in place with an ⅛” seam allowance, and a 3 mm stitch length. Start far enough past the bulk of the zipper tab to avoid needing the hump jumper for this basting seam.
When you near the zipper pull, stop sewing, raise the presser foot, unzip the zipper, and slide the zipper pull out of the way. Continue sewing the rest of the basting seam, making sure to use the hand wheel and hand crank over the zipper teeth, and use the hump jumper if needed.
Attaching the Second Lining Panel
Mark a line ¼” below the top straight edge (the edge opposite of the edge that has the square cutouts) on the wrong side of the lining panel (piece C2). Clip lining panel in place, aligning all the edges.
Because of the bulk of the zipper tab, this seam has the same issue that was caused by the zipper teeth last time. Use the hump jumper underneath the back of the presser foot like before. Alternatively, a scrap piece of fabric folded multiple times and placed underneath the back of the presser can work similarly to the hump jumper.
Sew this seam with a ¼” seam allowance and a 2.4mm stitch length. When you near the zipper pull, stop sewing, raise the presser foot, unzip the zipper, and slide the zipper pull out of the way.
Feel for the zipper teeth underneath the lining panel, and use the hand wheel and hand crank over the zipper teeth (using a hump jumper or folded fabric piece if needed) and finish this seam. Check the line of stitching, and see if it is decently straight. Adjust and fix as needed!
Take the newly attached lining panel and fold it back so that the wrong sides of the lining panel are touching the wrong sides of the exterior panel.
With a hot steamy iron, press the lining panel and the exterior panel along the zipper really flat, ensuring that the panels are folded smoothly away from the zipper tape.
Topstitching Zipper Side 2
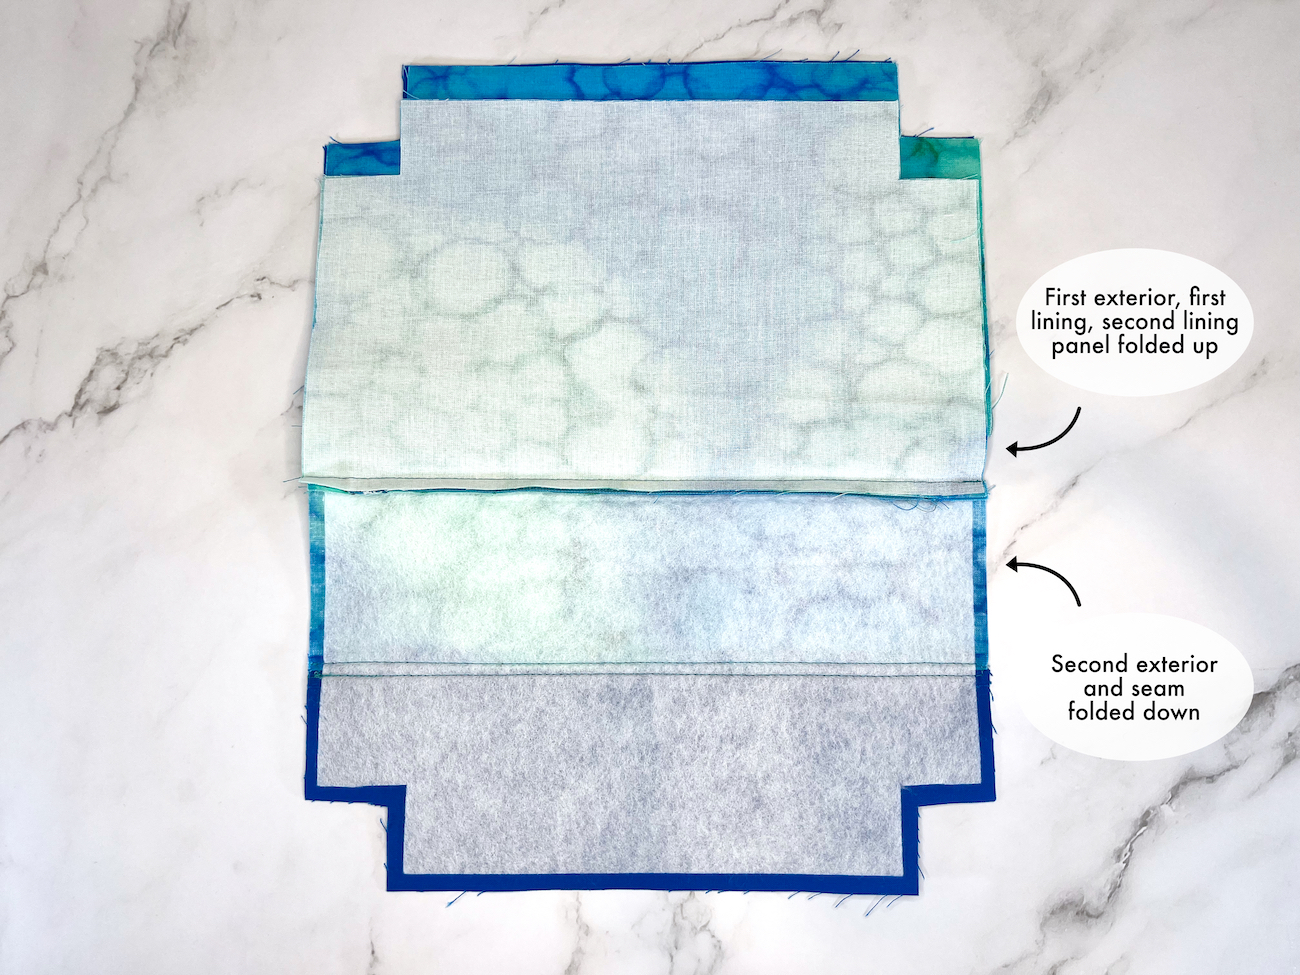
To topstitch along the second zipper seam, take the second lining panel and fold it out and away from the second exterior panel. The seam that was just sewn, and the second exterior panel will be facing down, and the first exterior, first lining, and second lining will be facing up.
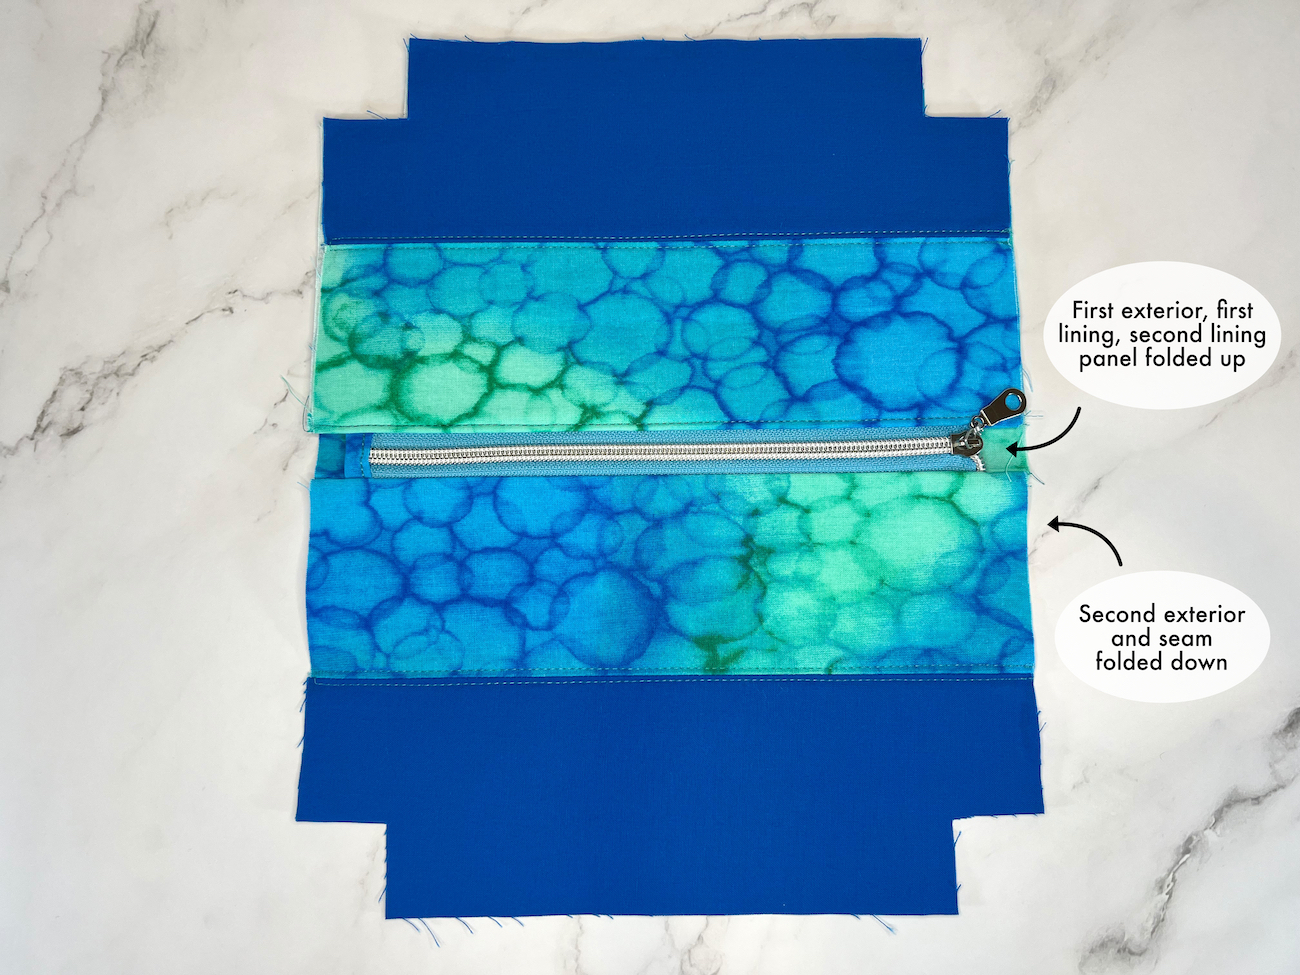
With the zipper zipped open, sew an ⅛” away from the fabric edge with a 3 mm stitch length. Use the hump jumper again to get the presser foot over the zipper teeth. Use the hand wheel to slowly hand-crank the needle over the zipper teeth. Sew until you near the zipper pull.
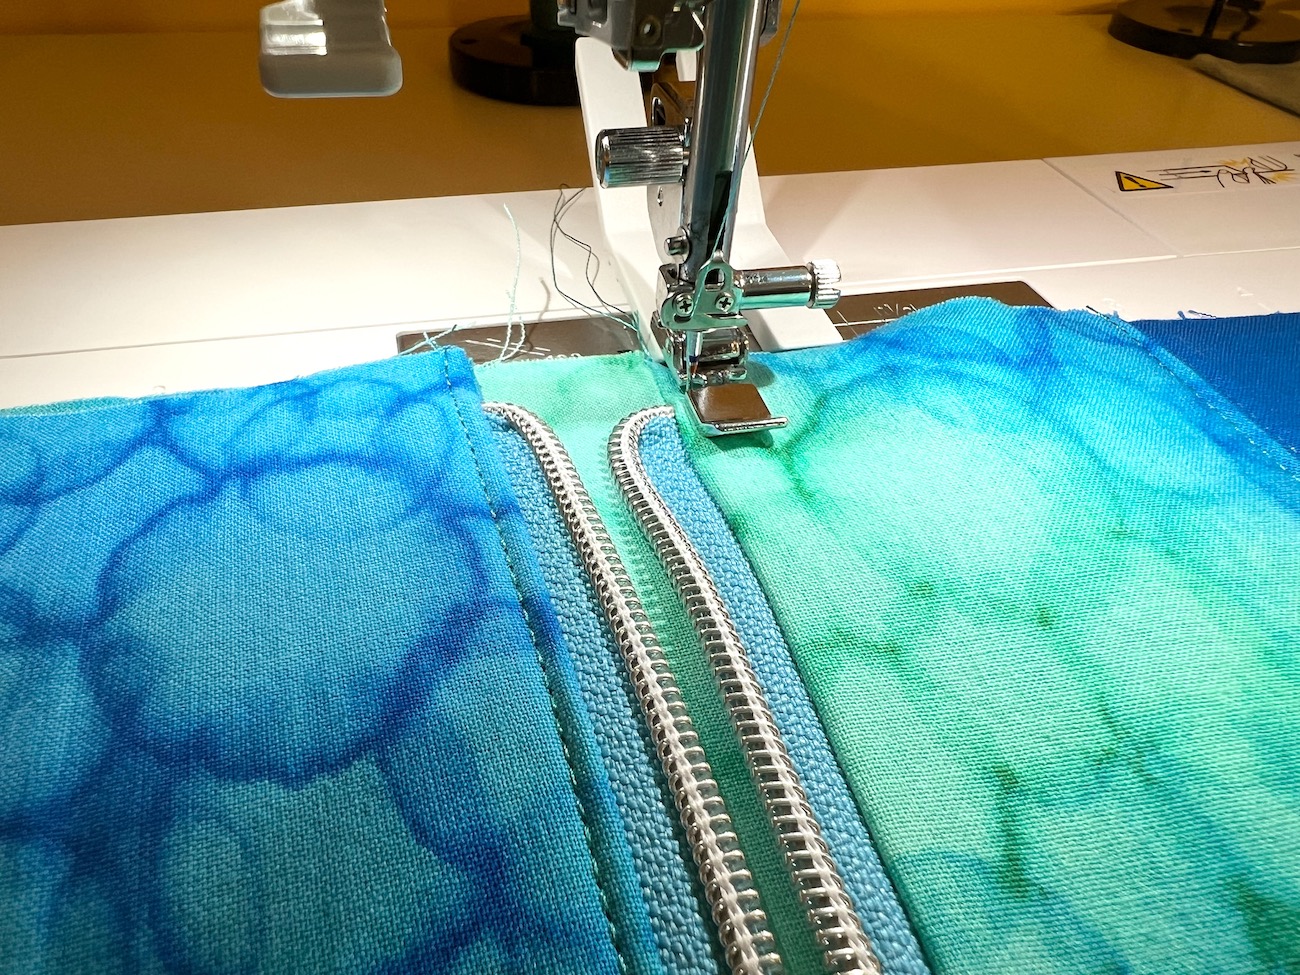
When you near the zipper pull, stop sewing and zip up the zipper, sliding the zipper pull out of the way. Continue sewing the rest of the topstitching seam.
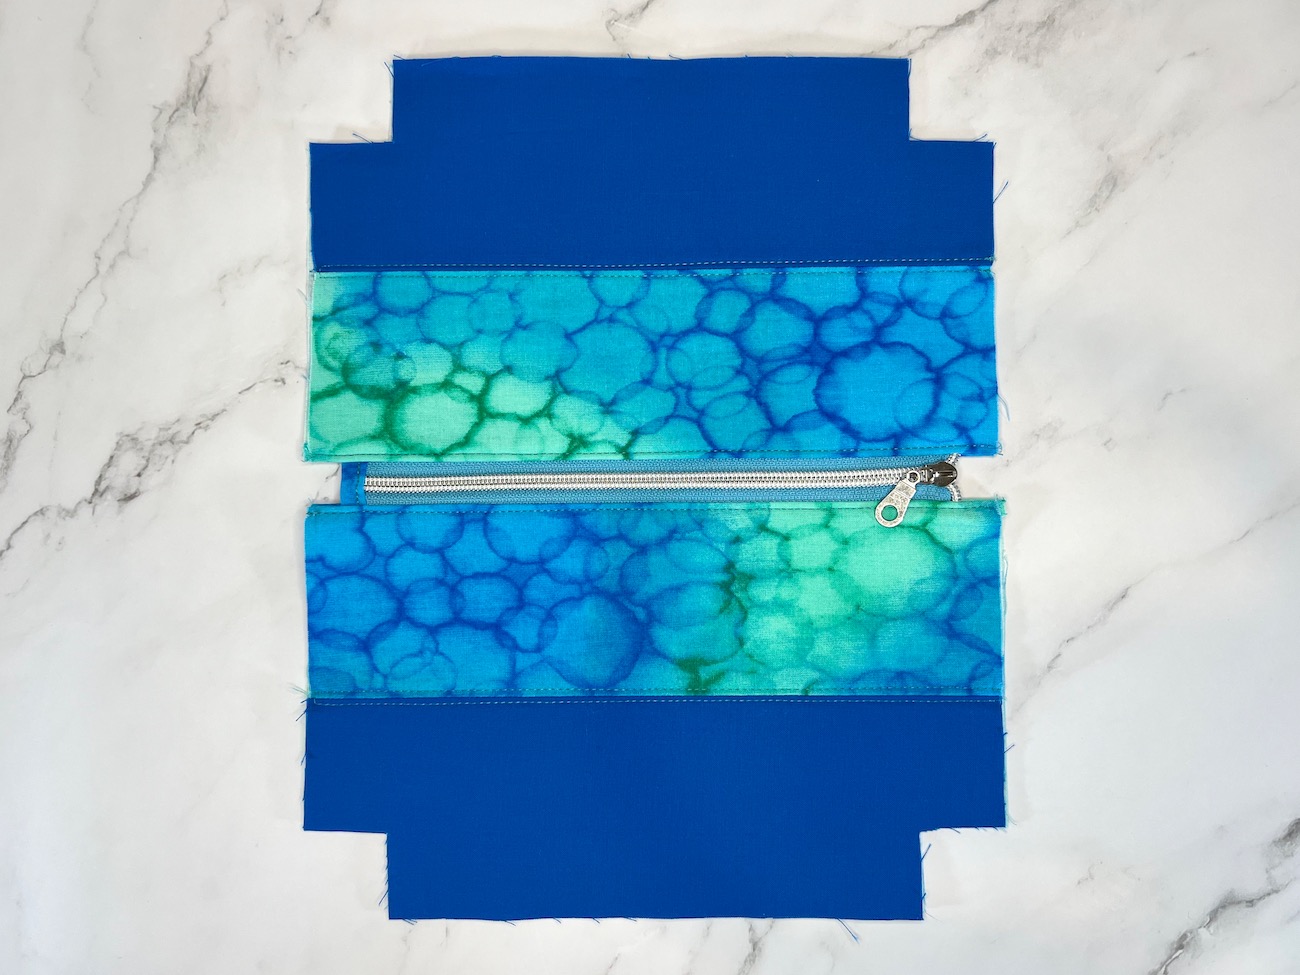
With that last topstitching seam, the zipper is completely installed and topstitched! As you practice and experiment more, you will learn how your sewing machine handles sewing through zippers (whether you need to use the hand wheel or not), and how well it does with bulk (whether you need a hump jumper sometimes, or not at all). I hope that this encourages you to give zippers a try if you haven’t already, or gives you some new tips or tricks to try out! In the last part of this zipper bag tutorial series, we will sew together the remaining side seams and box the corners and then you will be the proud new owner of a zipper pouch!!