Zipper Pouch Tutorial and Free Pattern Part 2
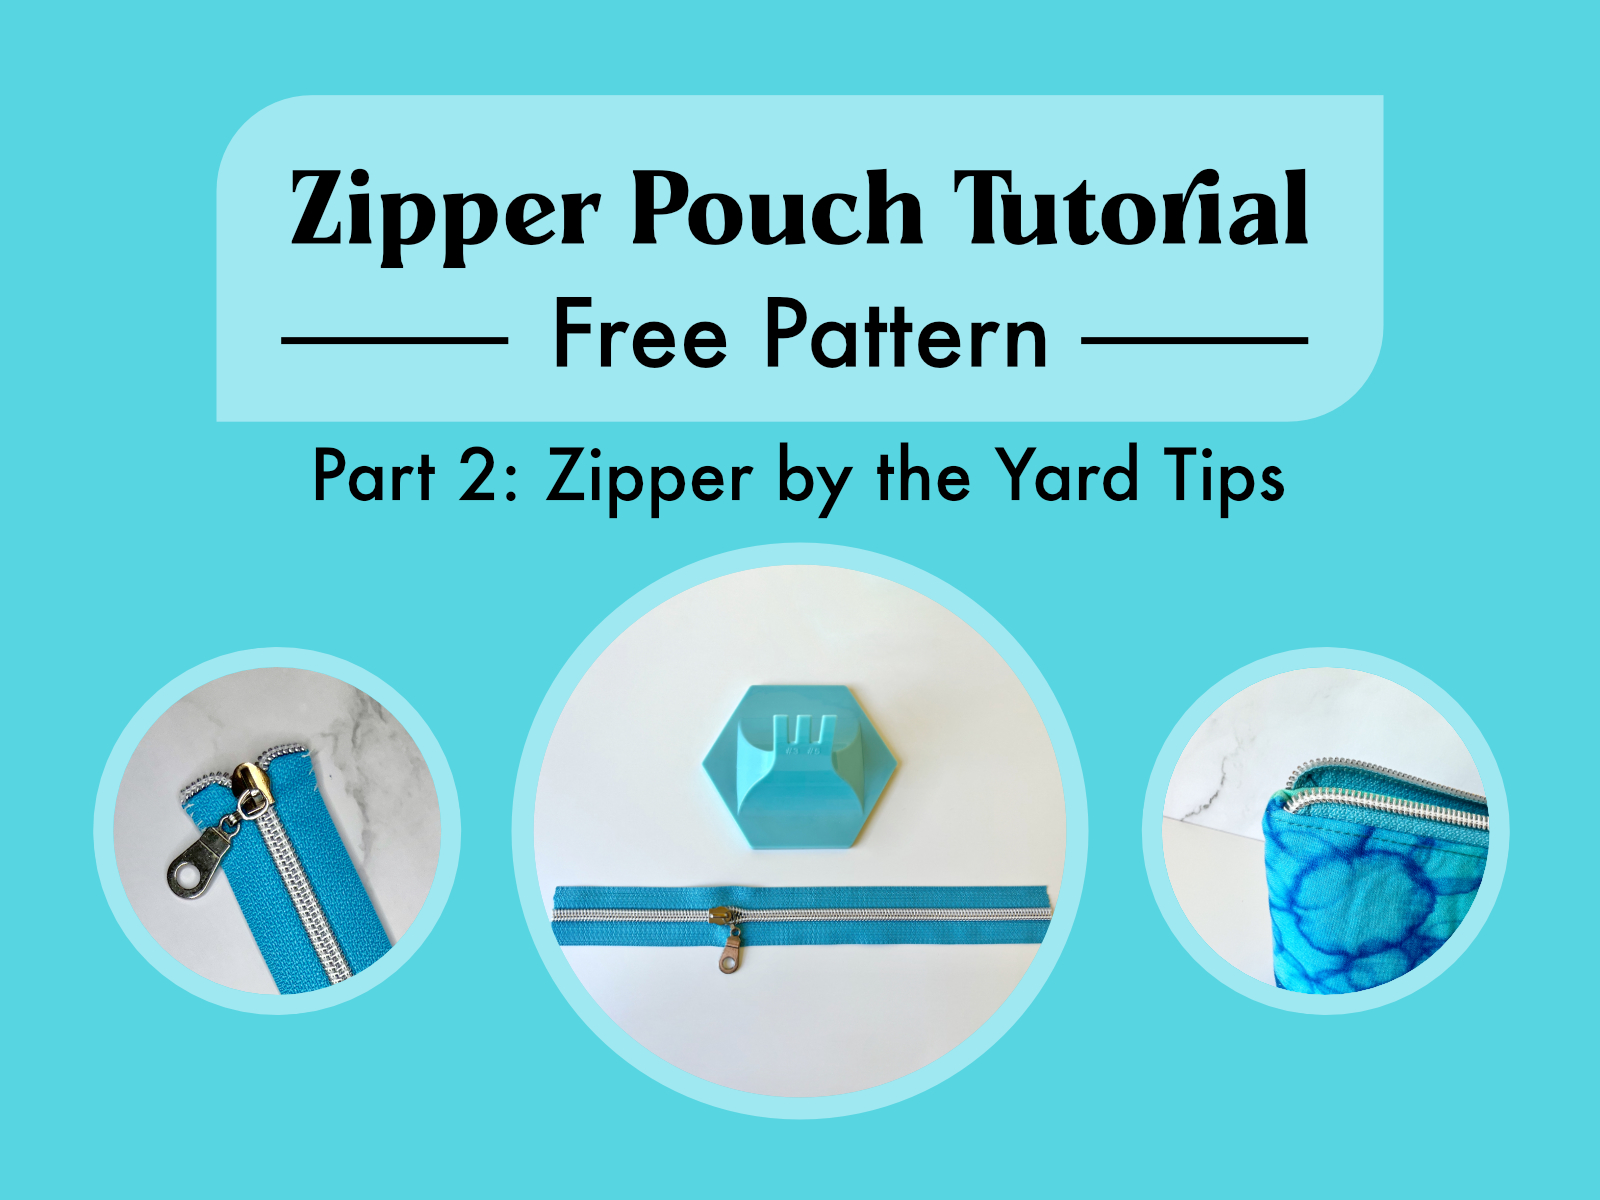
Today’s post is part 2 of my zipper pouch tutorial and free pattern series! Part 1 covered cutting and interfacing (read part 1 here!). Part 2 of this zipper pouch tutorial is all about prepping zippers by the yard. When I first started working with zippers by the yard, I was overwhelmed with how many different ways there were to finish the edges of the zipper tape. After trying a lot of different things, following these steps result in a finished zipper that I really like. Also, as a bonus, at the end of this post are my favorite stores to find zippers!
The supply list, cutting instructions (and labeling instructions) can be found in part 1.
Here is a handy table of contents if you want to skip to a specific part!
Attaching the Zipper Pull
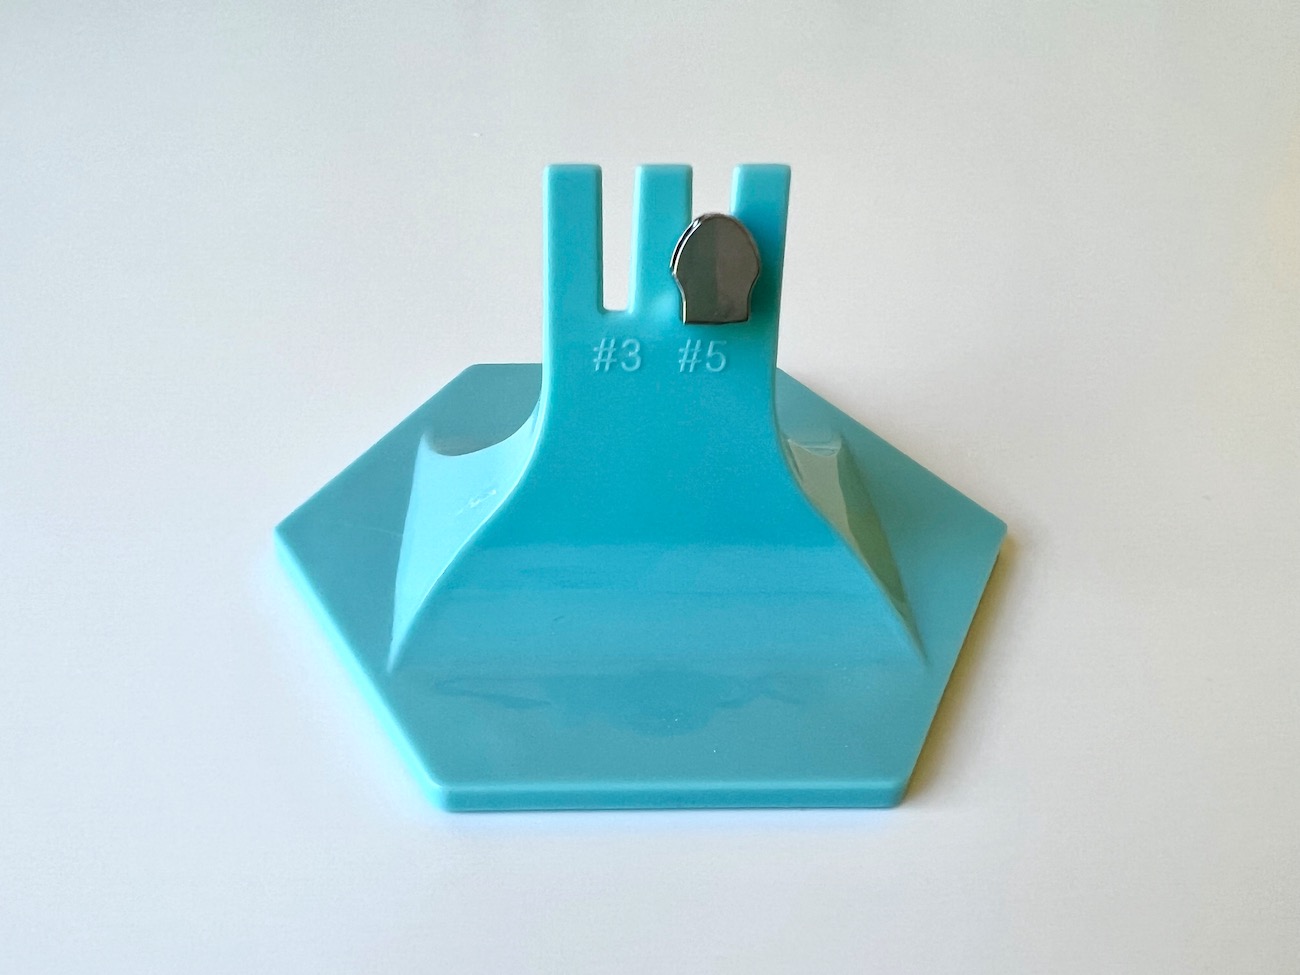
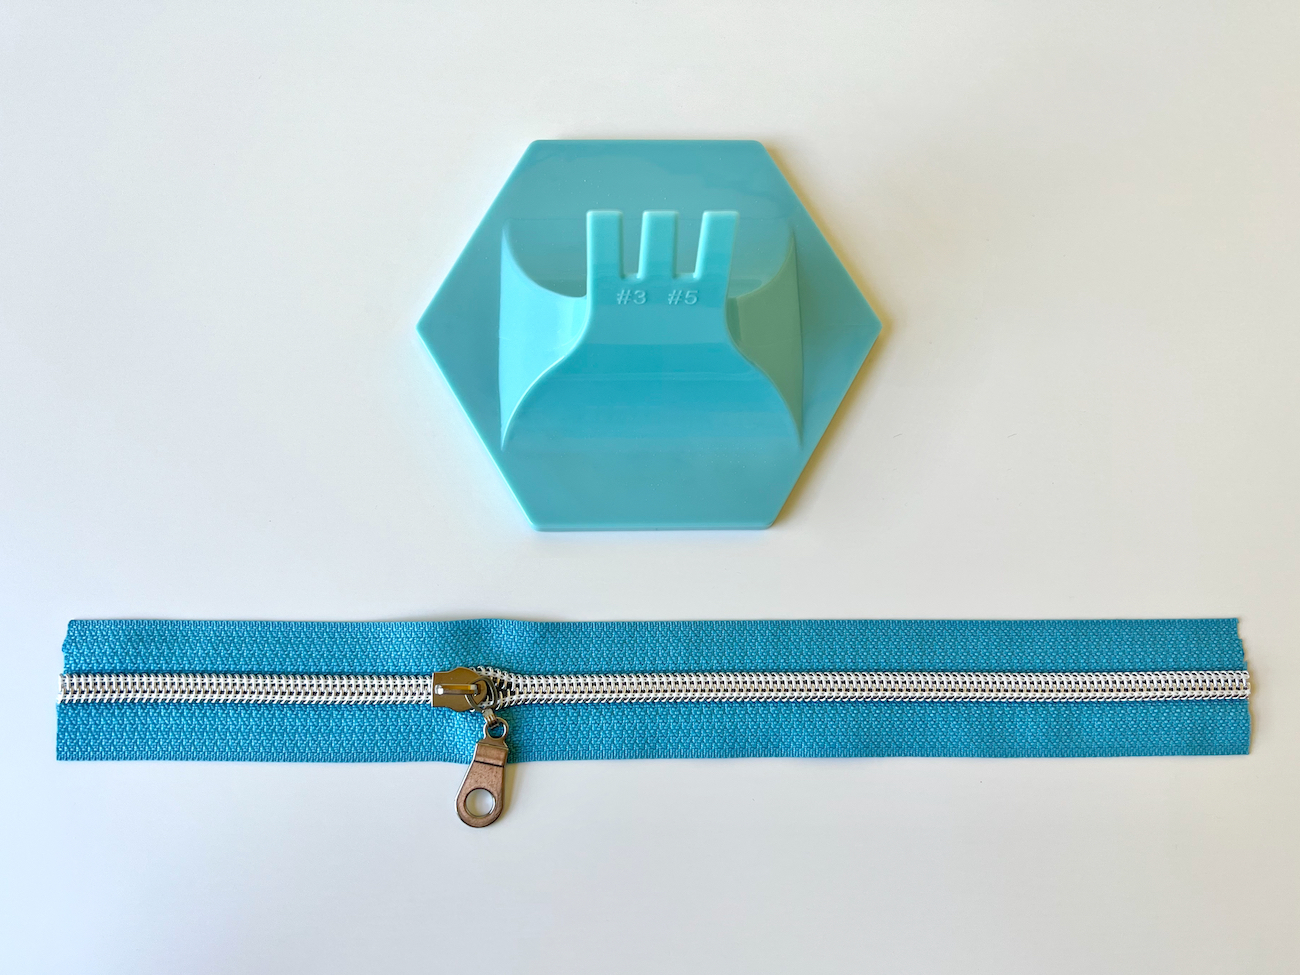
Attaching a zipper pull can be somewhat tricky when you have never worked with zippers by the yard before. But just like with everything, practice makes progress! There are a lot of helpful videos out there that show this in more detail, but this is my favorite method for attaching zipper pulls. In this tutorial, I am using the zipper jig by The Gypsy Quilter. However, my new favorite is this 3D-printed jig!
Take the 10 ½” or longer zipper tape and the zipper pull and place the zipper pull into the zipper jig. Zipper pulls have a curved side and a flat side. For this jig (and the 3D-printed jig I linked above), the zipper pull will lay in the zipper jig with the wrong side facing out and the curved side of the zipper pull facing up.
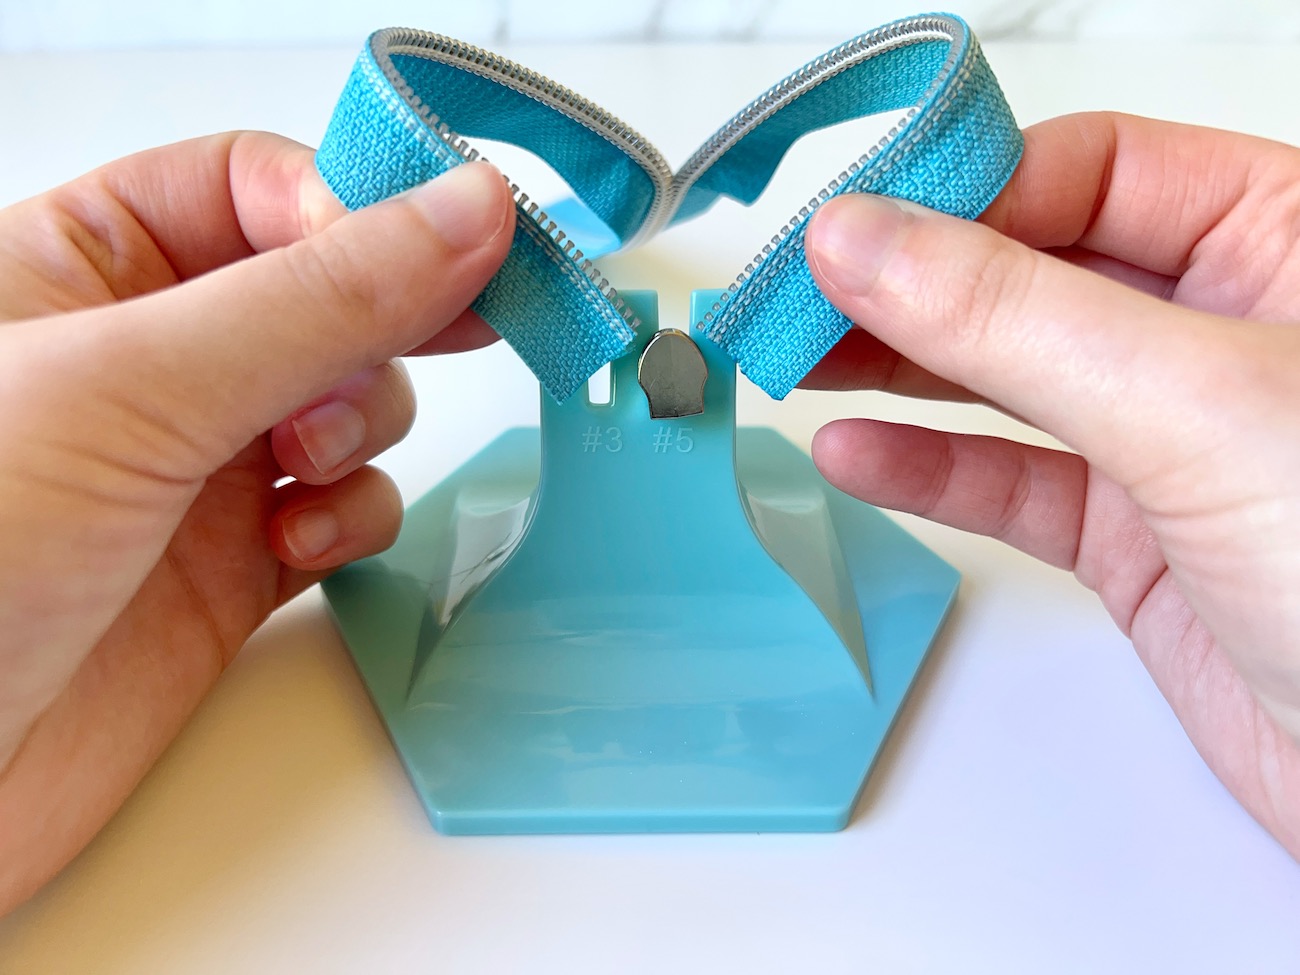
Take the zipper tape, and unzip several inches of the zipper. With the wrong side of the zipper tape facing you, angle the tape like in the picture below, and slowly push the zipper tape through the zipper pull trying to keep the bottom edges of the zipper tape aligned.
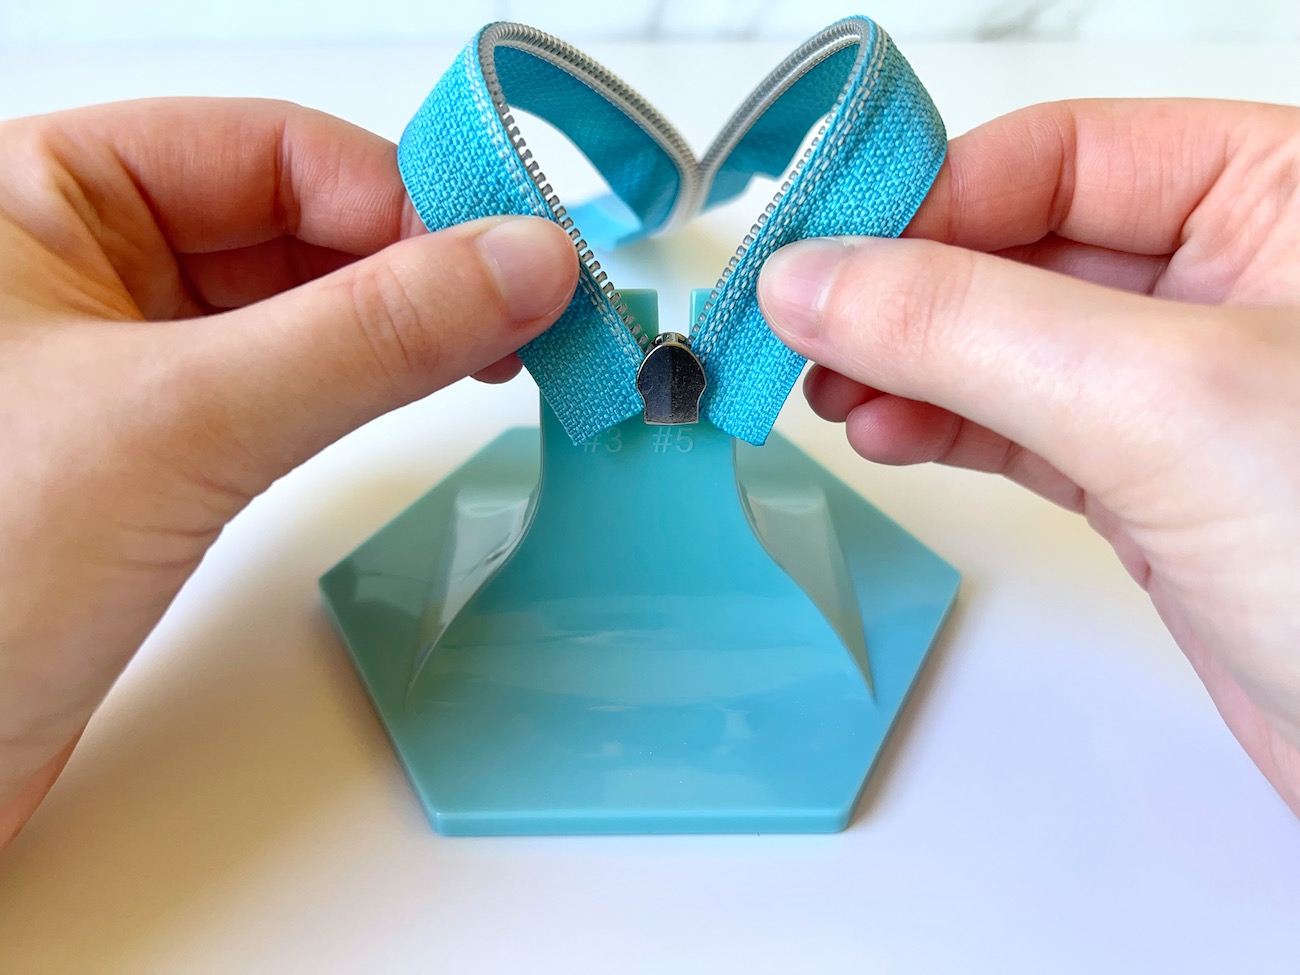
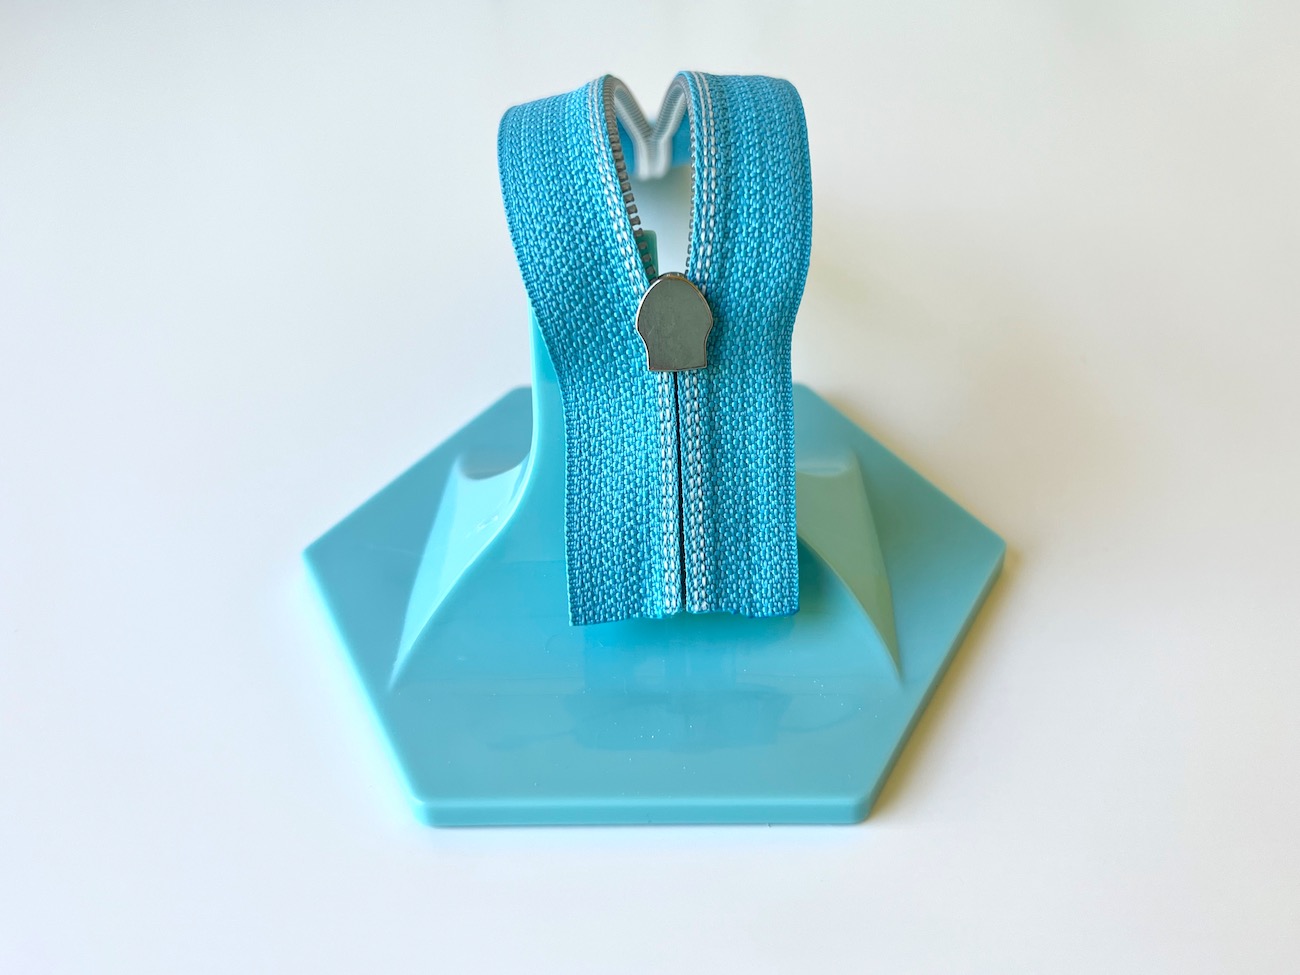
The goal is to have the end of the zipper tape as aligned as it was before the tape was opened. You can pull off the zipper pull and try again as many times as needed. The zipper tape is cut a little long, however, so if it’s slightly misaligned there is enough to trim down later. Once the pull is properly installed, give yourself a nice pat on the back!
Curving the Zipper Ends
With the zipper pull attached to the zipper, locate which edge of the zipper tape the curved end of the zipper pull is facing. (The zipper tape edge that the curved side of the zipper pull is facing is the side the zipper will open from).
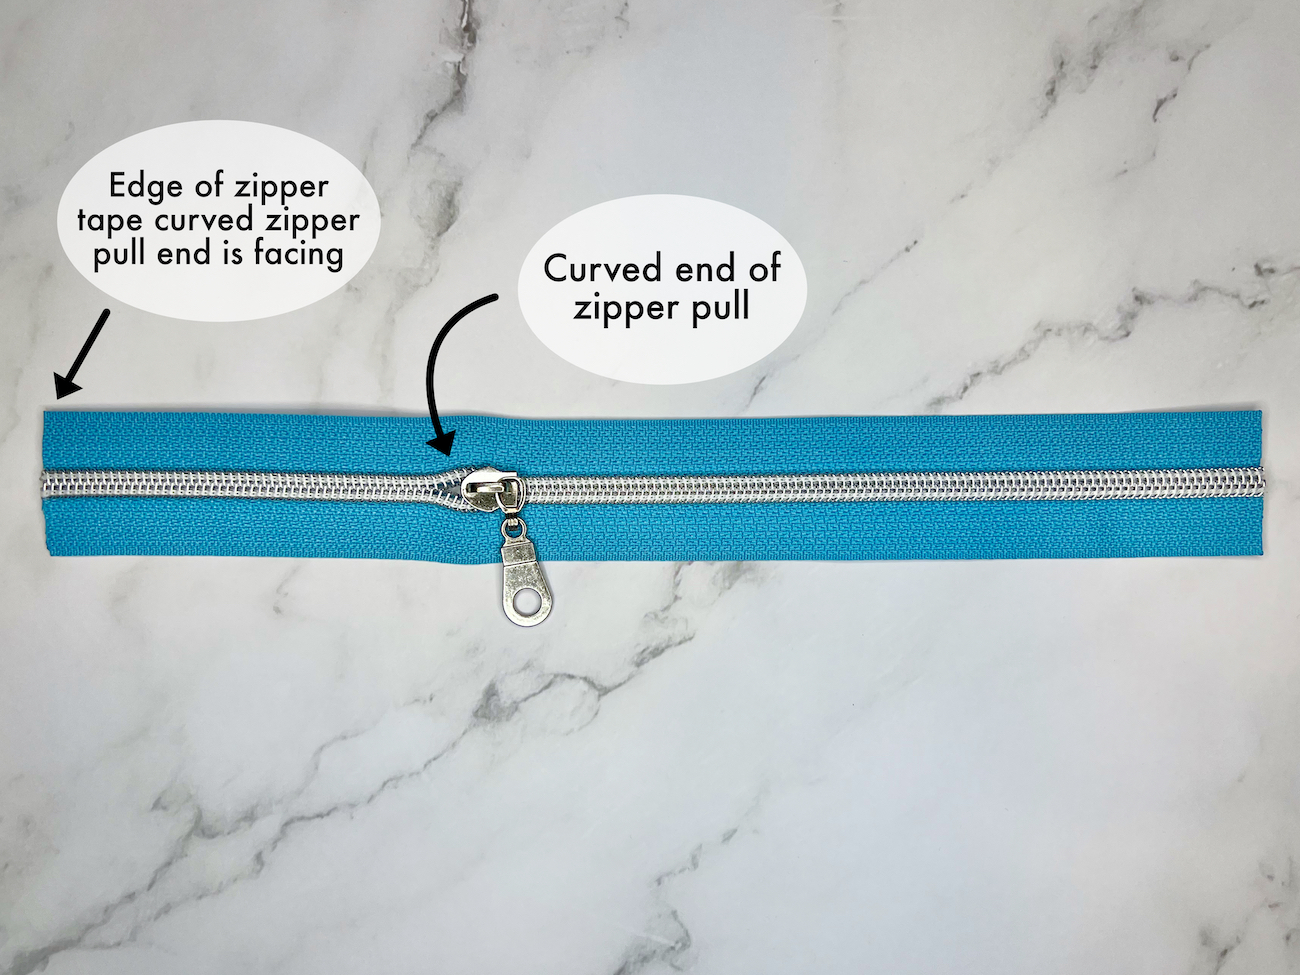
From the edge of the zipper tape that the curved end of the zipper pull is facing, make two marks ½” in from the cut edge of the zipper tape.
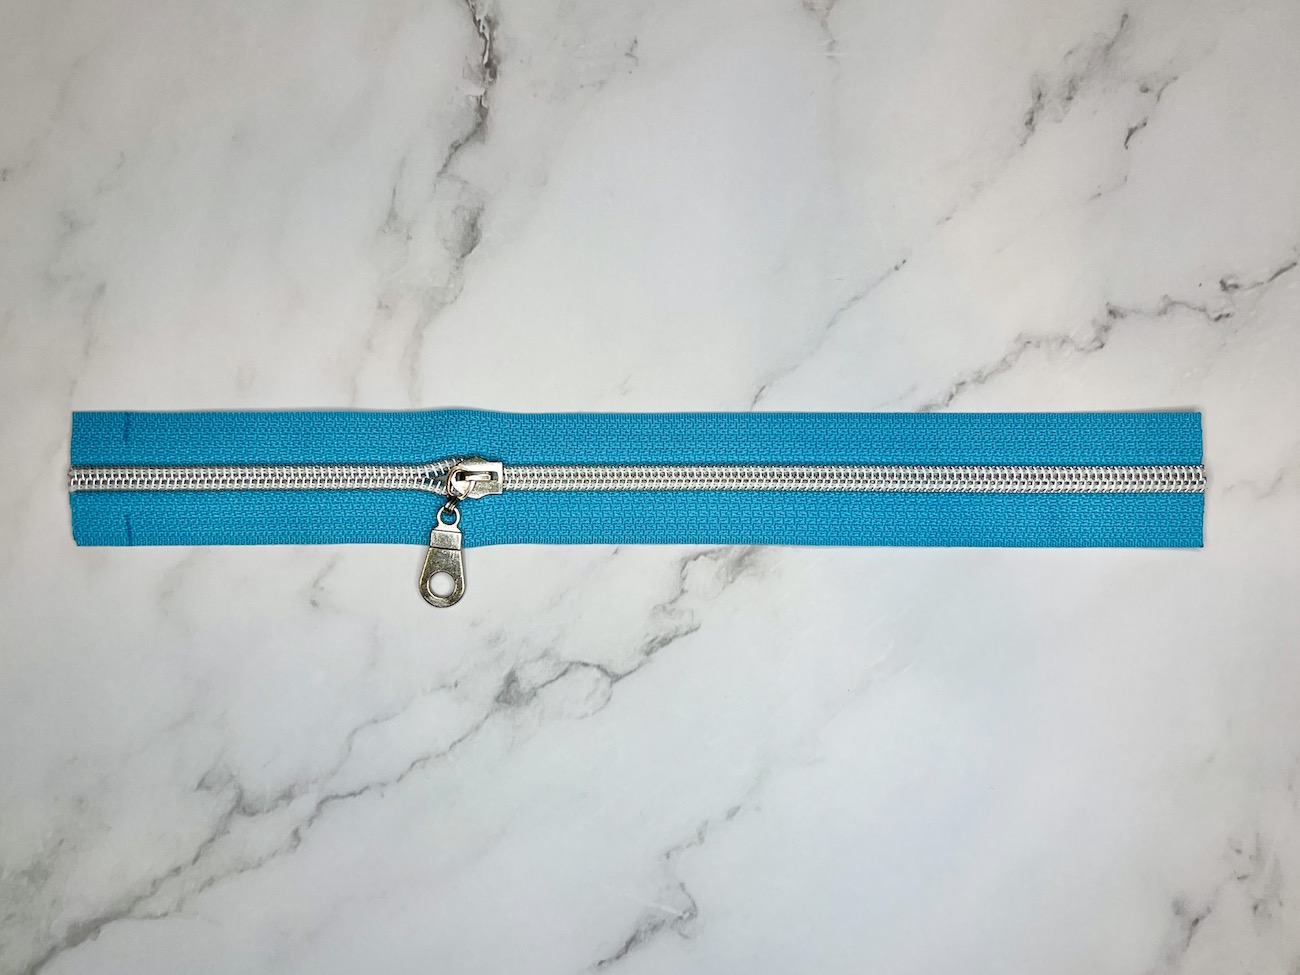
Unzip the zipper tape about 1 ½” from the cut side that has the ½” markings.
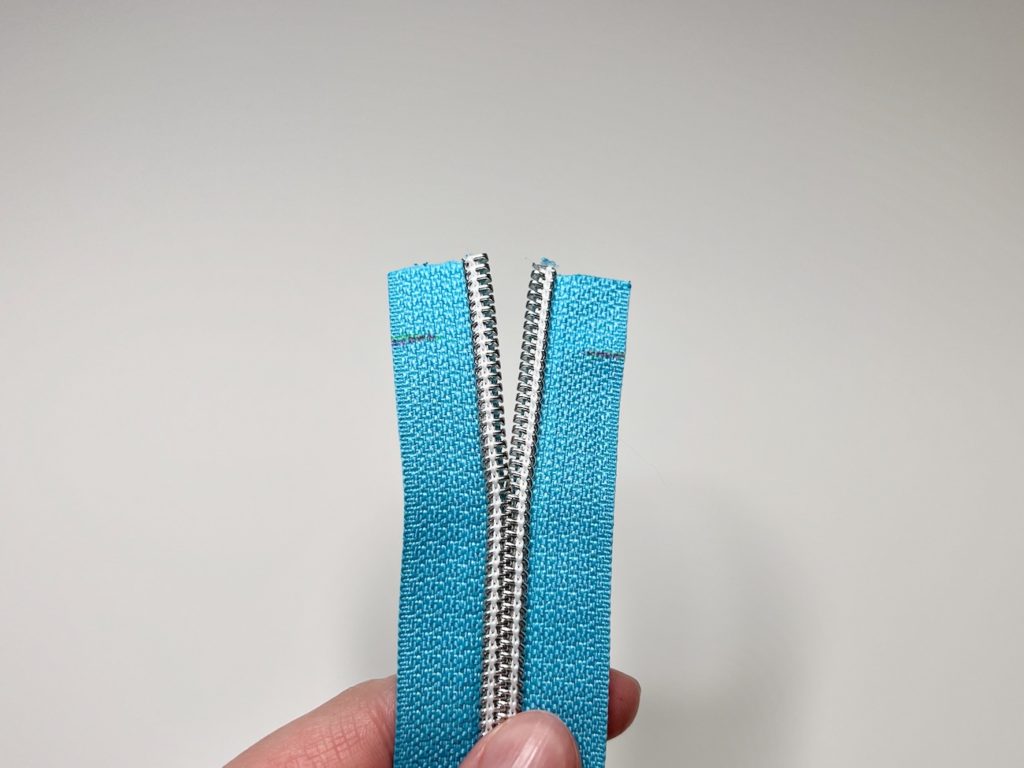
Pinch the zipper tape at the ½” marking, and fold the cut edge of the zipper tape so that the cut edge touches the finished side of the zipper tape and the marked line folds up to the zipper teeth.
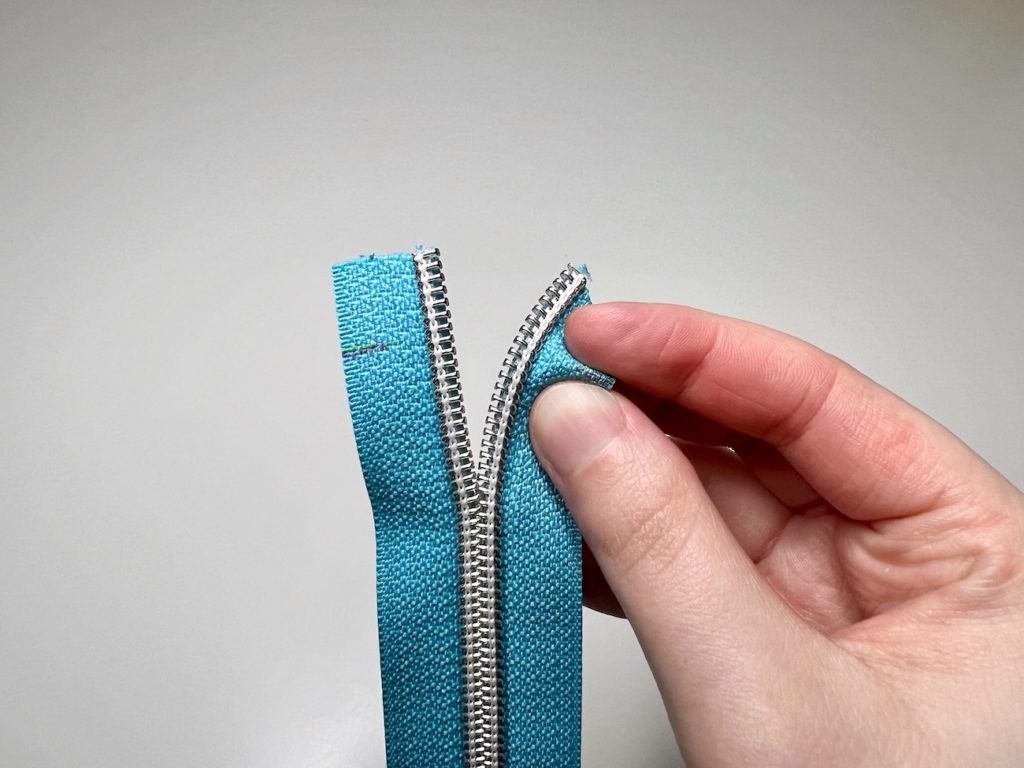
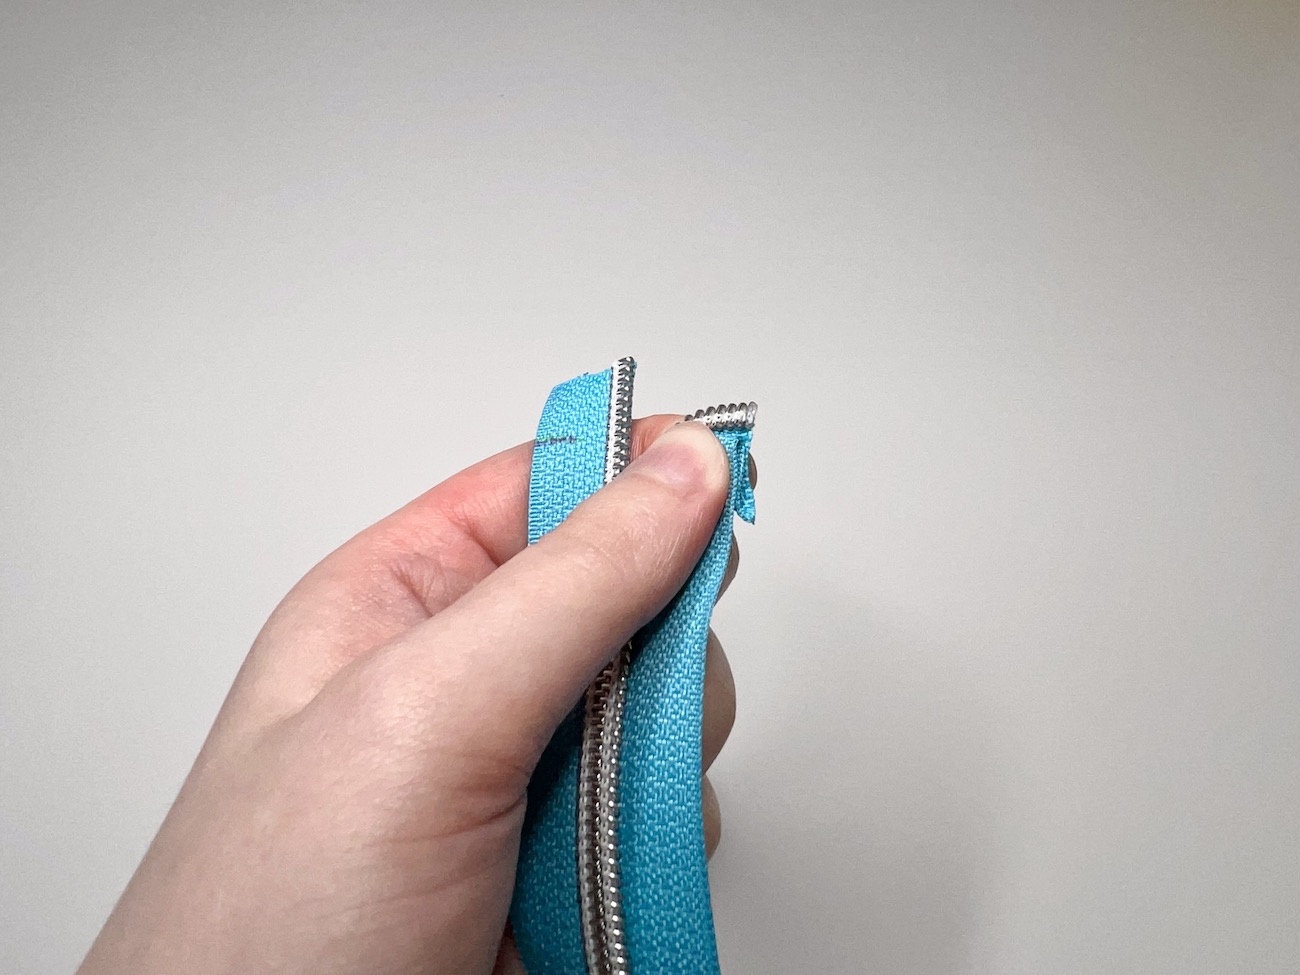
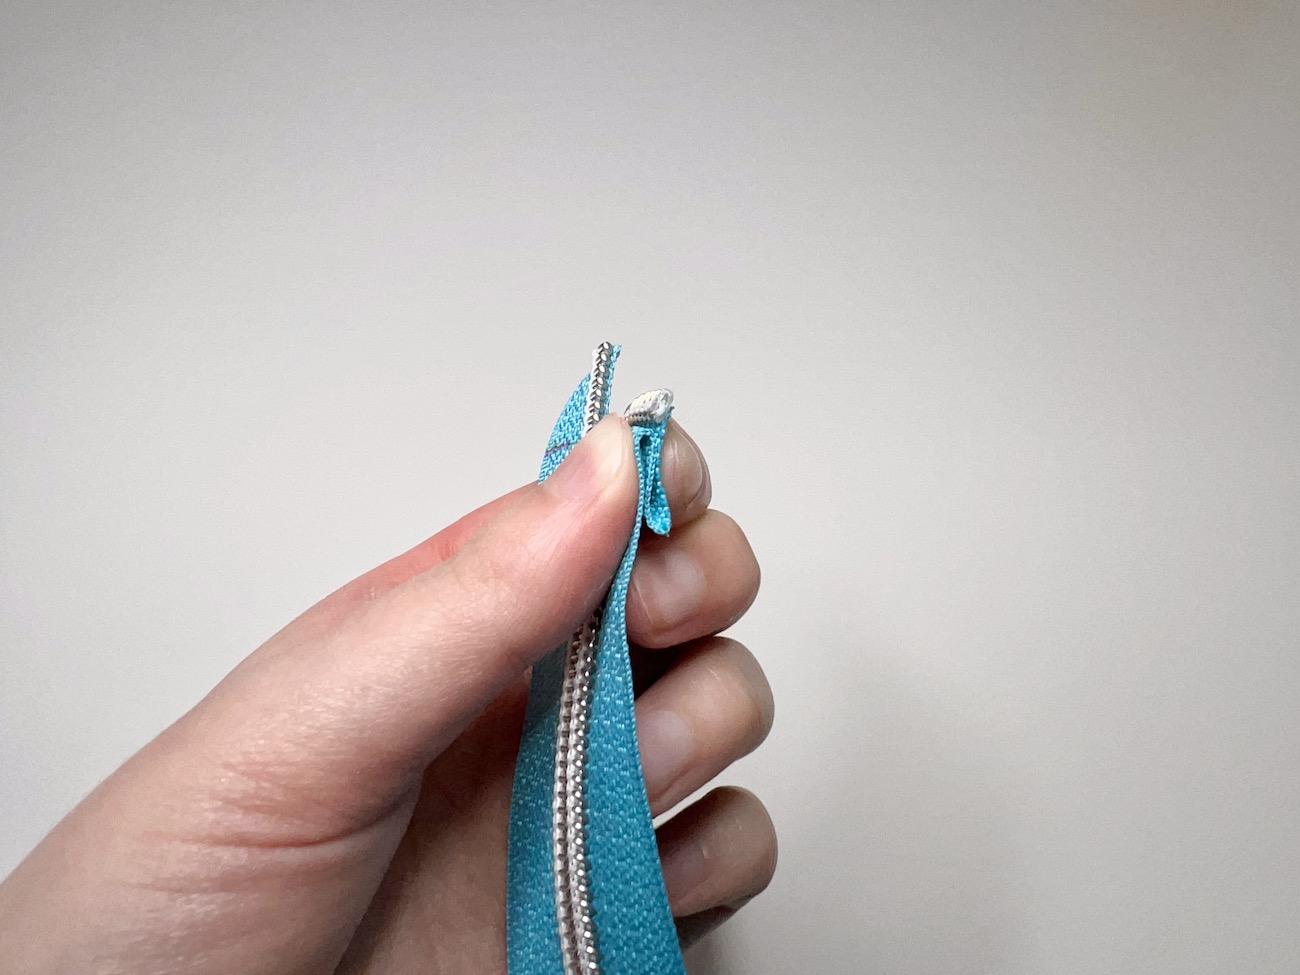
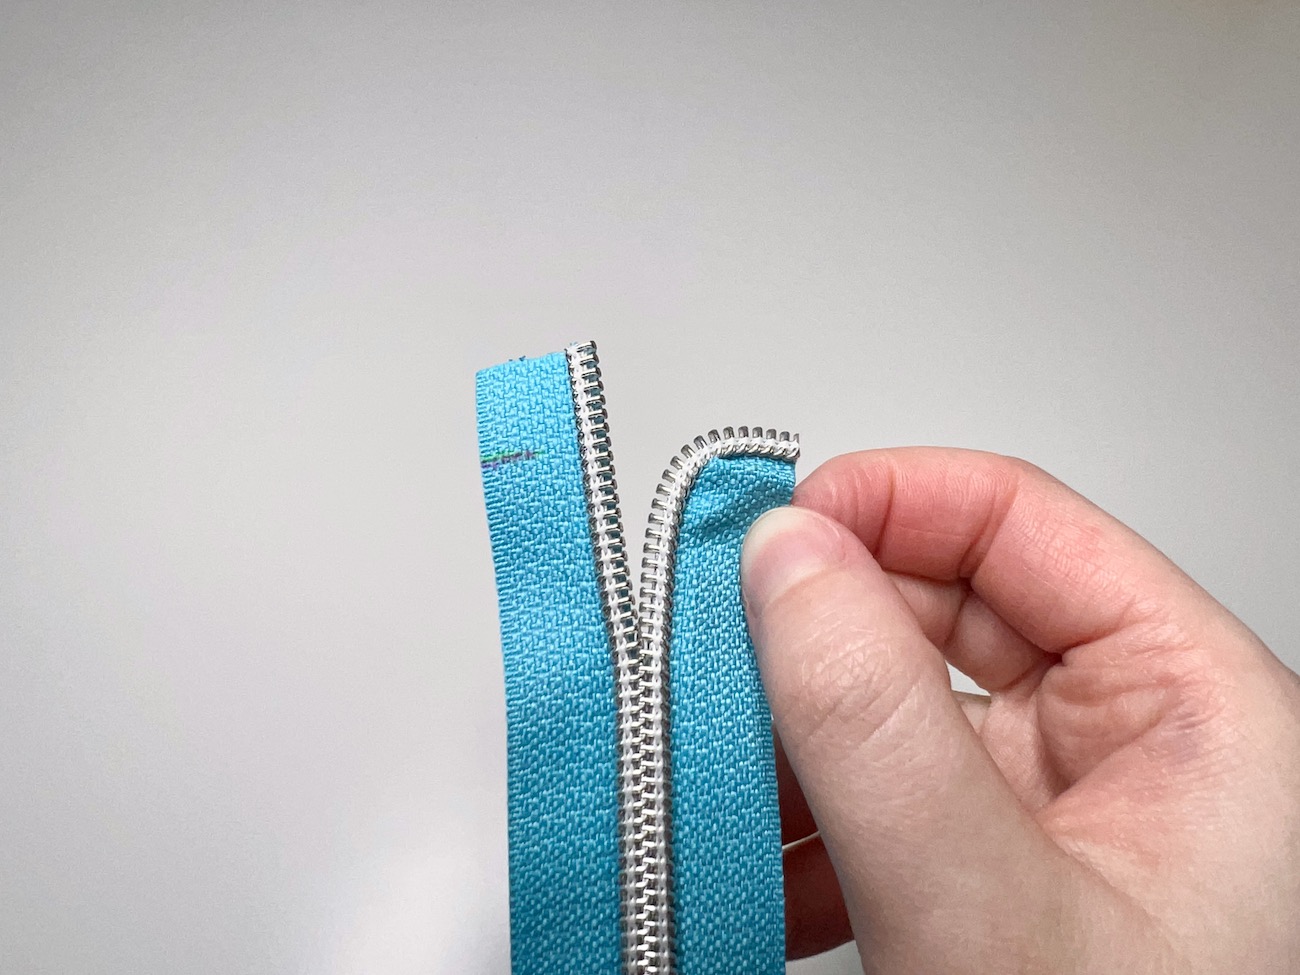
Take a hand-sewing needle and thread, and sew a few whip stitches ⅛” away from the edge to hold the right angle fold/pleat just created in place. These basting stitches will not be seen, so they can be any color of thread.
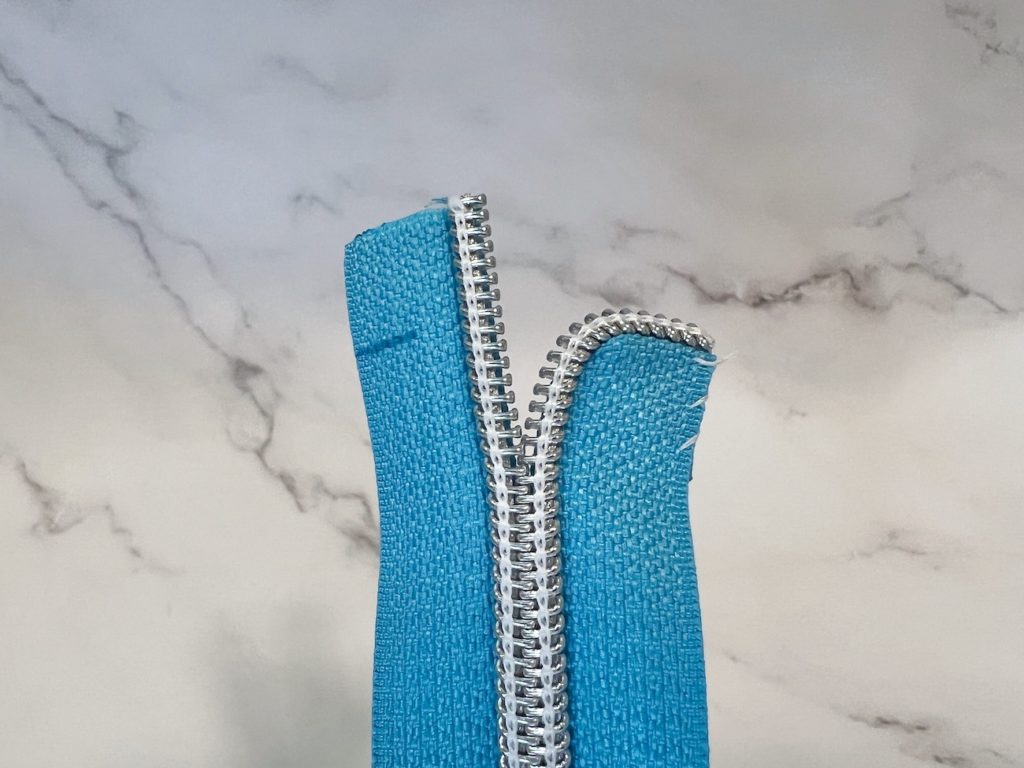
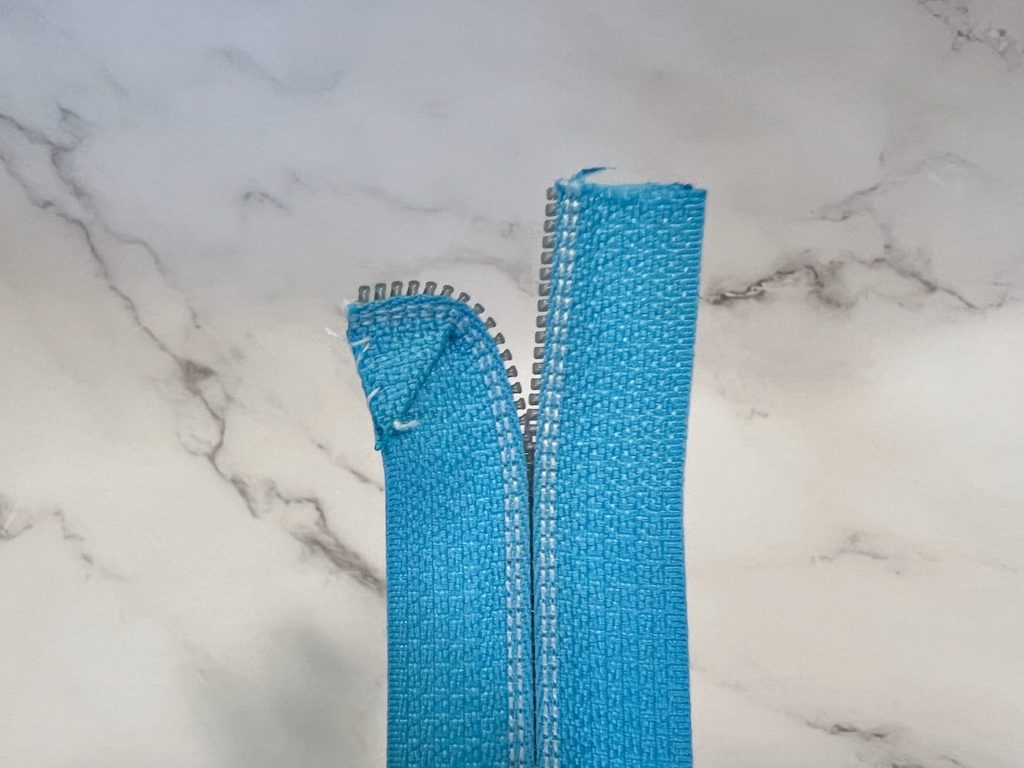
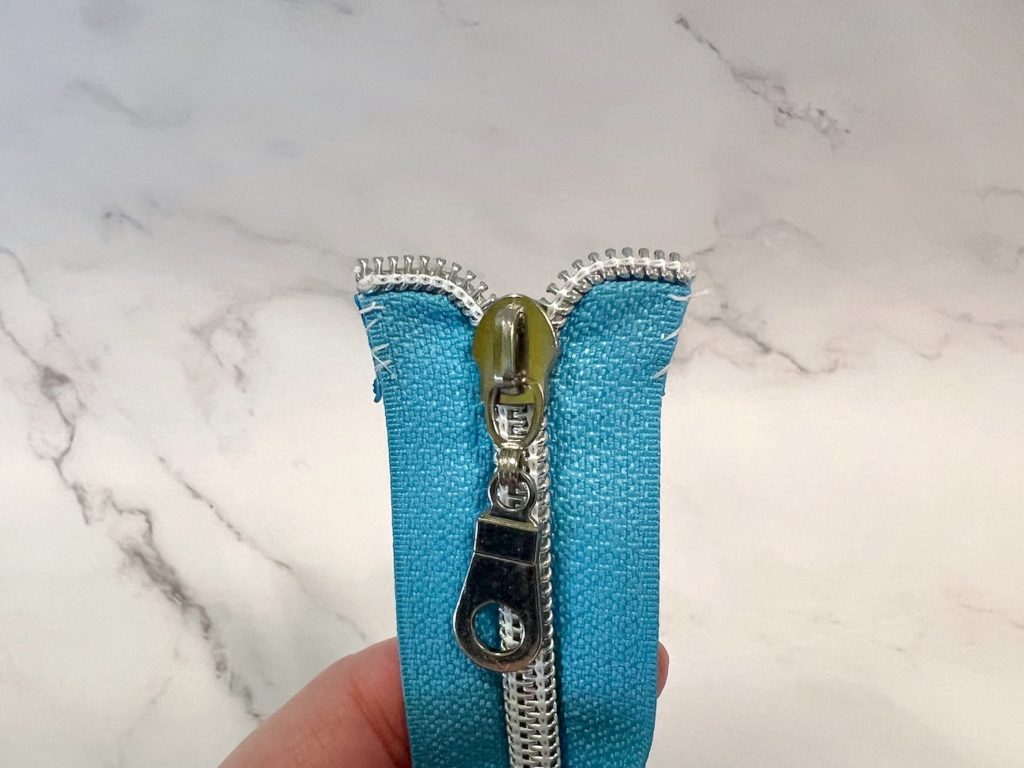
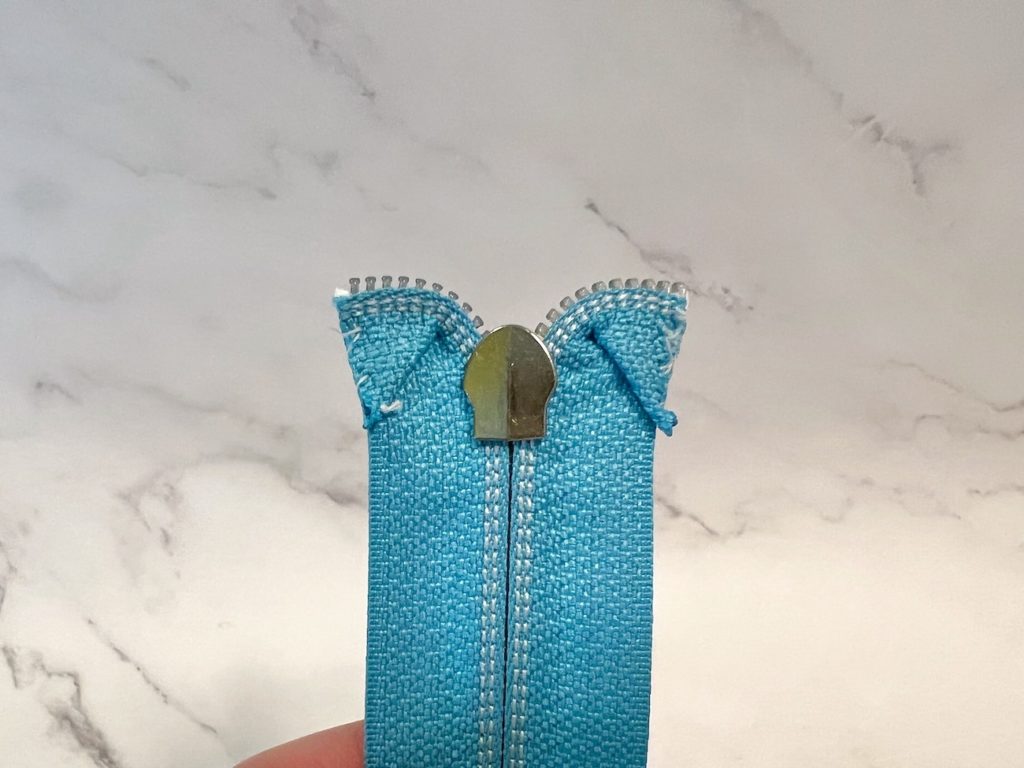
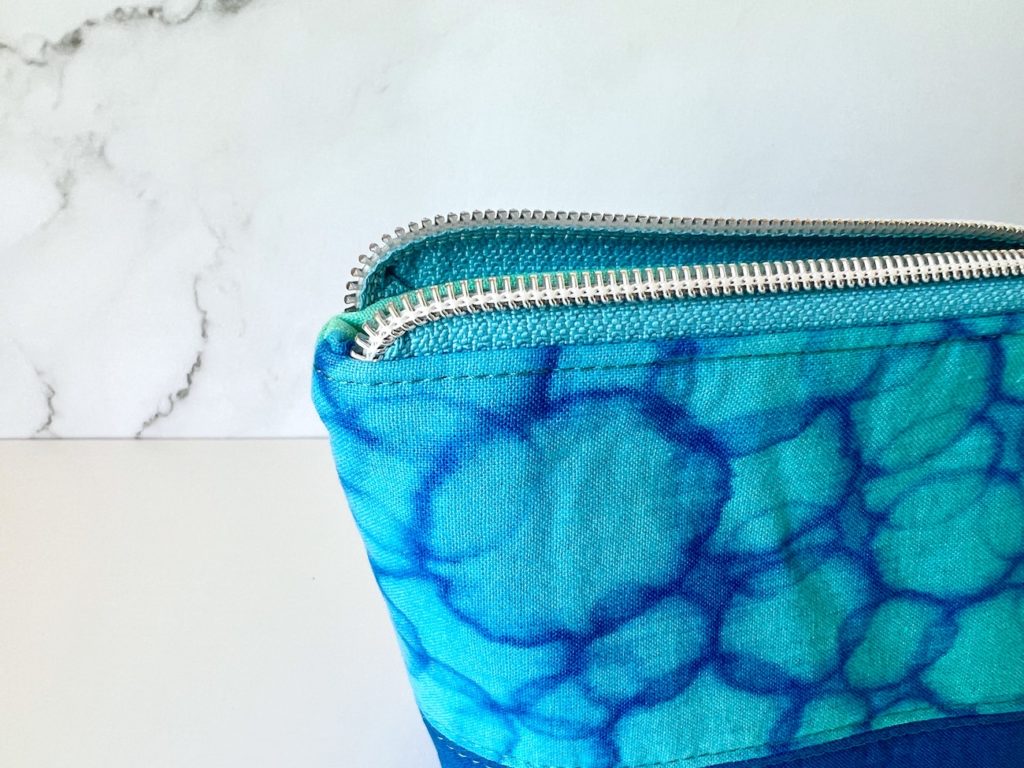
Repeat the folding and basting for the other side of the zipper tape. One end of the zipper tape now has curved edges that will nicely curve into the seam of the bag for a really clean finish.
Attaching the Zipper Tab
The zipper is cut slightly long just in case a small amount of trimming is needed after attaching the zipper pull or curving the edge of the tape. To ensure that the zipper finishes to the correct length, measure from one of the inner markings made earlier on the exterior panels to the other inner marking.
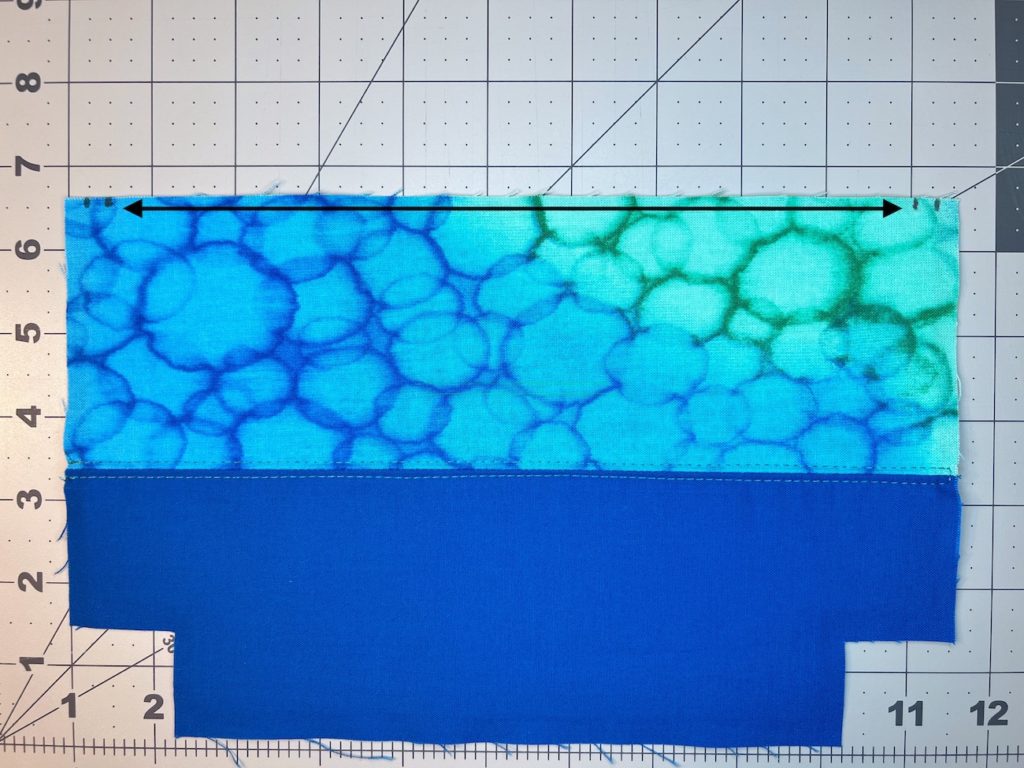
The inner measurement should be 9 ½”, so cut the zipper tape to 9 ½” from the remaining raw edge. Run the flame from the lighter (carefully) along the newly cut edge to prevent it from fraying.
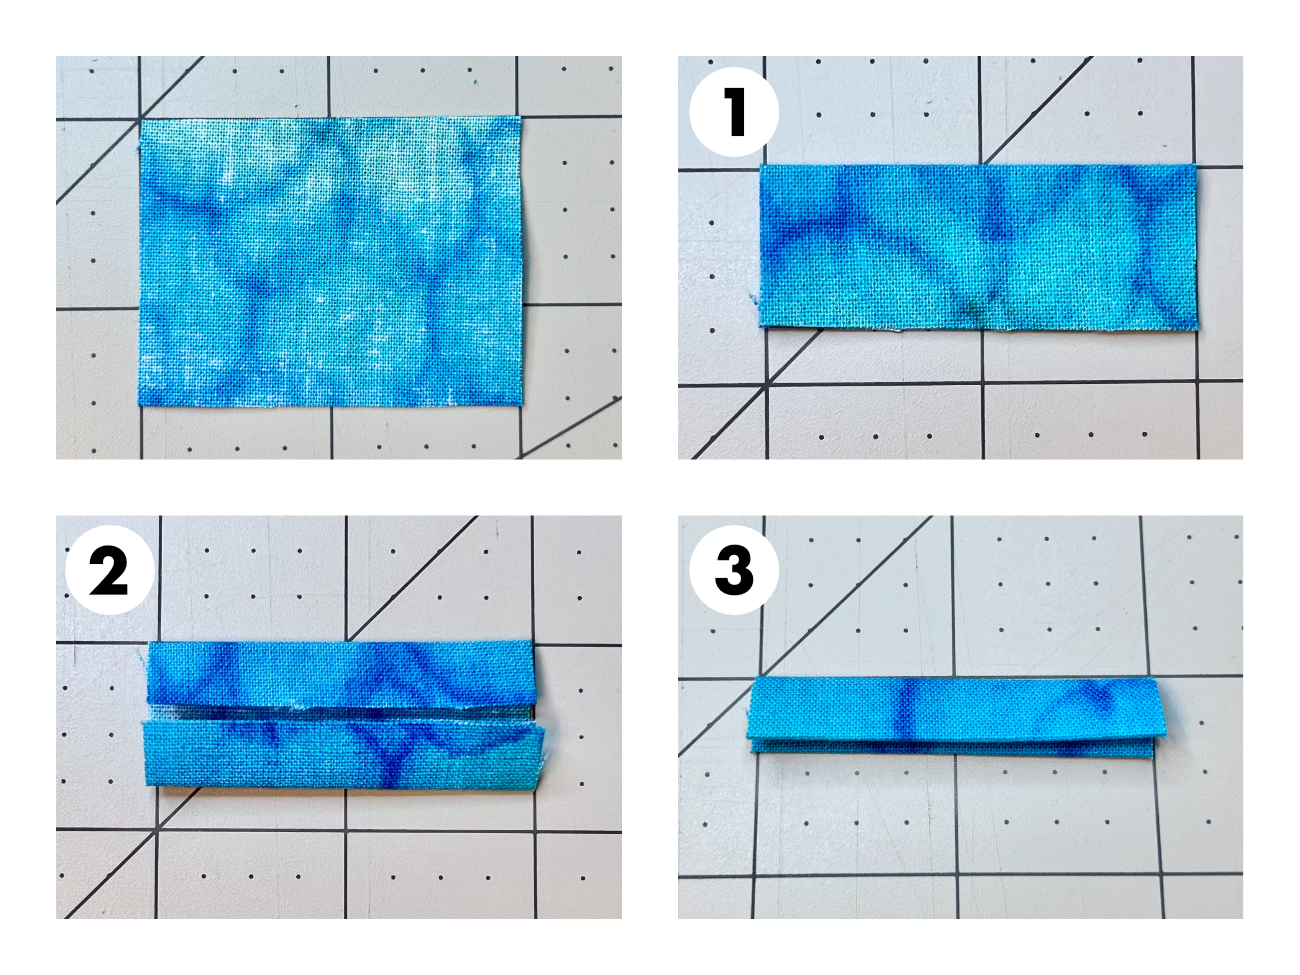
Take the zipper tab piece (piece G), and 1: fold the piece in half, folding the 2” edge down to meet the other 2” edge, and press (steam and a clapper are useful here). 2: Unfold that fold, revealing a center crease. Take the two, 2” edges and fold them to meet the center crease. 3: Take the zipper tab and fold it in half (fold the 2” folded edge to the other 2” folded edge). The long 2” raw edges should now be completely folded to the inside of the zipper tab piece.
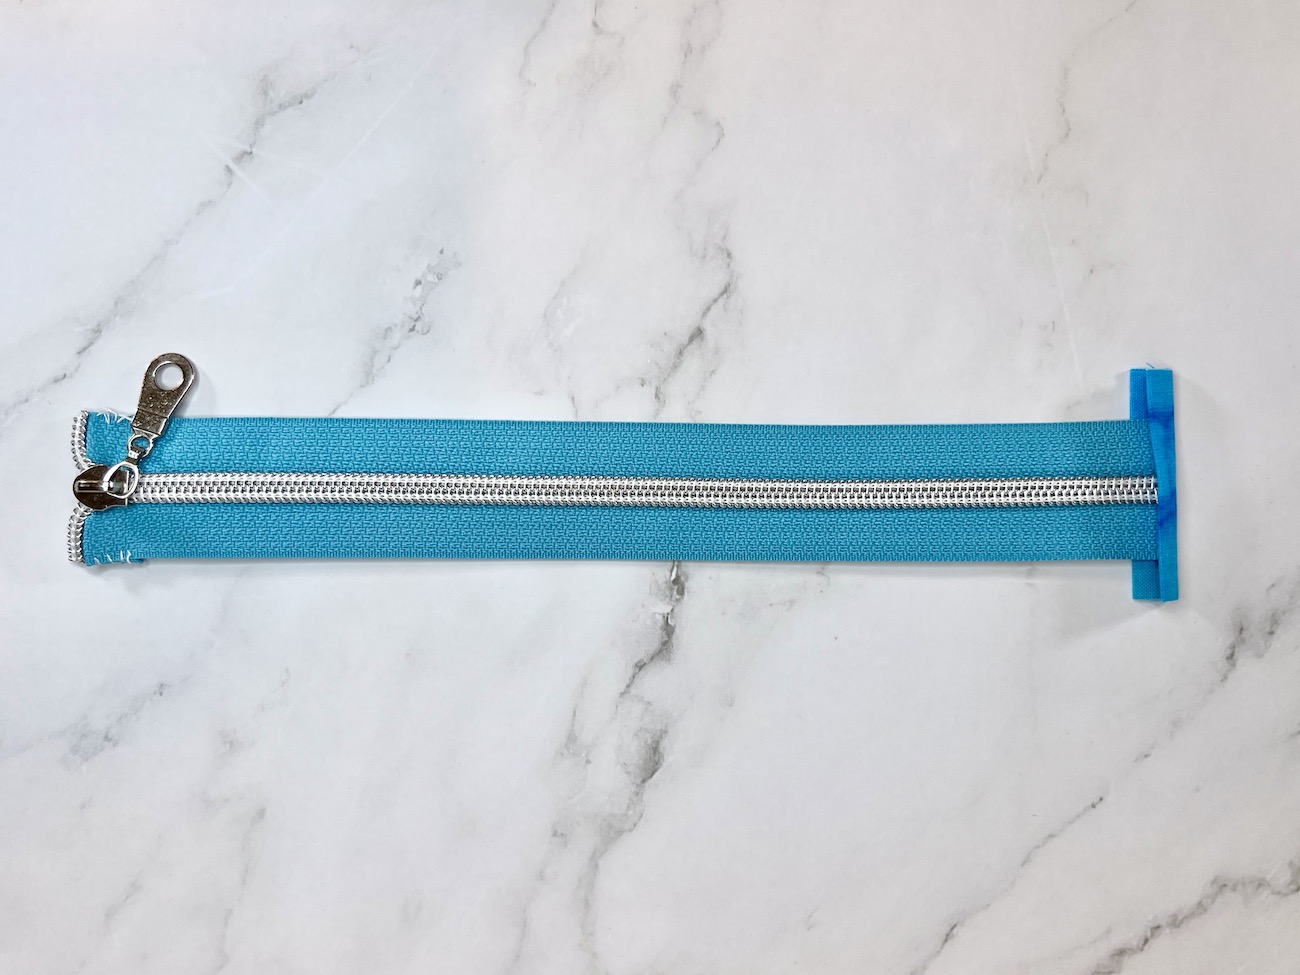
Take the cut edge of the zipper, and center it within the zipper tab piece.
Place one clip or pin on the lower section of the zipper tab. Draw up the bobbin thread, and hold the top thread and bobbin thread for the first few stitches. Begin sewing about an ⅛” away from the folded edge of the zipper tab (the edge of the zipper tab facing closest to the zipper) with a 3mm stitch length. A stiletto can be helpful here to keep things aligned. Stitch slowly and stop a few stitches before your needle reaches the zipper teeth.
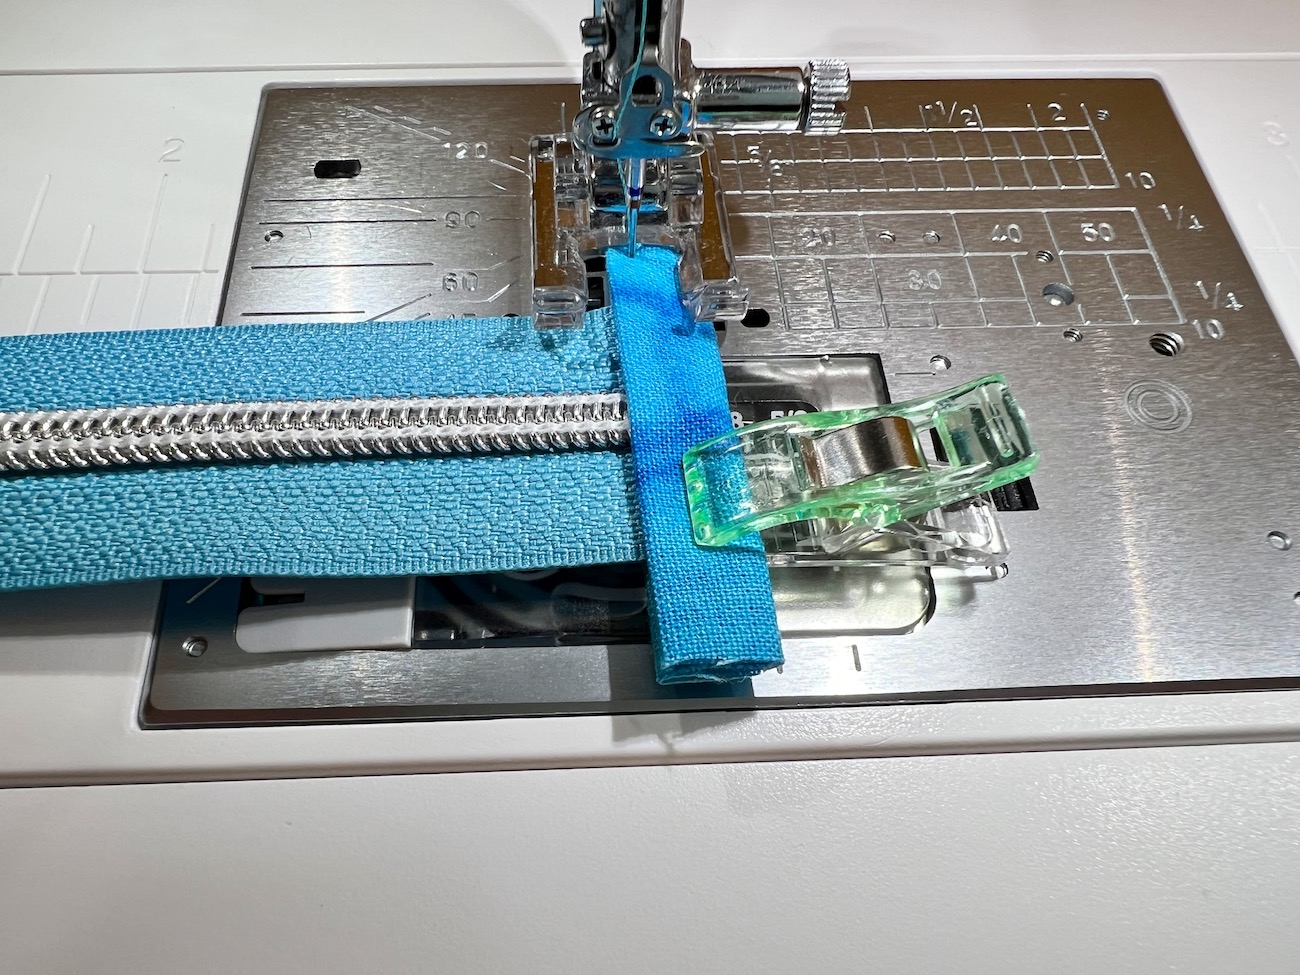
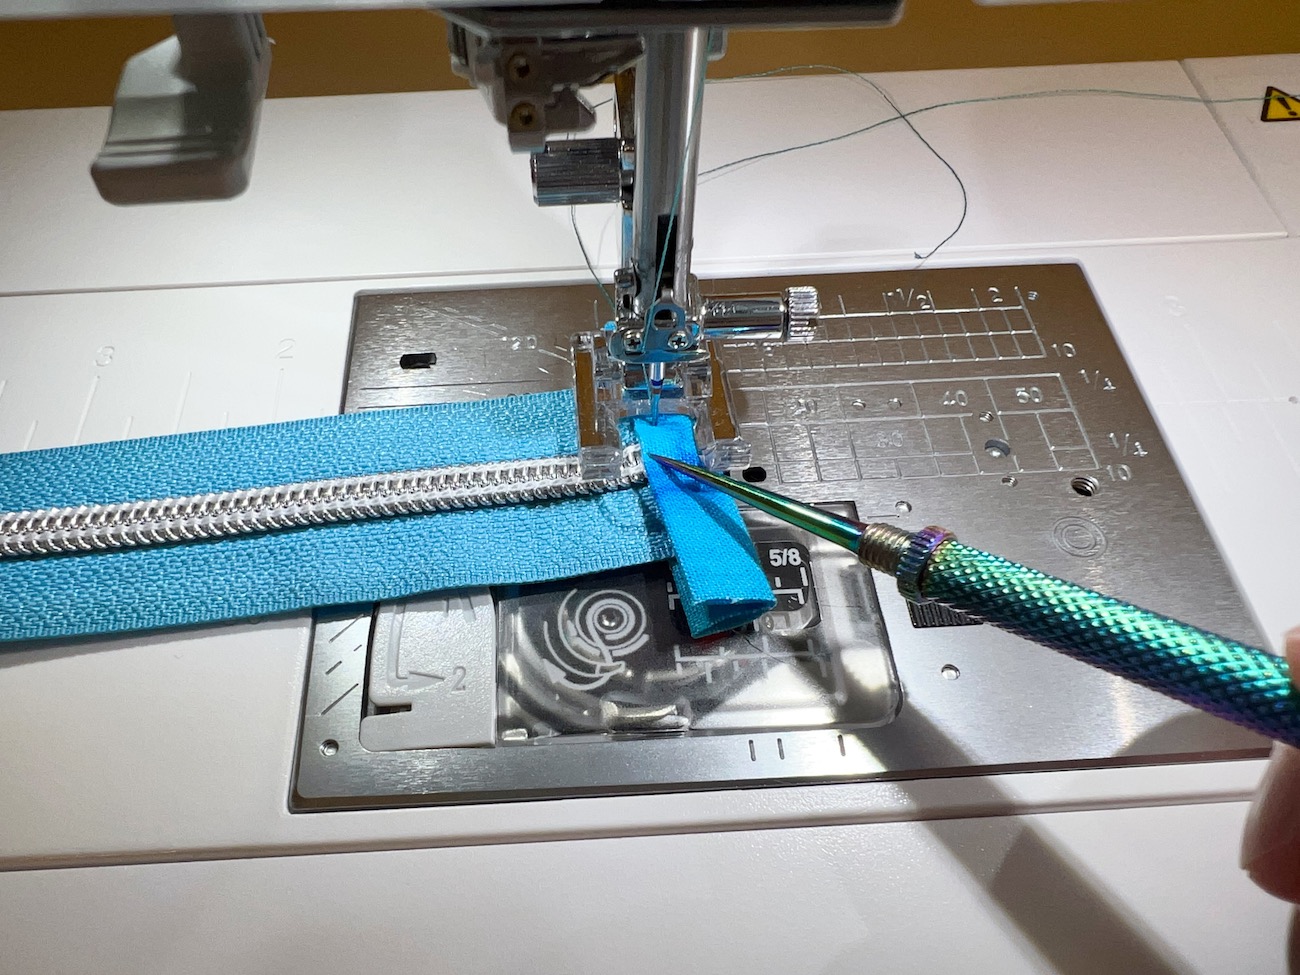
Use the hand wheel to slowly hand-crank your needle over the zipper teeth. The needle will need to go in between the plastic zipper teeth. Some machines sew through plastic zipper teeth with ease, others easily break needles so I recommend starting using the hand wheel until you know how your machine handles zippers. Continue stitching until a stitch or two past the edge of the zipper tape but before the edge of the zipper tab.
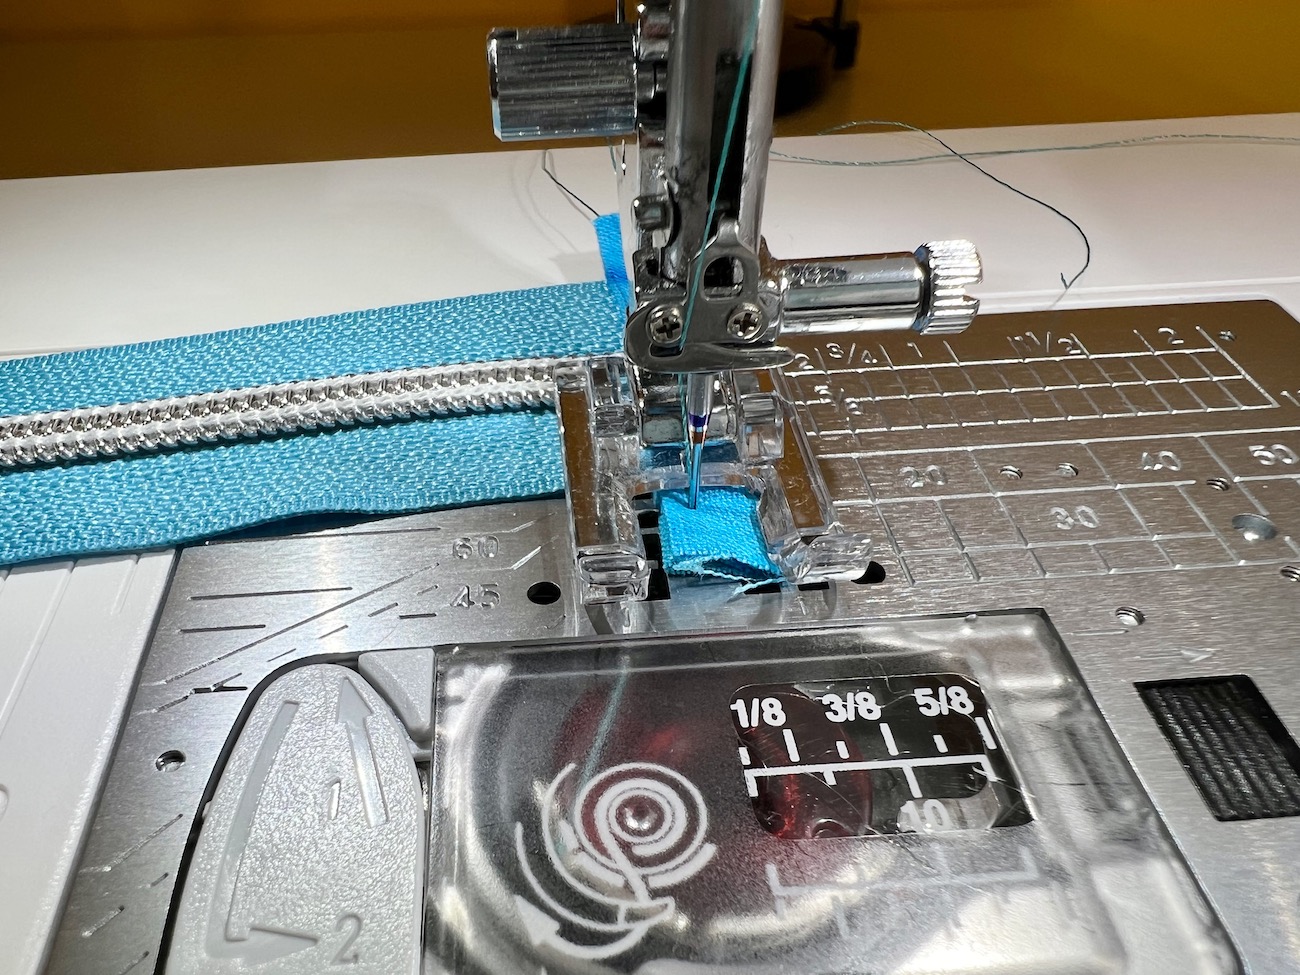
At this point, it would be time to backstitch over this line of stitching to reinforce that seam. I find hand cranking, backstitching, keeping the zipper aligned, and sewing smoothly to be impossible. I experimented with this one day, and it’s now my favorite little trick I use all the time! When you reach just past the edge of the zipper tape (but with your needle still down in the zipper tab), lift your presser foot, and rotate the zipper so that the zipper is now to your right.
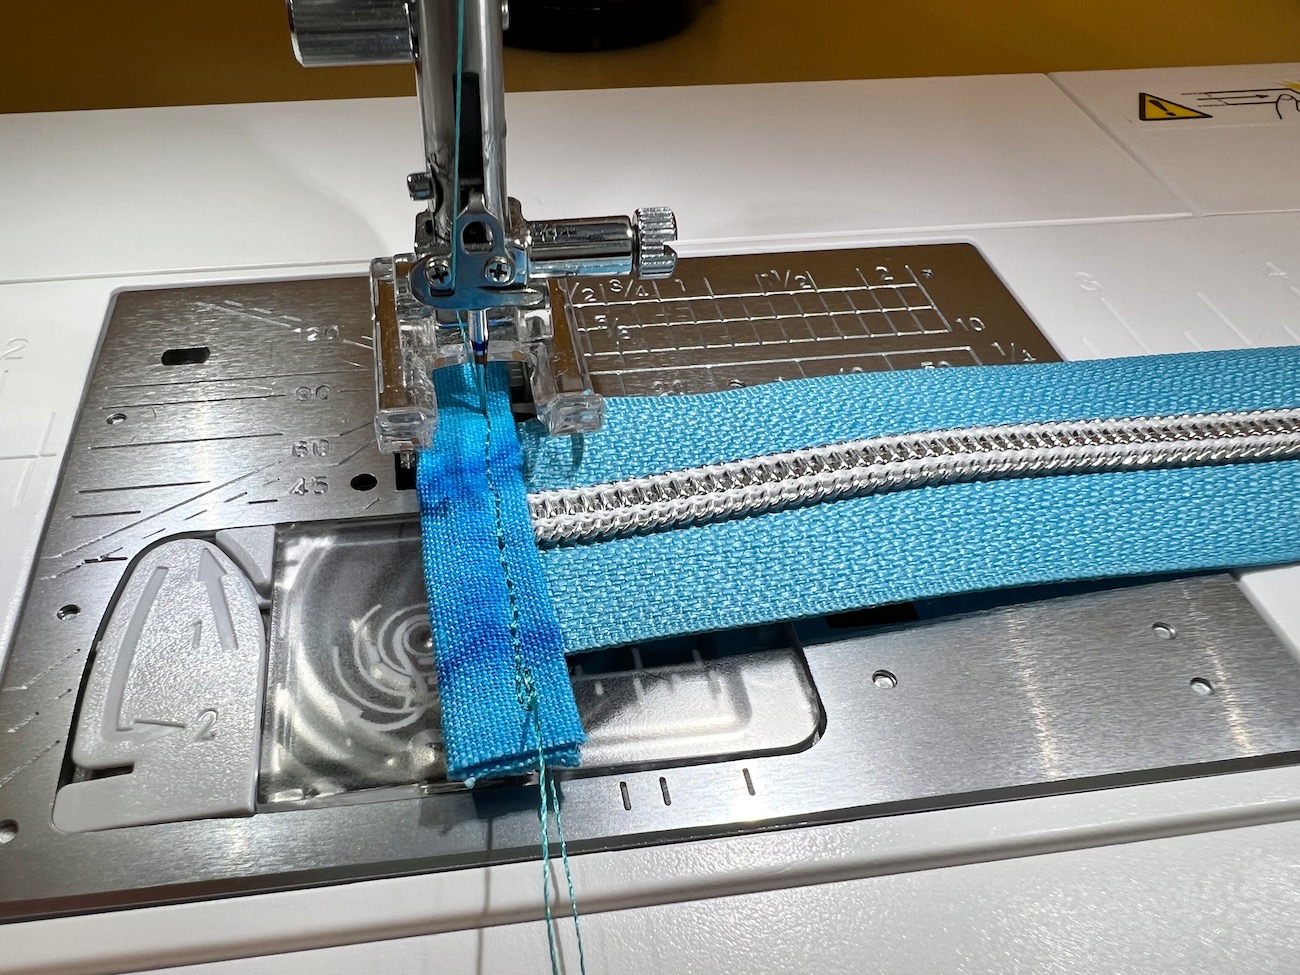
Lower your pressure foot, and then sew back across the first line of stitching. Stopping before the needle reaches the zipper teeth, and using the hand wheel to hand crank over the zipper teeth just like the first time. Stitch off the edge of the zipper tab, and you now have a securely stitched zipper tab, with no frustrating backstitching over the zipper teeth!!
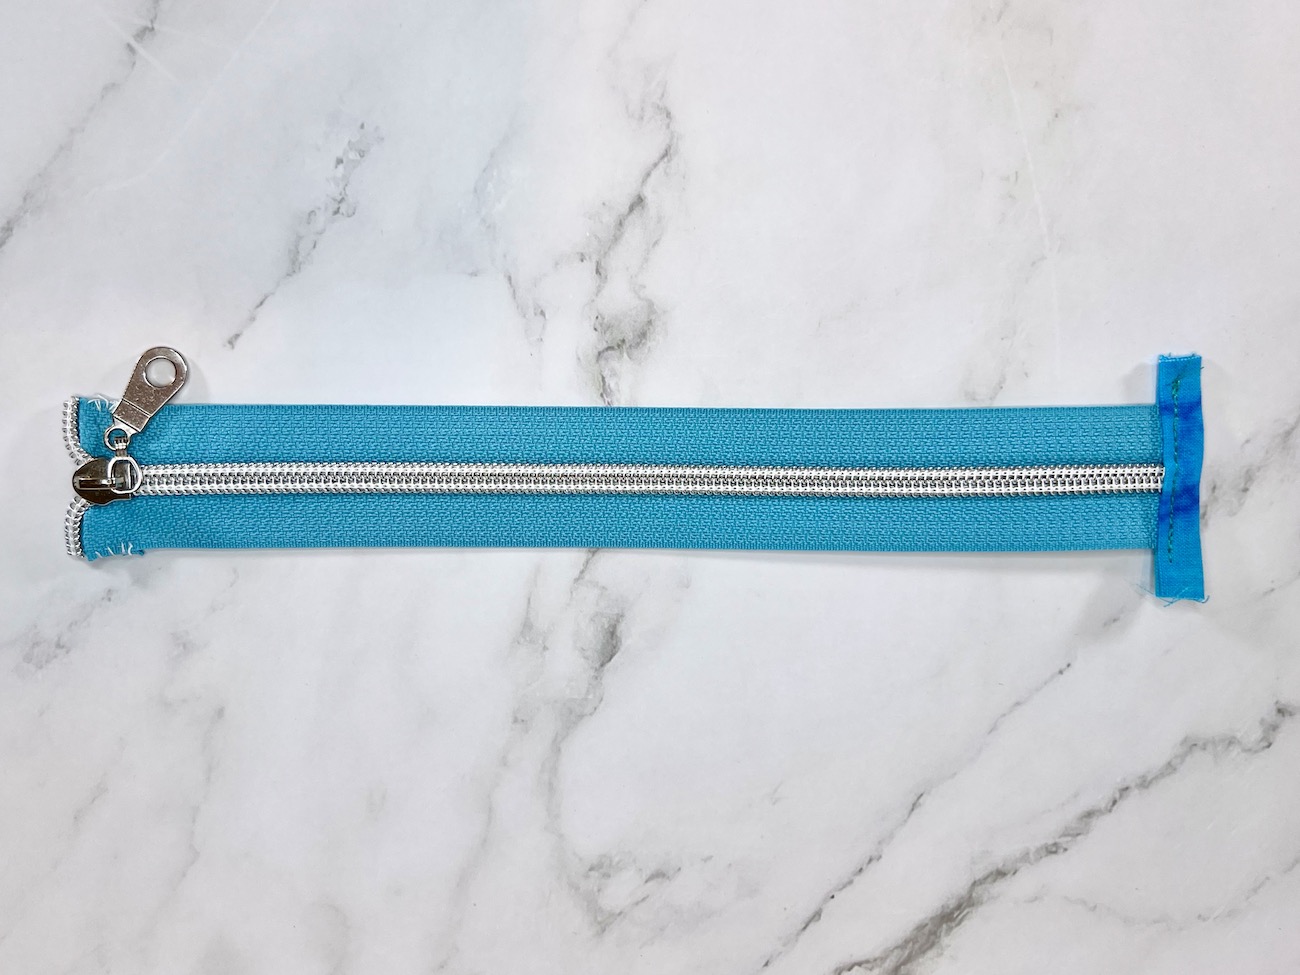
Trim the edges of the zipper tab that are hanging over past the zipper tape edge so that everything is aligned (be careful and try to only trim the zipper tab, and not the zipper edge).
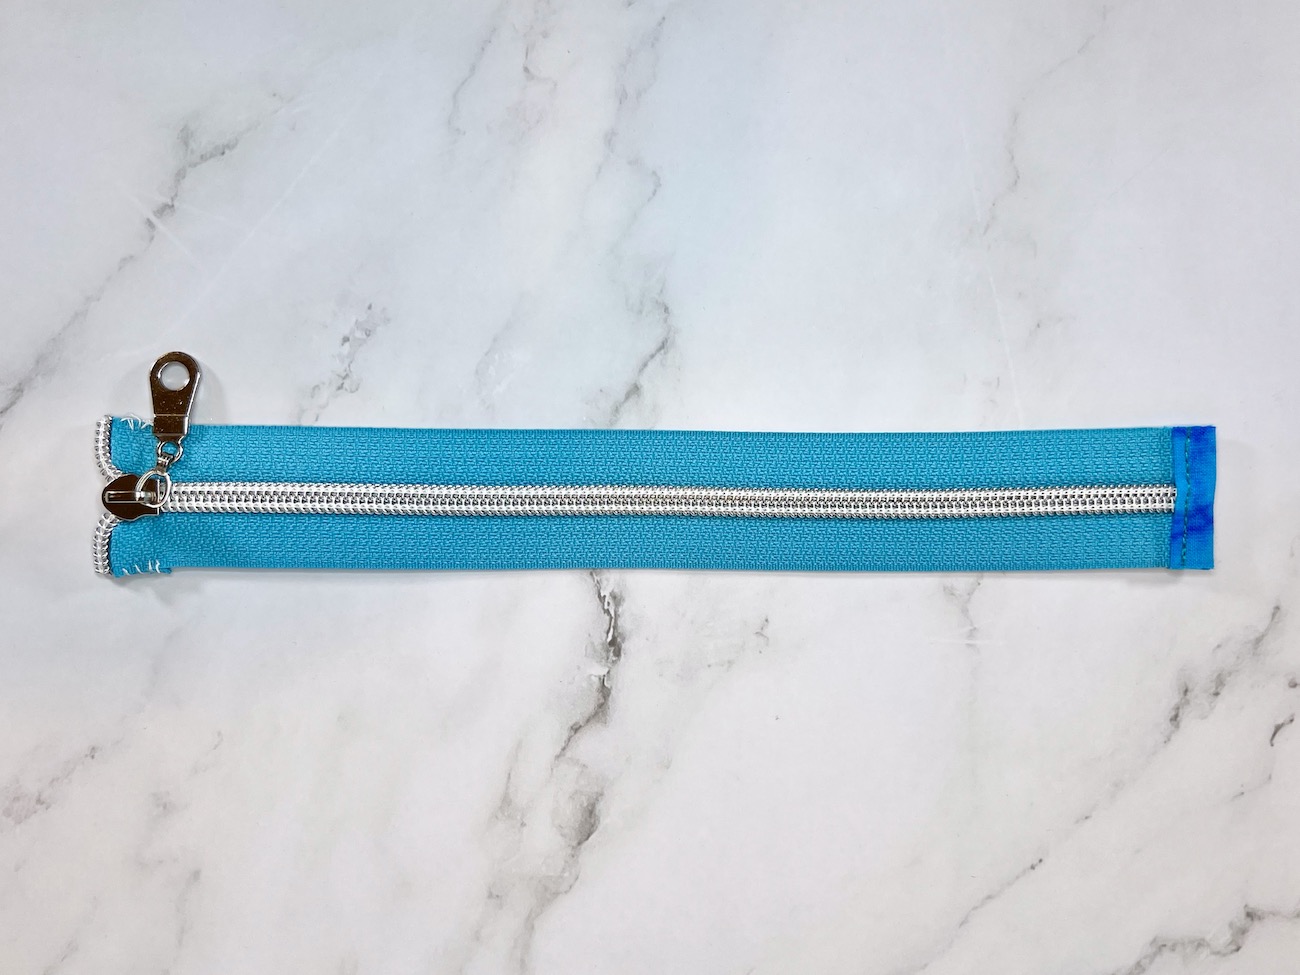
And with that final step, you now have a finished zipper ready to be turned into a zipper pouch! Once I started following these steps to finish zippers by the yard, I was so much happier with how the zipper bags I was making turned out as they look and feel so much more polished and professional.
My Favorite Zipper Stores
When I make zipper bags, I mainly use #5 zippers by the yard. The #5 refers to the width of the zipper teeth, so a #5 zipper has 5mm wide teeth. I typically use nylon coil teeth because I prefer not stressing about metal teeth and sewing needles! Premade zippers have very little variety (in zipper tape color, coil color, or zipper pulls), and there is much more waste with them so I do not use them very often. There are tons of options when it comes to zippers by the yard, with so many different color zipper tapes and coils. Some even have patterned or printed tape! In addition to the fun zipper tapes, the zipper pull options are endless. Lots of themed pulls, unique designs, and even colored enamel pulls!
I think that picking my favorite zipper shop could be likened to the impossibility of picking a favorite child… so maybe instead of a *favorite* I will just say that these are the stores that I shop at most frequently!! These stores all sell high-quality, durable zippers that I have never had any issues with.
In addition to zippers by the yard, these stores also sell bag hardware, vinyl, cork, notions, and many other things relating to bag making.
There are times when premade zippers or metal zippers are needed. If that’s the case, I recommend buying YKK brand zippers. My favorite sources for premade zippers are Zipit on Etsy and Sullivans Trims on Etsy.
That’s it for this second post in my zipper pouch tutorial and free pattern series! The next post, part 3, will be about sewing the zipper. Part 4 is all the finishing touches for a completed zipper pouch. Read those below!
